

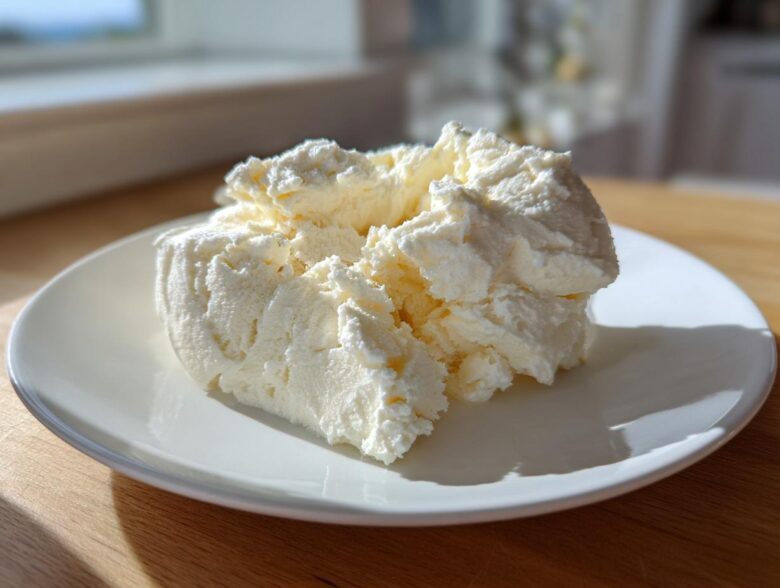
Oh my gosh, I have to tell you about my latest obsession! For years, I’ve been hunting for that perfect sweet treat that actually makes me feel *good* after eating it. You know, the high-protein dessert that doesn’t taste like cardboard? Well, friends, I finally cracked the code on the most unbelievably creamy cottage cheese ice cream you will ever taste. Seriously, this vanilla version is so easy, it requires absolutely no churning—yep, you read that right, no fancy machine needed!
As someone who has swapped out butter for applesauce more times than I can count, I am incredibly picky about healthy swaps. It’s what we do here at the blog, and you can read more about our philosophy right here. But this summer sweet snack revolutionizes the game. It’s naturally sweet, packed with protein, and comes together faster than waiting for your favorite delivery place to call you back. Trust me, you’re going to save this one!
Why This Cottage Cheese Ice Cream is the Best Healthy Ice Cream Recipes Choice
When you’re trying to eat better, you shouldn’t have to sacrifice texture or flavor, and that’s where this recipe truly shines above all the other healthy ice cream recipes out there. This isn’t just some diet food; it’s a genuinely decadent experience, just lighter and way better for you!
What makes it the winner? Look, I’ve seen plenty of attempts at using cottage cheese, and they often end up grainy and sad. Not this one! Plus, it packs a serious protein punch compared to store-bought options. If you love finding new ways to enjoy a protein packed dessert, you’re going to obsess over this. If you want to check out another great protein recipe, I highly recommend my vegan protein muffins!
- It’s naturally lower in sugar than commercial ice creams.
- It requires zero churning—huge win for busy weeks!
- The protein content leaves you feeling satisfied, not guilty.
We are making true, no-fuss cottage cheese ice cream that tastes like a treat you’d buy at a fancy shop, not something you have to suffer through.
Achieving a Creamy Cottage Cheese Treat Texture
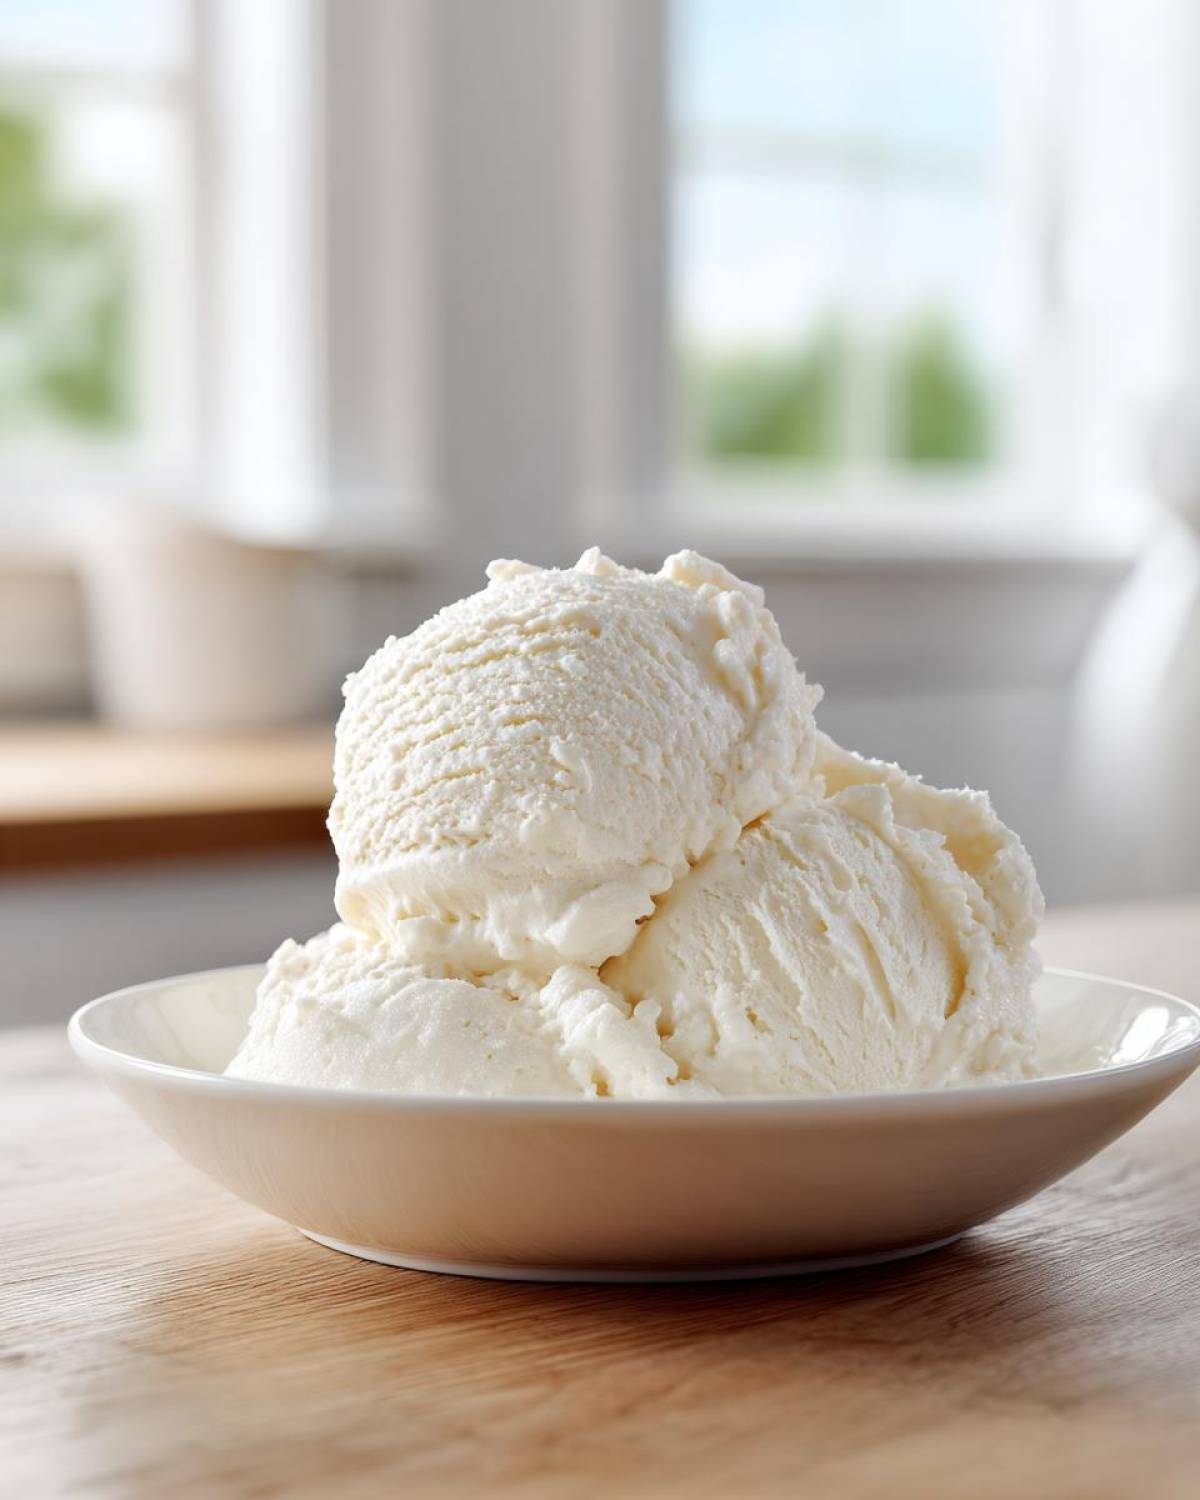
The number one fear people have with cottage cheese desserts is that gritty texture, right? Well, fear not! The secret to this incredible creamy soft serve recipe quality is aggressive blending. We aren’t just lightly mixing; we’re obliterating those curds in a high-powered appliance until it’s silk. This process incorporates just enough air while making sure the base is perfectly smooth before it even hits the freezer. That’s how you get that luxurious mouthfeel!
The High Protein Frozen Dessert Advantage
Let’s talk gains while you’re cooling down! Because our base is cottage cheese, we get a huge boost of satisfaction in every scoop. We’re pulling in around 18 grams of protein per serving, turning this into a legitimately beneficial protein packed dessert rather than just empty calories. It stops those late-night cravings dead in their tracks because you are actually fueled!
Essential Ingredients for Creamy Cottage Cheese Ice Cream
Okay, this is the part where we gather our troops! The beauty of this recipe is honestly how ridiculously few ingredients it calls for. You probably have most of this stuff sitting in your fridge or pantry right now. I kept this recipe super tight because I wanted it to be a truly easy homemade ice cream situation, not a trip to five specialty stores.
I’ve listed everything below. Please measure carefully, especially the sweetener, because the balance is what keeps this from getting too icy. These are the essentials that turn simple dairy into magic!
- 2 cups low-fat cottage cheese (don’t skip the low-fat unless you adjust the texture later—we want less fat to help it freeze right!)
- 1/4 cup milk (I use unsweetened almond milk, but any milk works fine)
- 1/4 cup sweetener (This is where you choose your path! Maple syrup for rich flavor, or Erythritol if you are aiming for that low sugar frozen dessert badge.)
- 1 teaspoon vanilla extract (Use the good stuff! It makes a difference in simple recipes.)
- Pinch of salt (Don’t skip this! It wakes up all the sweet flavors.)
Ingredient Specifications and Notes
Let’s talk specifics so you nail that amazing texture. I highly recommend using the small-curd, low-fat cottage cheese for this. The smaller size blends down to that perfectly smooth base we are aiming for. When you choose your sweetener, remember that maple syrup adds great flavor but also more natural sugar, while erythritol keeps the sugars low. Either way, start with that 1/4 cup. If you taste it before freezing and think, “Hmm, needs more zing,” hold off on adding more sweetener until after the first hour of freezing, just in case the flavor concentrates when it gets cold!
Step-by-Step Instructions for No Churn Ice Cream Tutorial
Getting the base just right is the most important part of this easy homemade ice cream adventure. If you skip the blending step or try to rush it, you’ll end up with icy shards instead of a decadent dream. But follow these steps, and you’ll have the most satisfying cottage cheese ice cream you’ve ever spooned straight from the container!
We start by combining everything in our blender or food processor. Don’t worry about layer order here; just toss it all in! The magic happens next when we blend this into oblivion.
Blending for a Smooth Cottage Cheese Ice Cream Base
This isn’t a quick pulse job, friends! You need to run your blender or food processor on medium-high until the mixture is utterly, totally uniform. I mean it: completely smooth and no lumps remain. You’ll likely need to stop down a few times to scrape the sides and make sure those last stubborn bits of curd get pulverized. Keep blending until it looks like actual melted ice cream batter, not just thick milk. Once it’s creamy, pour that gorgeous base into a freezer-safe pan. I love using a standard metal loaf pan because it seems to freeze more evenly.
Freezing Techniques for the Best Cottage Cheese Ice Cream
Now we tackle the freezing, and this is where you tell the recipe how much hands-on time you have! For the true no-churn method, which gives you that wonderful, slightly soft texture, you have to commit to stirring vigorously every 60 to 90 minutes for the first three hours. This breaks up ice crystals, which is vital for a creamy result. If you prefer the hands-off route, you can follow the overnight freeze, but you’ll need to process it later if you want the best cottage cheese ice cream texture.
If you’re making this for your Ninja Creami, just dump the mixture in, freeze completely solid overnight, and then hit that Lite Ice Cream button! We’re keeping this recipe flexible for everyone. If you want to see some stunning no-bake additions that pair well with this cold treat, check out these no-bake strawberry cheesecake cups for inspiration!
Ninja Creami Cottage Cheese Preparation Guide
I know, I know, the standard no-churn method is great when you have time to stir, but let’s be real—sometimes we want that creamy soft serve *now*. If you happen to have a Ninja Creami machine, this recipe is practically engineered for it! We can skip all that stirring and get straight to the good stuff. This is my go-to hack when I need my cottage cheese ice cream stat.
The main thing to remember when prepping for the Creami is that you must freeze it rock solid. We’re talking overnight solid, usually a minimum of 12 hours. Unlike the no-churn method where we stir to keep things creamy, the Creami actually needs to be completely frozen solid so the machine can spin the ice crystals perfectly into a smooth dessert.
Follow the blending instructions exactly as written above—we still need that base smooth! Pour the mixture into the outer Ninja Creami pint, making sure you don’t go past the ‘Max Fill’ line. Seriously, don’t overfill it, or you’ll make a huge mess! Freeze it flat and level. Once it’s fully frozen, just select the ‘Lite Ice Cream’ or standard ‘Ice Cream’ setting depending on how thick your ingredients are. Nine times out of ten, the Lite setting works brilliantly for this high protein frozen dessert!
If, after the first spin, your cottage cheese ice cream looks a little crumbly (it happens!), just add a tiny splash—maybe a tablespoon—of milk or even water right back into the pint, put it back in, and run the ‘Re-Spin’ function. It comes out tasting exactly like store-bought, guilt-free perfection. It’s honestly the easiest way to get the best texture!
Tips for Success with Your High Protein Frozen Dessert
Even though this recipe is super straightforward, I’ve picked up a few little tricks over the batches I’ve made—and trust me, I’ve made *a lot* while testing for that perfect texture. Getting this right means you get that dreamy, scoopable experience every single time. For me, a successful high protein frozen dessert is all about timing when you take it out of the deep freeze.
If you pull this straight from the freezer after it’s been sitting for those final few hours, it can be a little too hard, especially if you didn’t stir much during the no-churn process. My absolute best advice for achieving that dreamy consistency—the kind that scoots easily into a bowl—is to let it sit on the counter first. Seriously, give it about five to ten minutes on the counter before you even think about grabbing the ice cream scoop.
This short rest lets the texture soften just enough without melting everything into soup. If you’re aiming for that perfect, classic scoopable feel from a protein packed dessert, five minutes is the magic number here. I usually start this timer right after I finish blending the other flavor variations I’m testing!
Another thing you’ll want to keep in mind involves the sweetness. Since cold temperatures really mute sweetness, sometimes what tastes perfect going into the freezer ends up tasting just okay when it’s fully frozen. If you happen to taste your mixture before freezing and feel like it needs a bit more punch, don’t be shy! You can absolutely bump that sweetener up just a little bit before you freeze it solid. I usually go up to a scant 1/3 cup if I know I’m going to let it freeze overnight, especially if I’m using a zero-calorie sweetener like erythritol.
Want to read some of my other quick kitchen advice and hacks? I keep adding new wisdom over on the main blog page, so pop over there once you’ve got your creamy cottage cheese treat chilling!
Variations: Flavoring Your Cottage Cheese Ice Cream
Okay, so the vanilla base for our cottage cheese ice cream is incredible on its own—it’s clean, cool, and delightfully satisfying. But honestly, after the first batch, you’re going to want to start experimenting! This recipe is such a wonderful canvas for all those other popular flavors you see everywhere. Think of the base as the perfect, high-protein foundation for whatever sweet mood you’re in.
Since you already made sure the base is perfectly smooth and blended, adding flavorings is just as easy. You can blend them in during the initial blending stage, or, if you’re using the no-churn method, you can swirl them in later! This keeps things fun and exciting without making you invest in a whole new high protein frozen dessert recipe.
My favorite addition is always chocolate. If you want to transform this into a chocolate version—perhaps you prefer protein desserts that taste good with cocoa—just add about 3 to 4 tablespoons of unsweetened cocoa powder right in with the initial cottage cheese and sweetener. You might need to add like a teaspoon more milk if it seems too thick after blending, that’s all. Blend it until it’s a gorgeous, uniform brown!
For those of you who prefer fruit, let me tell you about strawberries! Instead of blending fresh strawberries directly (which can sometimes have too much water content and make things icy), try this: whisk up a small batch of mashed strawberries with a tiny bit of sweetener on the stove just until they thicken slightly, almost like a jam. Once your cottage cheese ice cream base is mostly frozen (say, after the second stir if you are no-churning), you dollop that strawberry reduction in and swirl it gently with a butter knife. That creates those beautiful, thick ribbons of fruit, making it look totally professional.
If you’re looking for something totally different, try adding a teaspoon of maple extract along with maybe a tablespoon of chopped pecans during the last stir when it’s partially frozen. It tastes just like a fancy maple-nut confection! You can see how easy it is to adapt this wonderful base; it’s just a matter of what you’re craving! If you enjoyed tweaking this recipe, you absolutely must try my decadent chocolate zucchini cake recipe when you need a baked treat!
Serving Suggestions for This Creamy Cottage Cheese Treat
So, your cottage cheese ice cream is perfectly blended, creamy, and ready to serve! Since we’ve worked so hard to keep this a light and healthy option, I really encourage you to just keep the toppings simple, too. You hardly need them because the vanilla base is so good, but if you want a little extra flair, think fresh!
A few slices of fresh summer berries—maybe some vibrant sliced peaches or even a little dust of cinnamon—is all you need to elevate this scoop. If you want something a little punchier, I sometimes make a quick, fresh mango salsa on the side, and honestly, the sweetness works beautifully with the cold protein treat. You can see my favorite simple salsa recipe right here. Enjoy this delicious, guilt-free snack!
Storage and Reheating Instructions for Cottage Cheese Ice Cream
One of the best perks of making a small batch of cottage cheese ice cream like this is that we don’t usually end up with massive leftovers—because it’s just too good! But if you do manage to save some for later, how you store it is crucial for keeping that creamy texture we worked so hard to achieve.
Ice cream hates air. Air causes freezer burn and those annoying little crunchy ice pockets to form on the surface. So, the first golden rule for saving your creamy cottage cheese treat is using the most airtight container you possibly can. A glass loaf pan with a truly tight-fitting lid works wonders. If you don’t have a great top, use a layer of plastic wrap pressed directly onto the surface of the ice cream before sealing the lid on top of that. That double barrier helps a ton!
Now, you might be wondering about serving it later, especially since this isn’t like traditional ice cream made with tons of sugar and stabilizers. Since this is a healthier, guilt free ice cream alternative, the texture can change slightly after being fully frozen solid again. It might be a little harder than when you first made it if you didn’t stir it during the no-churn process.
Here’s the trick for serving, whether you used the no-churn method or the Ninja Creami: forget the microwave—that’s a fast track to sad, soupy milk! Instead, just pull your container out of the deep freeze about ten minutes before you plan to serve it. Give it a gentle poke. If it feels rock solid, wait another five minutes. This brief resting time at room temperature softens the surface just enough so you can easily scrape out a perfect, soft scoop of your cottage cheese ice cream!
If you’ve stored it for a few weeks and it seems extra hard, don’t panic! Just let it sit on the counter for a little longer until it reaches that lovely soft-serve stage. And hey, if you’re interested in other quick storage tricks for things you make at home—though hopefully nothing that needs to thaw out like this—you might want to check out my tips on quick refrigerator dill pickles for speedy preservation!
Frequently Asked Questions About Healthy Ice Cream Recipes
I know you might still have a few little questions bouncing around in your head—that’s totally normal when you’re trying out a totally new kind of treat! People ask me all the time about textures and tweaking the flavors. I’ve pulled together the questions I get asked most often about making these wonderful healthy ice cream recipes so you can get your perfect scoop right away. If you have any other questions, you can always check our site disclaimer!
Can I make this a low-carb or keto cottage cheese ice cream?
Absolutely! Since we used maple syrup as an option in the main recipe, it’s naturally not strictly keto, but it’s so simple to convert. If you want a true low sugar frozen dessert experience, swap out the maple syrup completely and use a granular zero-calorie sweetener like erythritol or monk fruit blend. You might need to use slightly less liquid in your blend because maple syrup adds moisture, so just watch the consistency. If you do this, you’ll have a fantastic keto-friendly, high-protein dessert that still tastes amazing!
Why is my homemade cottage cheese ice cream icy?
Oh, the dreaded ice crystals! This is usually down to one of two things, and it usually happens when you are attempting the no-churn method. First: did you blend enough? If you see any graininess when you mix the initial ingredients, it means the base wasn’t smooth enough to begin with, and those little bits turn into ice shards. Second, and this is the big one: did you forget to stir? If you leave it unattended for 4+ hours, the edges freeze rock hard while the middle remains slightly soupy, leading to a crystalline texture overall. Remember, with no-churn, you need to check it every hour or so for those first three hours!
What is the best type of cottage cheese for this protein packed dessert?
My go-to is low-fat, small-curd cottage cheese. The small curds break down almost completely when blended, giving you that smooth base we are aiming for. Large curd is doable, but you have to blend it *longer* to get it smooth, and you risk those small pockets of texture remaining. Also, and this is important: check the container! If your cottage cheese looks really watery or has excess liquid pooling on top, you should drain that liquid off first before measuring out your two cups. Too much extra water means more ice crystals, which is the enemy of a good protein packed dessert!
Estimated Nutritional Data for Cottage Cheese Ice Cream
I know that for many of you, choosing a healthy ice cream recipes alternative means you really want to keep tabs on what you’re putting into your body. That’s completely fair! When I was creating this recipe, I made sure to calculate the approximate nutrition based on the standard low-fat cottage cheese and 1/4 cup maple syrup version. Remember, if you swap to erythritol, your sugar count will drop significantly, making this an even better low sugar frozen dessert!
These numbers are estimates based on the recipe amounts for one serving size (which is about half a cup). I always recommend tracking this yourself if you are sticking to a strict plan, but this gives you a fantastic baseline for this guilt free ice cream!
- Serving Size: 1/2 cup
- Calories: About 150
- Protein: Roughly 18g (Now THAT is a powerhouse!)
- Total Fat: Around 3g
- Carbohydrates: Approximately 15g
- Sugar: About 12g (This is what makes it taste sweet and delicious!)
See? Almost as much protein as a small chicken breast, but this is a creamy, cool dessert! It’s proof that you don’t have to sacrifice your fitness goals for a great nightcap. Enjoy this guilt-free spoonful!
Share Your Easy Homemade Ice Cream Experience
That’s it—you’ve reached the finish line of making the creamiest, highest-protein cottage cheese ice cream ever! I’m so thrilled for you to dig in. Now, I really want to know what you think. Did you try the hands-on stirring method, or did you lean on your Ninja Creami for that perfect easy homemade ice cream finish?
Drop a rating below and tell me in the comments if this became your new favorite summer sweet snack! If you have a great photo too, you can always reach out to us via our Contact Page!
PrintCreamy Vanilla Cottage Cheese Ice Cream (No Churn)
Make a simple, high-protein frozen dessert using cottage cheese. This recipe yields a creamy texture without an ice cream machine.
- Prep Time: 10 min
- Cook Time: 0 min
- Total Time: 10 min
- Yield: 4 servings
- Category: Dessert
- Method: Freezing
- Cuisine: American
- Diet: Low Fat
Ingredients
- 2 cups low-fat cottage cheese
- 1/4 cup milk (dairy or non-dairy)
- 1/4 cup sweetener (e.g., maple syrup or erythritol)
- 1 teaspoon vanilla extract
- Pinch of salt
Instructions
- Place the cottage cheese, milk, sweetener, vanilla extract, and salt into a high-speed blender or food processor.
- Blend the mixture until it is completely smooth and no lumps remain. Scrape down the sides as needed.
- Pour the smooth mixture into a freezer-safe container, such as a loaf pan or shallow dish. Cover the container tightly with a lid or plastic wrap.
- Freeze for 4 to 6 hours, stirring vigorously every 60 to 90 minutes for the first 3 hours to break up ice crystals and maintain creaminess.
- If using a Ninja Creami, freeze the mixture solid overnight, then process according to your machine’s instructions for ‘Lite Ice Cream’ or ‘Ice Cream’ setting.
- Serve immediately for a soft-serve consistency, or allow it to firm up slightly in the freezer for a scoopable texture.
Notes
- For a thicker, softer texture, let the ice cream sit at room temperature for 5 to 10 minutes before scooping.
- If you prefer a sweeter taste, increase the sweetener to 1/3 cup.
- For a Ninja Creami preparation, you may need to add 1-2 tablespoons of extra liquid after the first spin if the texture is too crumbly.
Nutrition
- Serving Size: 1/2 cup
- Calories: 150
- Sugar: 12
- Sodium: 250
- Fat: 3
- Saturated Fat: 1.5
- Unsaturated Fat: 1.5
- Trans Fat: 0
- Carbohydrates: 15
- Fiber: 0
- Protein: 18
- Cholesterol: 10