

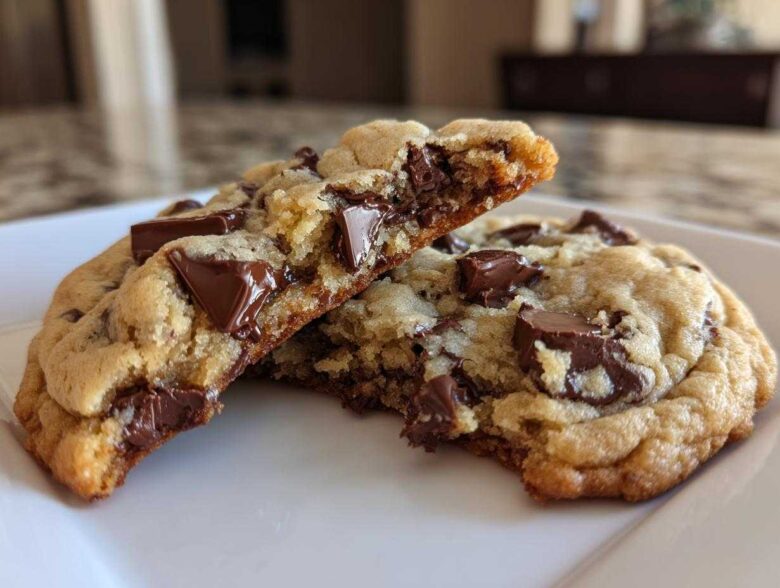
Let’s be honest, finding that truly perfect bite—the one with the thick, chewy center that melts pools of chocolate against a shatteringly crisp edge—is a serious quest. I spent years chasing what I thought was the ultimate chocolate chip cookie. My kitchen counter was littered with attempts that were too flat, too cakey, or just plain sad. But friends, I cracked the code! This isn’t just another recipe; this is my absolute tried-and-true, bakery style chocolate chip cookie recipe that guarantees those amazing thick centers and crispy borders every single time. You are going to love this!
Why This Ultimate Chocolate Chip Cookie Recipe Works (The Secret to Bakery Style)
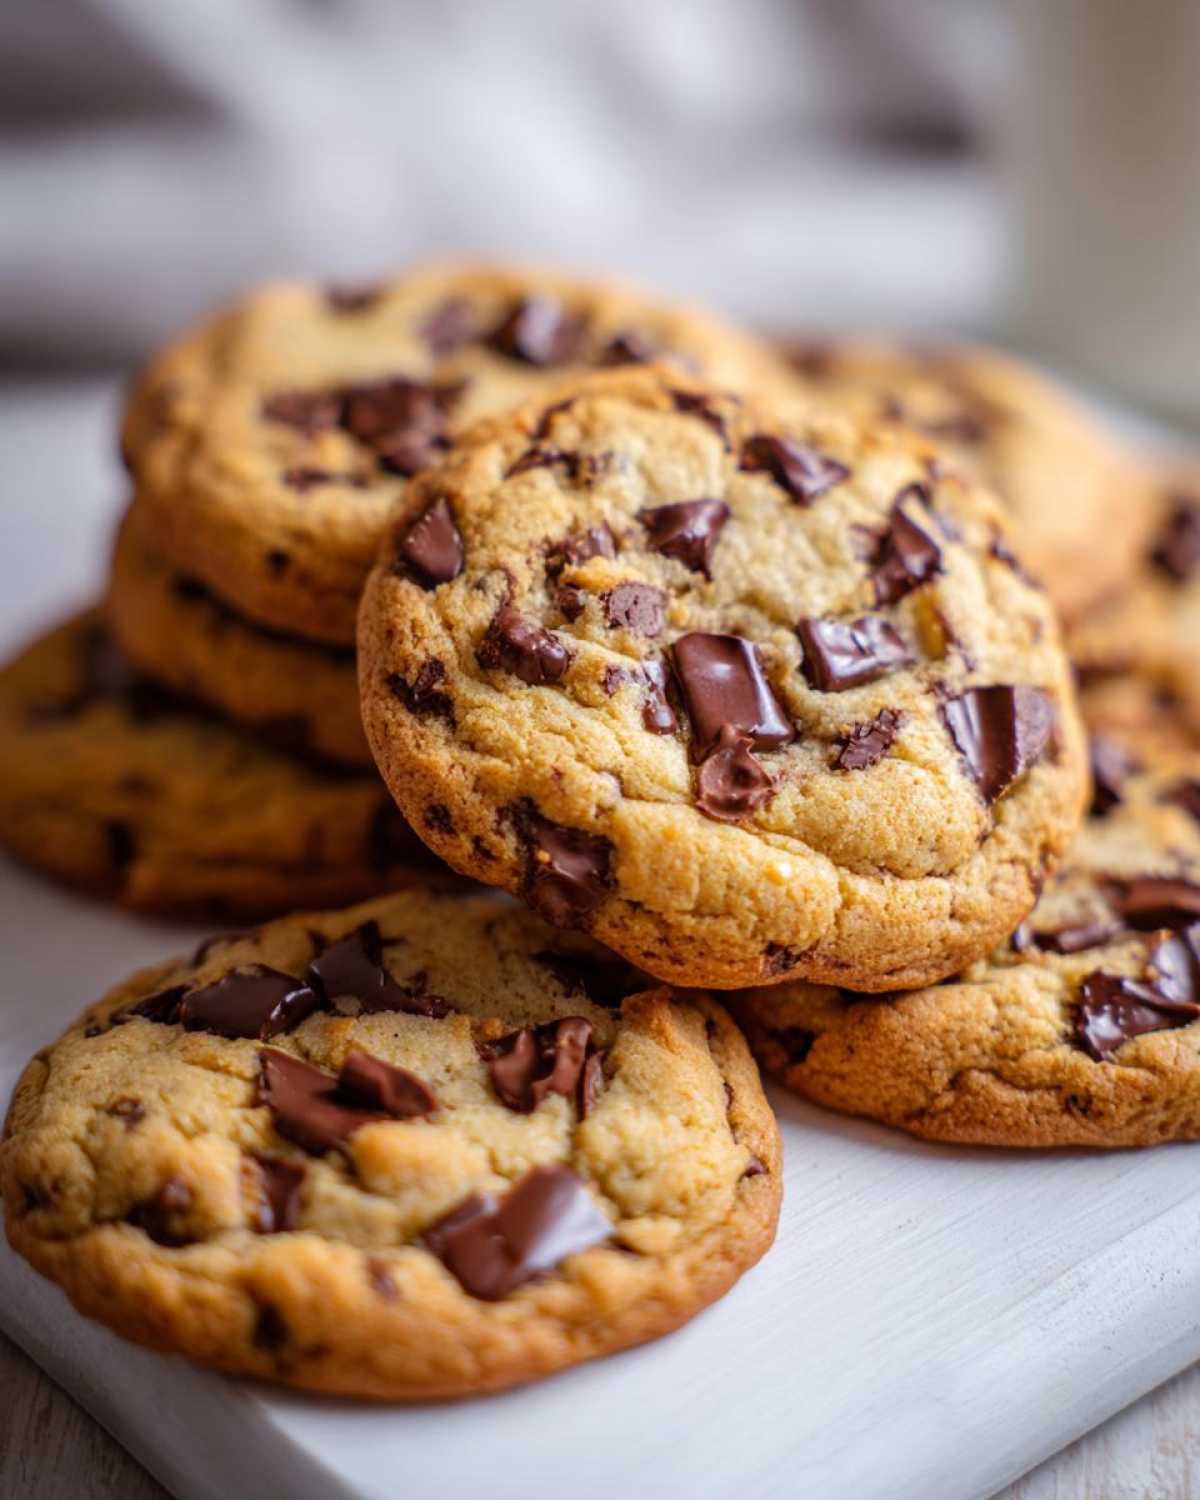
Okay, so why are these the best homemade chocolate chip cookies you’ll ever bother making? It all comes down to a couple of small, non-negotiable steps that totally change the game. We aren’t just throwing stuff into a bowl here; we are building layers of texture and deep, buttery flavor. That combination of crispy edges hugging a soft, gooey center? That’s the signature of real bakery style chocolate chip cookies, and it’s totally achievable right here in your own kitchen. Trust me, mastering this guarantees you the perfect cookie texture.
The Power of Brown Butter in Your Chocolate Chip Cookie
First up, we’re browning the butter! I know, it adds one extra step, but you absolutely must do this. When you melt your butter down until those milk solids toast up and smell nutty, you’re adding an incredible depth of flavor that softened butter just can’t touch. Plus, using cooled brown butter affects the fat structure slightly, which helps keep our cookies from spreading too much. It makes the whole batch smell like a dream before they even hit the oven!
Achieving Thick Chocolate Chip Cookies with Dough Chilling
This is the step everyone skips, and honestly, it’s tragic. After mixing, you have to chill that dough! We’re talking a minimum of 24 hours, but 48 is even better. Chilling lets the flour fully hydrate and concentrates all those yummy flavors from the brown sugar and brown butter. More importantly, it firms up the fat, ensuring we get those gorgeous, thick chocolate chip cookies instead of thin, greasy pancakes. Patience pays off immensely here!
Ingredients Needed for the Best Chocolate Chip Cookie Recipe
Gathering your ingredients is half the battle won for these beautiful homemade chocolate chip cookies. Remember, precision matters when you’re aiming for that bakery quality. You can check out my favorite chocolate chip zucchini muffins recipe if you end up with extra eggs! Anyway, here is exactly what you need:
- 1 cup (2 sticks) unsalted butter, browned and cooled
- 1 cup packed light brown sugar
- 1/2 cup granulated sugar
- 2 large eggs, room temperature
- 1 tablespoon vanilla extract
- 2 1/4 cups all-purpose flour
- 1 teaspoon baking soda
- 1 teaspoon salt
- 1 1/2 cups semi-sweet chocolate chips
- 1 cup milk chocolate chips
Seriously, make sure that butter is truly cooled down before moving forward, or you’ll melt all that structure we’re trying to build! And room temperature eggs mix in so much smoother, which helps create that incredible cookie base.
Step-by-Step Instructions for Perfect Chocolate Chip Cookie Baking
Now we get to the active part! This process is actually quite simple cookie baking once you’ve done the crucial chilling step we talked about. We want to gently bring everything together so we don’t knock out all the air we worked so hard to incorporate earlier. Pay close attention to the visuals—that’s how you know you’re on the path to those gorgeously thick, chewy chocolate chip cookies that melt in your mouth. This is what makes this my go-to for no bake chocolate chip granola bars when I need something different!
Preparing the Wet Base for Your Chocolate Chip Cookie
First, you have to brown that butter. Melt it, watch those solids toast up beautifully, and pour it into a bowl to cool for about twenty minutes. It needs to be barely warm, not hot! Once it’s cooled, go ahead and whisk in both sugars until it looks smooth. Now, for the eggs—make sure they are truly at room temperature so they blend right in without shocking the cooled butter. Beat them in one by one, followed by that lovely vanilla extract. Easy peasy! That temperature control is key for rich flavor.
Combining and Chilling the Ultimate Cookie Recipe Dough
In a separate dish, whisk your dry stuff—flour, baking soda, and salt—so everything is nicely distributed. Add this dry mix to the wet ingredients slowly, mixing on low speed. And here is the major rule for the ultimate cookie recipe: STOP mixing the second you see the last streak of flour disappear. Overmixing toughens cookies! Once it’s just combined, fold in your glorious chocolate chips. Then, cover that whole bowl and stick it in the fridge for at least 24 hours, like we discussed. That chilling time is mandatory for the best chocolate chip cookie!
Baking for Chewy Chocolate Chip Cookies with Crispy Edges
When you’re ready to bake, preheat your oven to 375 degrees Fahrenheit and line those sheets with parchment paper—always use parchment! Scoop out dough balls that are about three tablespoons big and space them three inches apart. They need room to breathe and spread just a tiny bit. Bake for 10 to 12 minutes. The magic cue is when the edges are golden brown but the center still looks a bit pale and gloriously underdone. Let them sit right there on the hot pan for five minutes to solidify those crispy edge cookies before you move them to the rack. That resting time sets the structure perfectly!
Ingredient Notes and Substitutions for Your Chocolate Chip Cookie
When you’re diving into a recipe this specific, people always have questions about tweaking things, and that’s totally understandable! I get asked all the time if you can cheat on the butter or change up the chocolate. Look, I love an easy chocolate chip cookies day too, but for this *ultimate* version, some parts are really important for that thick, chewy center we’re after. Don’t worry though, I’ve got some good news on substitutions.
If you absolutely must skip browning the butter—maybe you’re in a real rush—you can simply use 1 cup of softened, unsalted butter instead of the browned stuff. The texture will be good, classic, and buttery, but you will lose that deep, complex nutty flavor that makes this recipe special. It’s a trade-off, but it still works for a quick fix!
For those gooey center cookies, the type of chocolate matters more than anything else. We are using both semi-sweet and milk chocolate chips here. Why two? The semi-sweet gives us that necessary intense chocolate kick, and the milk chocolate melts down into those perfect, creamy pockets. If you only have one kind, go for chopped chocolate bars instead of chips whenever possible. Chopped chocolate melts better and creates those fabulous, irregular pools of melty chocolate chip goodness.
Also, remember the notes about chilling? If you are looking for crispy edge cookies, do not skip the chill time; it’s far more critical than the butter substitution! If your dough seems too stiff after chilling overnight, just leave it on the counter for 15 minutes while the oven preheats. You want it workable, not warm. A little trick I learned when I ran out of chips once was adding chopped peanut butter cups along with the chocolate—it made for an amazing variation! You can find a few other fun swaps like this over in my chocolate chip zucchini muffins post, too.
Tips for Success When Making Homemade Chocolate Chip Cookies
Look, even with the best recipe, sometimes homemade chocolate chip cookies decide they want to be difficult. If you want a truly no fail cookie recipe, you need to pay attention to your oven and your scooping technique. This is where my years of trial and error really help you out!
First thing: oven calibration. Most home ovens lie about their temperature—mine definitely runs hot. If you don’t have an oven thermometer, grab one! Baking a fatty cookie like this at 390 degrees when you think it’s 375 is the difference between a thick cookie and a greasy puddle. Adjust your settings after checking, okay?
When scooping, size consistency is everything for even baking. I use a standard three-tablespoon scoop, but if you don’t have one, take a level tablespoon and scoop it twice. Don’t just eyeball it! Those little dough balls need to be uniform so they all finish baking at the exact same moment. This keeps the chewy centers exactly where they should be.
Finally, for those buttery chocolate chip cookies to hold their shape, make sure your chilled dough balls are slightly cold when they go into the oven. If they sit out too long while you’re preheating, they’ll spread too fast. A quick ten minutes in the freezer right before baking is a great little trick I use when I want extra assurance against flat cookies. You can find some other great baking wisdom over at my oatmeal chocolate chip muffins post, too!
Storing and Reheating Your Chocolate Chip Cookie Batch
So, you have successfully baked the most amazing cookies, but now you have to resist eating all 18 at once! That’s the real challenge. For storage, keep your baked crispy edge cookies in a sturdy, airtight container at room temperature. Don’t stick them in the fridge; that will just make them stale faster, even though the chilling step was essential for making the dough.
If you want to bring back that freshly baked magic and restore the gooey center, you have two great, quick options. Pop one on a microwave-safe plate for about 10 seconds. That brings the chocolate right back to life! For a slightly better result that keeps the edges crisp, warm them on a baking sheet in a 300-degree oven for about three minutes. You can find some other long-lasting treats in my no bake chocolate oatmeal cookies guide!
Frequently Asked Questions About This Chocolate Chip Cookie Recipe
I know you might have a few lingering questions after seeing how detailed we got about achieving those perfect crispy edges and chewy centers. It’s totally normal! When you’re aiming for the best chocolate chip cookie recipe, you want total confidence. Here are a few things people always ask me about making these classic chocolate chip cookies.
Can I make these without browning the butter?
Yes, you totally can, though I beg you to try it with the brown butter at least once! If you need super quick cookie recipes and skip that step, just substitute the 1 cup of browned and cooled butter with 1 cup of standard, softened, unsalted butter. Now, since you skipped the flavor step, you want those cookies to be as flavorful as possible, so I highly recommend adding an extra splash of vanilla extract—maybe 1 and 1/2 teaspoons total—to compensate for the missing nutty depth. It’s a good shortcut for easy chocolate chip cookies!
How long can I chill the dough?
This is where you have total control over your comfort food desserts! I insist on a minimum of 24 hours for the best flavor and thickness. But honestly? The dough gets even better if you let it hang out in the fridge for 48 hours. You can even push it to 72 hours! Just keep it covered tightly in the bowl. If you go past three days, you might notice the chocolate chips start to look a little dusty, but it’s still perfectly edible. This extended rest time is what prevents flat cookies, so resist the temptation to bake it right away!
Why are my cookies spreading too much?
Ugh, flat cookies are the worst, right? This usually happens for two main reasons, even with a great recipe like this. First, if your oven temperature is running too low, the edges don’t set fast enough before the fat melts completely. Like I said, grab that oven thermometer! Second, sometimes people forget to chill the dough long enough, or they let the dough balls sit out on the counter too long before baking. Remember, the dough needs to go into the oven still quite cold to maintain that thickness. If you’re making these for holiday cookie baking, always roll out the balls right from the fridge for the best structure. For more reliable tips on texture, check out my guide on classic chocolate chip muffins, which shares the same structural secrets!
Can I use all brown sugar for a chewier result?
While I love using dark brown sugar for that rich, molasses flavor, I wouldn’t recommend swapping out all the granulated sugar. Granulated sugar plays a big role in achieving those crispy edges we love—it melts differently than brown sugar. If you want chewy chocolate chip cookies, keeping that 1:2 ratio of white to brown sugar is essential. The brown sugar handles the chewiness, and the white sugar provides the necessary crisp. It’s about balance!
If you have other questions about this ultimate cookie recipe, drop them in the comments below! I love hearing what you all think about these buttery chocolate chip cookies.
Estimated Nutritional Data for a Single Chocolate Chip Cookie
Alright, let’s talk numbers, because sometimes you just need to know what you’re indulging in! I always feel better eating one of these incredible, bakery style chocolate chip cookies when I realize they aren’t as scary as they taste—though they definitely pack a buttery punch!
The recipe yields about 18 of these thick beauties, and based on the ingredients, here is the estimated breakdown for one cookie. Please remember this is just an estimate, as the exact numbers will change depending on the brand of chocolate chips or the precise amount of molasses left in your brown sugar.
- Calories: Around 280
- Fat: About 16g (It is butter, after all!)
- Carbohydrates: Approximately 33g
- Sugar: Roughly 25g—that’s where the chewy joy comes from!
- Protein: About 3g
- Sodium: Around 150mg
This is comfort food at its finest, friends. Knowing you’re getting that perfect texture and delicious flavor profile is what really counts. Enjoy these amazing homemade chocolate chip cookies guilt-free, knowing exactly what went into that gooey center!
Share Your Bakery Style Chocolate Chip Cookie Results
Whew! We made some absolute magic happen, didn’t we? I truly hope you’ve got a cooling rack full of thick, chewy, perfectly crisp-edged chocolate chip cookies sitting on your counter right now. Baking is about sharing that love, so I need to hear all about it!
When you try this ultimate cookie recipe, please come back here and leave me a star rating. Let me know what you thought of the brown butter—was it worth the extra pan cleaning? Tell me about your chilling experiment. Did you go for the minimum 24 hours or push it to 72? I absolutely live for hearing about that gooey center!
Better yet, snap a picture of your beautiful bakery style creations and tag me on social media! Seeing your results is the biggest compliment I could ever receive. It helps other bakers see that this no-fail cookie recipe really does deliver exactly what it promises. Your feedback helps build up our community here, and I promise to read every single comment you leave below. Don’t forget that if you have any concerns or need troubleshooting help, you can always check out our cookie policy for general baking guidelines!
PrintUltimate Bakery Style Chocolate Chip Cookies
Make thick, chewy chocolate chip cookies with crispy edges using this reliable recipe.
- Prep Time: 20 min
- Cook Time: 12 min
- Total Time: 24 hr 32 min
- Yield: About 18 cookies
- Category: Dessert
- Method: Baking
- Cuisine: American
- Diet: Vegetarian
Ingredients
- 1 cup (2 sticks) unsalted butter, browned and cooled
- 1 cup packed light brown sugar
- 1/2 cup granulated sugar
- 2 large eggs, room temperature
- 1 tablespoon vanilla extract
- 2 1/4 cups all-purpose flour
- 1 teaspoon baking soda
- 1 teaspoon salt
- 1 1/2 cups semi-sweet chocolate chips
- 1 cup milk chocolate chips
Instructions
- Brown the butter: Melt the butter in a saucepan over medium heat. Continue cooking, stirring occasionally, until the milk solids turn brown and smell nutty. Pour into a heatproof bowl and let cool for 20 minutes.
- In a large bowl, whisk together the cooled brown butter, brown sugar, and granulated sugar until smooth.
- Beat in the eggs one at a time, then mix in the vanilla extract.
- In a separate bowl, whisk together the flour, baking soda, and salt.
- Gradually add the dry ingredients to the wet ingredients, mixing on low speed until just combined. Do not overmix.
- Fold in both types of chocolate chips.
- Cover the dough and chill for at least 24 hours for best flavor and texture.
- Preheat your oven to 375 degrees Fahrenheit. Line baking sheets with parchment paper.
- Scoop dough into balls, about 3 tablespoons each. Place them 3 inches apart on the prepared sheets.
- Bake for 10 to 12 minutes, or until the edges are golden brown and the centers look slightly underbaked.
- Let the cookies cool on the baking sheet for 5 minutes before transferring them to a wire rack to cool completely.
Notes
- Chilling the dough for 24 to 72 hours develops a deeper flavor.
- For extra gooey centers, press a few extra chocolate chips onto the tops of the dough balls before baking.
- If you skip browning the butter, use 1 cup of softened, unsalted butter instead.
Nutrition
- Serving Size: 1 cookie
- Calories: 280
- Sugar: 25g
- Sodium: 150mg
- Fat: 16g
- Saturated Fat: 10g
- Unsaturated Fat: 6g
- Trans Fat: 0.2g
- Carbohydrates: 33g
- Fiber: 1g
- Protein: 3g
- Cholesterol: 55mg