

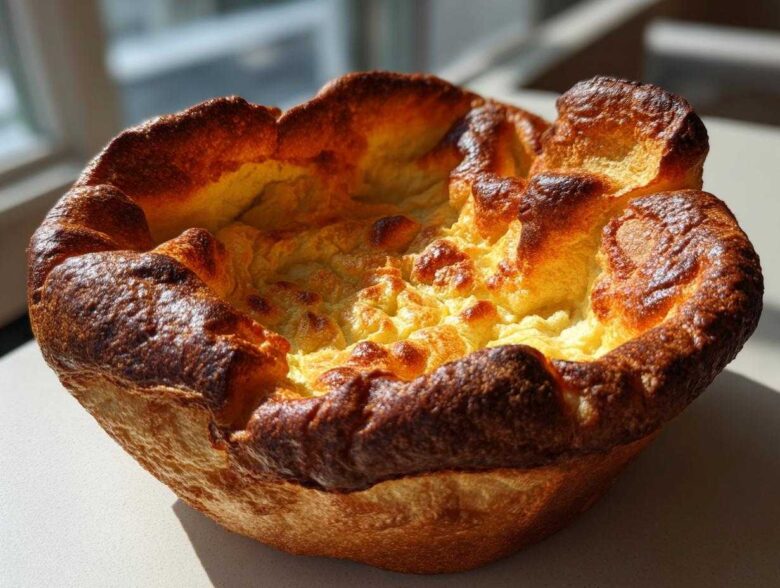
Honestly, doesn’t it feel like everyone is secretly terrified of making Yorkshire pudding? You see those perfect, towering creations on TV, and then you try, and you end up with sad little pancake discs swimming in fat. Don’t even talk to me about my first attempts; I once watched a batch collapse so dramatically I thought my oven was haunted! But listen, I’ve cracked the code. I’m sharing my absolutely foolproof guide to getting puddings that are light, tall, and have those crispy edges everyone raves about. Forget the fear—we’re making show-stopping Yorkshire pudding that will impress every single person at your Sunday roast.
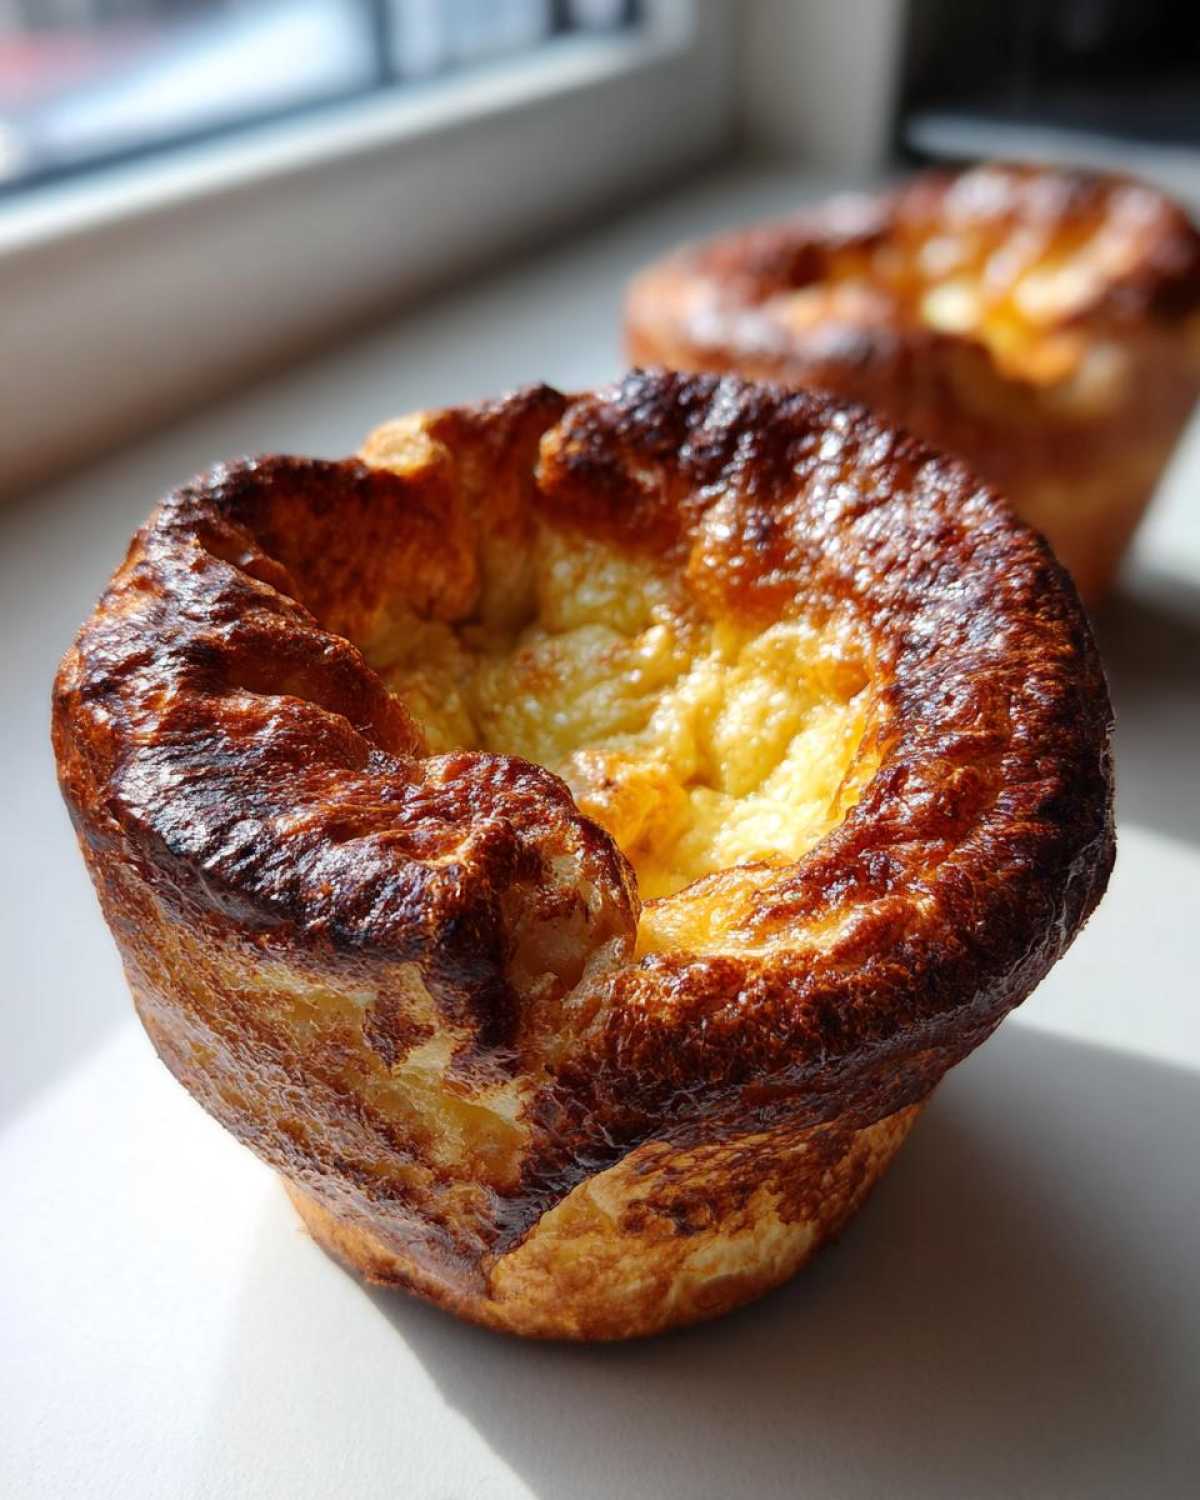
I remember my mum watching an instructional video where the chef opened the oven door too early and ruined everything. I took that lesson to heart!
If you want to know more about my journey in the kitchen, you can check out my about page for a little more background on why I share these recipes!
Why This is the Best Yorkshire Pudding Recipe for a Perfect Rise
You’re looking for height, right? That glorious puff that makes them perfect for soaking up gravy? The secret isn’t just luck; it’s science applied simply. This recipe eliminates the guesswork and guarantees success, even if you’ve failed before. We aren’t messing around when it comes to baking tips for tall puddings!
- Perfectly thin, rested batter consistency.
- Guaranteed smoking hot oil for that initial heat shock.
- No peeking allowed for the crucial first 20 minutes!
When you follow these rules on this puffy batter recipe, failure just isn’t an option. It’s the easiest side dish you’ll ever master.
Achieving Tall, Crispy Baked Puddings
So, how do we get that elevation? It boils down to three things you absolutely must nail. First, the batter has to be thin, almost like heavy cream—no thick globs allowed! Second, you must let that batter rest; it lets the gluten relax so the rise is lighter, not stiff. And finally, the third and most critical point: the fat has to be smoking hot. That instant, intense blast of heat hitting the cold batter is what forces them straight up to the ceiling. Trust me on the smoke!
Essential Ingredients for Authentic Yorkshire Pudding
You don’t need a million fancy things for perfect Yorkshire pudding—honestly, it’s built on staples! Keep your ingredients simple, but make sure they are good quality. When I make this for a big holiday feast, I use the exact amounts listed below. It’s a straightforward recipe for the best British side dishes, yielding 12 beautiful puddings.
- 140g plain flour (Sifted, always sift!)
- 4 large eggs (Room temp if you remember, but don’t stress too much)
- 200ml milk (Whole milk truly gives the richest body)
- Pinch of salt
- Vegetable oil or beef dripping, for heating
That’s it! No baking powder, no sodas. Just flour, eggs, milk, and salt. The magic happens in the technique, not complicated pantry additions.
Ingredient Spotlight: Fat Choice for Yorkshire Pudding
This is where we talk about true authenticity and flavor. If you are making a proper Sunday roast, you simply have to use beef dripping if you can get your hands on it. Dripping retains heat incredibly well, which is vital for that fantastic rise, and the flavor it imparts is unmatched. It really makes these puddings the ultimate gravy soaking side dish.
But look, I know not everyone keeps beef dripping on hand, and certainly not if you’re leaning toward vegetarian cooking! If you’re okay skipping that deep beefy flavor, use a high smoke point vegetable oil, like canola or sunflower oil. Just make absolutely certain that whatever fat you choose is heated until it’s screaming hot before the batter goes in. That fat is the engine for the puff!
Step-by-Step Instructions to Make Yorkshire Pudding
Right, time to get serious! You have your ingredients ready, now we combine them. Don’t rush this part—it’s where we build the foundation for maximum height. Getting the batter right is the secret to answering the question, how to make Yorkshire pudding rise properly!
First, you’ll sift that flour and salt together. Then, make a little volcano in the middle—a well. Crack your eggs right into that hole. Start whisking just the eggs, and slowly, slowly, start pulling in the flour from the sides. It’ll look like a thick paste at first. Keep going until it thickens up too much, and then—slowly—stream in the milk while you beat it like you mean it. You want a completely smooth batter, thin like pouring cream. If you have lumps, you’ve whisked too fast or added liquid too quickly!
Cover that bowl up. At least 30 minutes minimum on the counter, or shove it in the fridge for a few hours. That rest time is non-negotiable for truly fluffy results. While it rests, get your oven cranked up to 220C (425F) with your tin inside ready to receive oil.
Preparing the Homemade Savory Batter
When you’re mixing, the trick to avoiding lumps is patience. Think slow incorporation. You’re basically trying to coax the flour grains into the liquid without letting them clump up! You want that mixture to flow off the whisk smoothly. If it feels heavy, keep adding that milk bit by bit until it flows beautifully. This smooth texture is what guarantees you end up with nice, light interior crumb, not tough bread!
The Crucial Step: Heating the Fat for Yorkshire Pudding
This is literally the make-or-break moment. When you pull that muffin tin out—carefully, using oven gloves, please!—the oil or dripping needs to be shimmering and just starting to smoke. I usually wait until I see those tiny wisps rising up. That heat is what blasts the batter upwards!
Quickly pour your rested batter into each hot cup, filling them only about a third of the way. Work fast so the tin cools as little as possible. Then, slam that oven door shut, turn the temp down slightly if you need to maintain 220C, and DO NOT OPEN THAT DOOR for 20 full minutes. If you open it, gravity wins, and your beautiful crispy baked puddings will turn into sad, flat regrets!
Tips for Success with Your Yorkshire Pudding Batter
Okay, we’ve mixed it, we’ve rested it, and we’ve poured it into smoking hot fat—but just in case you’re feeling nervous, here are my last-minute nuggets of wisdom. These are the things I learned the hard way so you don’t have to!
First, oven accuracy counts! If your oven runs cool, your puddings will suffer immediately. I seriously recommend checking your temperature with an inexpensive oven thermometer. If your oven says 220C but it’s really only 200C, your puddings are doomed to fail the rise test. Make sure when that tin goes in, the heat is intense!
Second, get those portions just right. I used to worry about filling them too high, and I ended up with puddings that were burnt on the outside and raw in the middle. You only fill the cups about one-third full. The mix expands dramatically—it practically doubles, so be conservative with your pour. This helps ensure even cooking, giving you that soft center that perfectly cradles the gravy.
Third, and this sounds silly, but the resting time for the batter is crucial for creating fluffy popovers recipe textures, even though these are savory. If you are in a massive rush, you can put the batter in the freezer for 15 minutes instead of the fridge for an hour. That deep chill, followed by the searing heat shock of the oil, really helps deliver the puff factor. It’s a classic baking trick!
Finally, stick to the timings I gave you earlier regarding opening the door. I know you’ll be tempted, but resist! Those first 20 minutes are when the structure sets. If you must check, peek through the glass quickly, but don’t let that warm air escape!
Serving Suggestions for Your Yorkshire Pudding
Now that you have the most beautiful, puffed-up, golden-brown works of art, it’s time to talk about the main event: the roast dinner itself! These aren’t just any baked goods; these Yorkshire puddings are designed to be the essential foundation for soaking up all those delicious pan juices. They are definitely contenders for the title of the Best Sunday roast sides, hands down.
Of course, they are legendary with roast beef and lashings of thick, rich gravy. But don’t stop there! I use them as a backdrop for creamy mashed potatoes and veggies, too. They are simply the greatest gravy soaking side dish you can bake. Plate them up hot, right out of the oven, and watch how fast they disappear!
Storage and Reheating Yorkshire Pudding
So, you made too many. Isn’t that always the way? Making a massive batch of Yorkshire pudding means leftovers, and frankly, they are still pretty good the next day if you handle them right. The main thing you want to avoid is a soggy pudding!
When they’ve cooled completely—and I mean completely, don’t trap steam—pop them into a sturdy, airtight container. Make sure there’s no moisture in there, or you might get condensation, which is the enemy of crispiness. They’ll keep happily in the fridge for about two days, but honestly, they are best within 24 hours.
Now, the reheating part is where people mess up. Please, please, for the love of gravy, don’t use the microwave! Microwaves bring back the moisture, and suddenly your beautifully risen pudding is just a sad, chewy disk. Not worth it!
The way to revive that glorious crispiness and loft is back in a hot oven. Preheat your oven to about 180C (375F). Lay the puddings out on a baking sheet—don’t stack them—and pop them in there for about 5 to 8 minutes. You just need to heat them through and dry that exterior back out again. They come out piping hot, dry, and nearly as puffy as when they were first baked. It’s like magic, but it’s really just controlled heat!
Frequently Asked Questions About Yorkshire Pudding
Whenever I post about these beautiful, puffy titans of the roast dinner world, I always get a flood of questions. It’s totally understandable—mastering a classic like this takes confidence! Here are the big ones I hear most often about making sure your Yorkshire pudding turns out perfectly pale, tall, and crispy.
Can I use cold milk for the yorkshire pudding batter?
You can, yes, but I really, really advise against it if you want the absolute best rise. Think about it: you’re putting cold milk into flour and eggs, and it definitely slows down the process of smoothing everything out. Ideally, your milk should be room temperature, or even slightly warm—not hot, just not chilled!
If you completely forgot to take the milk out, don’t panic! The resting time becomes even more important. If the batter is cold, let it rest for a full hour, or even stick it in the fridge for hours, which actually helps that gluten relax perfectly anyway. The long rest compensates for the cold milk, giving you a great result for your traditional British baking.
What is the difference between Yorkshire pudding and popovers?
This is a great question, and people mix them up all the time! Technically, they are very similar—both rely on high heat and steam to puff up into hollow treats. A popover is just the general American term for that type of baked, airy dough.
The key difference, especially when you are working on a very easy savory baking recipe, is the fat and the context. True Yorkshire pudding demands a fat like beef dripping or a high-smoke-point oil heated until it’s smoking hot in the tin. Popovers are often baked in greased pans but don’t always rely on submerging the batter in that level of extreme heat or using traditional dripping. If you’re making a true fluffy popovers recipe adaptation, you might skip the dripping, but for our authentic version, that hot fat is essential for the height!
If you have any other burning questions about your next batch, please feel free to reach out to me via the contact page!
Nutritional Estimates for This Yorkshire Pudding Recipe
So, while these are the greatest British side dishes ever invented, I know some of you want to keep an eye on what you’re eating! Keep in mind that these numbers are just estimates, because whether you use oil or beef dripping makes a difference, naturally.
For one medium pudding made with this recipe, you’re looking at roughly:
- Calories: 150
- Fat: 8g
- Carbohydrates: 16g
- Protein: 5g
Everything can swing a bit based on how much fat you use in the tin, so treat these figures as a general guide for your holiday roast accompaniments. If you want to check out my full recipe disclaimer philosophy, you can read it right here.
Share Your Perfect Yorkshire Pudding Results
Well, that’s it! You are now fully equipped to make the most magnificent, puffed-up, crispy-edged Yorkshire pudding that your family has ever seen. Seriously, measuring that oil temperature is the key, so don’t skip that step!
I absolutely live to hear from you guys! Did you manage to get that incredible rise? Did the batter rest perfectly? Head down to the comments below and tell me how they turned out!
If you followed my instructions and ended up with a tray full of golden, soaring towers ready for gravy, please, please give this recipe a five-star rating. It really helps other nervous bakers find this foolproof guide. And if you managed to snap a picture of your beautiful British side dishes, share it on Instagram and tag me so I can marvel at your success!
Happy roasting, everyone!
PrintFoolproof, Super Puffy Yorkshire Puddings: Master the Crispy Edges and Soft Center

Follow these simple steps to make light, tall, and crispy Yorkshire puddings perfect for soaking up gravy with your roast dinner.
- Prep Time: 10 min
- Cook Time: 25 min
- Total Time: 65 min
- Yield: 12 medium puddings
- Category: Side Dish
- Method: Baking
- Cuisine: British
- Diet: Vegetarian
Ingredients
- 140g plain flour
- 4 large eggs
- 200ml milk (whole milk works best)
- Pinch of salt
- Vegetable oil or beef dripping, for heating
Instructions
- Sift the flour and salt into a large bowl. Make a well in the center.
- Crack the eggs into the well. Begin whisking the eggs slowly, gradually incorporating the flour from the sides.
- Slowly pour in the milk while continuously whisking until you have a smooth, thin batter, similar in consistency to thin cream.
- Cover the bowl and let the batter rest at room temperature for at least 30 minutes, or up to several hours in the refrigerator. This resting period helps achieve a better rise.
- Preheat your oven to 220C (425F). Place a 12-hole muffin tin or a dedicated Yorkshire pudding tin into the oven.
- Add about 1 teaspoon of vegetable oil or beef dripping into each cup of the hot tin. Heat the oil in the oven for 10 minutes until it is smoking hot.
- Carefully remove the hot tin from the oven. Quickly and steadily pour the batter evenly into the hot oil, filling each cup about one-third full. Work fast to keep the heat in the tin.
- Immediately return the tin to the oven. Do not open the oven door for the first 20 minutes of cooking.
- Bake for 20 to 25 minutes, or until the puddings are well risen, deep golden brown, and crispy.
- Serve immediately with your roast dinner and gravy.
Notes
- Use beef dripping instead of oil for the most authentic flavor and crispness.
- The oil must be smoking hot before you pour in the batter; this shock of heat causes the dramatic rise.
- For the tallest puddings, ensure your oven temperature is accurate and do not open the door while they are baking.
Nutrition
- Serving Size: 1 pudding
- Calories: 150
- Sugar: 2
- Sodium: 120
- Fat: 8
- Saturated Fat: 3
- Unsaturated Fat: 5
- Trans Fat: 0
- Carbohydrates: 16
- Fiber: 1
- Protein: 5
- Cholesterol: 85