

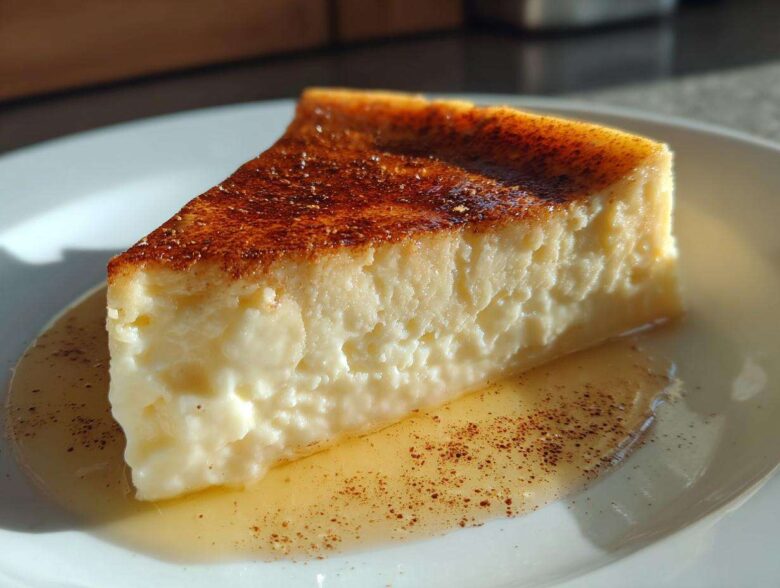
Oh, you know those desserts that just smell like childhood holidays and cozy Sunday nights? That’s exactly what this recipe is! I spent way too many afternoons trying to master that perfect, delicate texture in a baked dessert. I swear, homemade custard was always either rubbery or had little air bubbles popping out. Not anymore! This egg custard recipe? It’s the one. It is genuinely fail-proof, and when you pull it out of the oven, I promise you, it will be the silkiest, smoothest thing you’ve ever made. It truly is my go-to classic egg custard recipe.
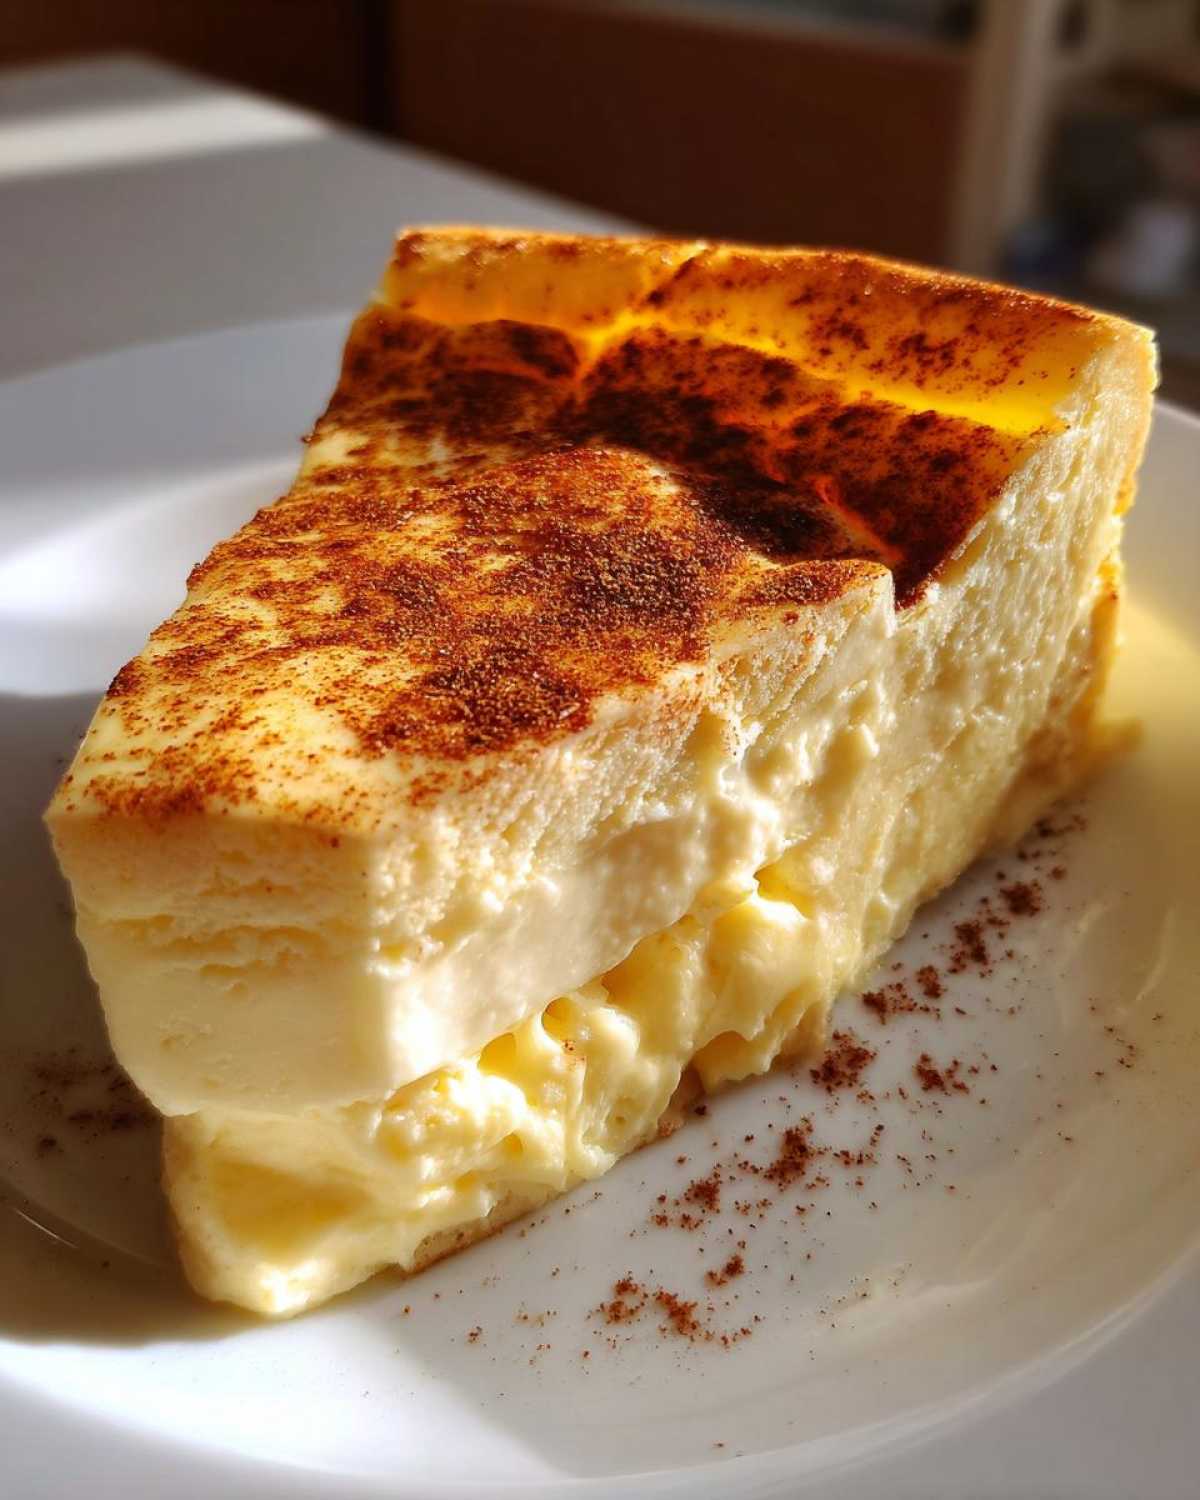
I finally figured out that the secret isn’t complicated ingredients; it’s all about respecting the eggs and using that water bath—trust me on that one! I’ve made this so many times that I can practically do it blindfolded now, and I want to share every trick I learned so your first attempt is a total success. For those who want to know more about my wild (and often messy) journey in the kitchen, you can read a bit more about my baking philosophy here.
Why This Fail-Proof Egg Custard Recipe Works (Comfort Food Dessert)
What makes this recipe so dependable? Well, when I call it ‘fail-proof,’ I mean it! This isn’t just another sweet treat; it’s pure comfort food dessert—the kind that tastes exactly how you remember it. The magic is in keeping things simple and gentle. Most recipes go wrong because people try to rush the eggs, but we aren’t doing that here! We are aiming for that beautiful, creamy dessert texture that melts in your mouth.
My secret to avoiding that annoying, slightly rubbery top layer that ruins so many custards is all about texture management before it even hits the oven. It requires a little patience, but the result is worth every second!
Achieving a Truly Smooth Custard Dessert
If you want that perfectly glassy, smooth custard dessert finish, you have to treat those eggs gently. Don’t grab the electric mixer! We only want to lightly whisk the eggs—just enough to break them up. Then, the real pro move: always, always strain your finished liquid mixture through a fine-mesh sieve right before pouring. This catches any little bits of unmixed egg white or chalazae. It’s the one step that guarantees silkiness.
The Essential Role of the Water Bath for Perfect Egg Custard
Seriously, toss any thought of baking this directly on the rack. The water bath, or bain-marie, is non-negotiable for achieving an easy baked custard that doesn’t curdle or crack. The hot water surrounds your dish, creating a steamy, gentle warmth. This slow, indirect heat cooks the egg custard evenly from the sides to the center. It’s the insurance policy against that bumpy, uneven texture, and it keeps your final dessert incredibly tender.
Ingredients for Your Old Fashioned Egg Custard
Okay, now for the fun part: gathering the supplies! I love that this recipe uses such simple, pantry-friendly stuff. We aren’t messing around with complicated thickeners here; the eggs do all the heavy lifting. You’ll probably find everything you need already sitting in your kitchen, which makes this one of my favorite vintage dessert recipes to pull together last minute.
You’ll need four large eggs, half a cup of sugar, just a tiny bit of salt to wake everything up, a teaspoon of vanilla, and two cups of whole milk. Oh, and don’t forget the star seasoning: the nutmeg! We’ll need a quarter teaspoon of that spicy goodness for the top. If you’re making it a pie instead of cups, you’ll also need one unbaked 9-inch pie crust. Keep your measurements precise, and you are golden!
Ingredient Notes and Substitutions for Classic Egg Custard Recipe
When it comes to the fat content, you can definitely tinker with this classic egg custard recipe, but whole milk is truly the standard for that traditional taste. If you want to be extra fancy—maybe for a special occasion—swap out half a cup of the milk for heavy whipping cream. That makes it even richer, trust me! Keep the full amount of milk you use otherwise, or the baking time will change.
As for the crust, that’s totally optional! For individual baked custard cups, you skip it entirely. But if you are making the pie version, use a crust you love. I usually keep mine unbaked, as the water bath handles the bottom crust beautifully, ensuring it doesn’t get soggy or tough.
Step-by-Step Instructions for Your Simple Sweet Custard
Alright, time to put the pan in the water, so to speak! This is where we combine everything. First thing? Get that oven warmed up to 350°F. If you’re using ramekins for individual desserts, place them nicely inside a larger baking pan now. We’re going to be quick, so prep everything ahead of time!
We are going to follow the instructions exactly for the best results possible. I highly recommend heading over to see what else we’ve been whipping up in the mornings, like yummy fresh bakes, while you get your water boiling for the bath. You can check out my breakfast favorites here.
Preparing the Base Mixture for the Egg Custard
Remember what I said about not wanting air bubbles? Take your four large eggs and just lightly whisk them in a bowl. We’re not aiming for fluffiness, folks! We want them just broken up. Then, whisk in that sugar, salt, and vanilla until the sugar starts to vanish. Next, drizzle in the whole milk slowly while continuing to whisk very carefully.
This is your liquid egg custard base. If you really want that high-end, restaurant-level smooth texture, pour this whole liquid mix through a fine-mesh sieve right before you move to the next step. Seriously, ditch those tiny air bubbles now before they bake into a meringue on top of your dessert.
Baking the Homemade Custard Pie or Cups
Pour that strained mixture carefully into your pie crust or your individual ramekins. Then, use your nutmeg and dust the top lightly and evenly—don’t glob it in one spot! Now for the crucial part: the water bath. Carefully pour hot water into the larger pan so it comes halfway up the sides of your dishes.
Bake for about 40 to 50 minutes if you made a homemade custard pie, or a little less time for the cups (around 35 to 45 minutes). You know it’s done when the edges look set, but the very center still has a tiny, adorable jiggle left. Don’t overbake it, or you’ll regret it!
Tips for Success with Your Fail Proof Custard Recipe
I know you’re excited to try this fail proof custard recipe, and honestly, it’s so rewarding when it comes out perfect! Beyond the water bath, a couple of little things can take this from good to truly stunning. These are the tiny secrets I picked up from years of trial and error—mostly error, ha! Don’t worry about perfection on your first go, but these tips will get you there faster.
For instance, chilling is just as important as baking. You absolutely cannot dig into it piping hot; it needs that relaxing time in the fridge to fully set its structure. If you’re looking for more helpful hints on general kitchen happenings, I sometimes post quick tips on my little blog!
The Best Way to Apply Nutmeg Custard Topping
That little dusting of nutmeg on top is key! It’s the classic indicator that you’re eating true, old fashioned dessert. Don’t just shake it on randomly, okay? The best approach for the nutmeg custard topping is to sprinkle it evenly *right before* the custard goes into the oven, just before you add the hot water for the bath.
Use a fine sifter if you have one, or just tap your spice jar gently over two or three passes across the surface. This prevents clumping and ensures that every spoonful gets that little aromatic punch of spice, rather than one bite tasting mostly of nutmeg.
Storage and Serving Suggestions for This Creamy Dessert
Okay, you’ve baked it perfectly, and now you’re staring at that beautiful, slightly wobbly top. Don’t touch it! The hardest part of making this creamy dessert is waiting for it to cool down. You must let it cool completely on the counter first—at least an hour. Then, it needs a solid three hours in the refrigerator, but honestly, overnight is even better. That chilling time is when the custard fully sets up so it doesn’t slump when you cut it.
When you’re ready to serve, pull out those chilled cups or slices. While a tiny bit more nutmeg is always welcome, I sometimes top mine with some fresh fruit because the richness really balances a bit of tartness. Think raspberries or sliced kiwi! If you want a refreshing pairing for this classic, I found this amazing watermelon mint lemonade that is just divine alongside it.
Frequently Asked Questions About Making Egg Custard
It’s really common to have a few questions pop up, especially since getting the texture just right can feel tricky! I’ve gathered the ones I get asked most often about this simple sweet custard. Don’t be shy—if you can master this dessert, you can master anything in the kitchen, I promise you that!
When you’re dealing with eggs and liquid, details matter, so let’s clear up any confusion right now before you start mixing. I want everyone to experience that beautiful, wobbly center!
Can I make this egg custard without a water bath?
Oh, honey, you technically *can*, but I really, really advise against it. Without that warm, steamy barrier, the direct heat of the oven gets right to the edges of your egg custard, and it cooks too fast. That’s how you end up with cracked tops or that awful rubbery texture instead of the silky feel we are aiming for.
What makes this a beginner baking dessert?
This recipe is fantastic for anyone just starting out because there are very few ingredients, and we aren’t trying to whip anything into stiff peaks! It really is one of the best beginner baking desserts. You mix, you pour, you bake gently in the water. No fancy folding, no complicated layers—just pure, straightforward baking that yields impressive results every single time.
Nutritional Estimates for This Simple Custard Filing
I always get asked if this rich, creamy treat is wildly unhealthy, and honestly, for a classic dessert, it’s not too bad, especially since it’s packed with the protein from those eggs! Now, remember, these numbers are just estimates based on using the standard ingredients—like whole milk and an unbaked crust if you go that route. Since this is a simple custard filing, it keeps things fairly straightforward.
Per serving (1/6th of the pie), you’re looking at roughly 250 calories. That includes about 11 grams of total fat and a solid 10 grams of protein. It clocks in around 28 grams of carbs and 22 grams of sugar. We’re treating ourselves, but we’re doing it with a classic, scratch-made taste! For the full rundown on ingredients and policies, you can always read up on the details on our privacy page.
Share Your Experience with This Classic Egg Custard Recipe
I truly hope you give this recipe a whirl, whether you opt for the cozy baked custard cups or the comforting homemade custard pie! Seriously, let me know how it turned out in the comments below. Did you keep it super simple, or did you sneak in that extra splash of cream? I love seeing everyone enjoy this egg custard!
If you have any last-minute questions as you’re baking, don’t hesitate to reach out; you can always get in touch over on the contact page!
PrintFail-Proof Baked Egg Custard

A simple recipe for a classic, smooth baked egg custard dessert, perfect for beginners.
- Prep Time: 10 min
- Cook Time: 45 min
- Total Time: 4 hours 55 min
- Yield: 6 servings
- Category: Dessert
- Method: Baking
- Cuisine: American
- Diet: Vegetarian
Ingredients
- 4 large eggs
- 1/2 cup granulated sugar
- 1/4 teaspoon salt
- 1 teaspoon vanilla extract
- 2 cups whole milk
- 1/4 teaspoon ground nutmeg
- 1 unbaked 9-inch pie crust (optional, for pie version)
Instructions
- Preheat your oven to 350°F (175°C). If making individual custards, place ramekins in a large baking pan.
- In a medium bowl, lightly whisk the eggs. Do not overbeat; you want to avoid incorporating too much air.
- Whisk in the sugar, salt, and vanilla extract until the sugar begins to dissolve.
- Slowly whisk in the milk until just combined.
- If making a pie, pour the mixture into the unbaked pie crust. If making cups, pour the mixture evenly into the prepared ramekins.
- Sprinkle the top evenly with ground nutmeg.
- Carefully pour hot water into the baking pan around the ramekins or pie dish until the water reaches halfway up the sides of the dishes (this creates a water bath or bain-marie).
- Bake for 40 to 50 minutes for a pie, or 35 to 45 minutes for individual cups. The custard is done when a knife inserted near the center comes out clean, or when the edges are set and the center has only a slight jiggle.
- Remove the dishes from the water bath. Let the custard cool completely on a wire rack before chilling in the refrigerator for at least 3 hours before serving.
Notes
- For the smoothest texture, strain the liquid custard mixture through a fine-mesh sieve before pouring it into the crust or ramekins.
- If you skip the water bath, the custard may develop a rubbery texture or crack.
- For a richer flavor, you can substitute 1/2 cup of the milk with heavy cream.
Nutrition
- Serving Size: 1/6 of pie
- Calories: 250
- Sugar: 22
- Sodium: 180
- Fat: 11
- Saturated Fat: 6
- Unsaturated Fat: 5
- Trans Fat: 0
- Carbohydrates: 28
- Fiber: 0
- Protein: 10
- Cholesterol: 130