

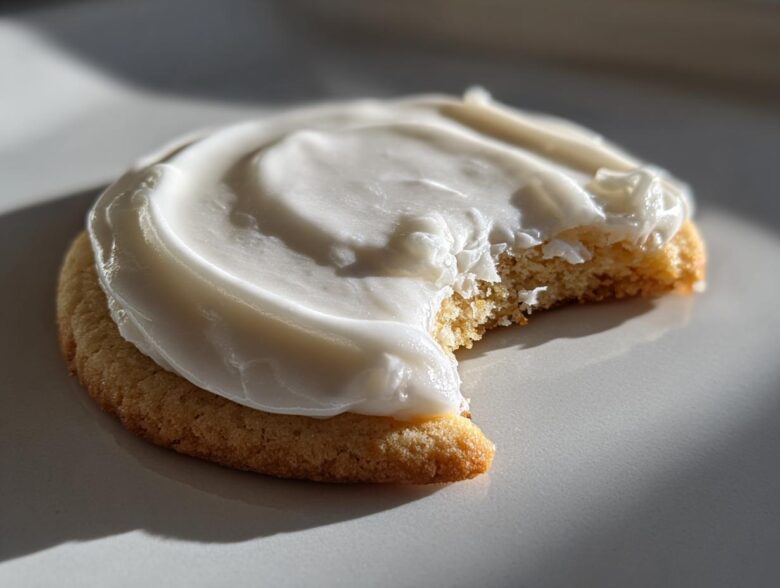
Oh, the heartbreak! You spend hours cutting out perfect little gingerbread men or delicate snowflakes, you pipe your design beautifully, and then… they stay sticky. You can’t stack them, you can’t ship them, and you certainly can’t gift them without everything smearing together. If that sounds familiar, you are in the absolute right place. I’ve battled soft, runny frosting for years, and I finally cracked the code. This sugar cookie icing recipe is my keeper—it dries hard, it sets incredibly smooth, and it’s tough enough for even the wildest holiday cookie trade.
I switched years ago to this Royal Icing style method, and honestly, I’ll never go back to a simple powdered sugar glaze for my cut-outs. This mixture is your secret weapon for durable, gorgeous results, whether you are just starting out or you’re prepping dozens for a big party.
Why This Sugar Cookie Icing Recipe Dries Hard and Smooth
The real game-changer here is that little container of meringue powder. Don’t skip it! That’s the magic ingredient that gives us that beautiful, hard shell we all secretly crave. When you beat this mixture high and long, the protein in the powder creates an amazing internal structure. It’s the reason this icing stays reliable even a week after decorating.
When people ask me for a sugar cookie glaze that hardens perfectly, this is exactly what I point them to. It’s far more stable than most flour-based frostings. This consistency is what allows you to stack your beautiful cookies up high without worrying about them sticking together or smudging during transport. Trust me, once you see how sturdy this sets, you won’t use anything else for gifts!
Achieving a Glossy Cookie Icing Tutorial Finish
Want that bakery-perfect sheen? That comes from the mixing time, not extra ingredients. We are beating this icing hard for a reason! That high speed incorporates tiny air bubbles which, when they settle, leave behind a super smooth, glossy surface. Follow my instructions below and run that mixer for the full time. This high-speed beating is the secret behind every professional glossy cookie icing tutorial you see online—it turns dull into dazzling!
Ingredients for the Ultimate Sugar Cookie Icing Recipe
Okay, let’s talk ingredients! This list is short and sweet, which is another reason I love this recipe so much, especially when I’m rushing to finish a huge batch for a bake sale. The key is precision here, not complexity. Make sure you’re using a good quality powdered sugar because we want absolutely zero grittiness in our final product.
Before you even start mixing, you absolutely must sift that sugar. I can’t stress this enough if you want that flawless look! Sifting takes out any tiny clumps hiding in there, which directly helps you achieve that beautiful, how to get smooth icing on cookies look we’re aiming for. Think of it as prepping your canvas!
- 4 cups powdered sugar, sifted
- 3 tablespoons meringue powder
- 6 tablespoons warm water
- 1 teaspoon clear vanilla extract
- 1/4 teaspoon almond extract (optional, but I highly recommend it!)
If you want to check out some of my other favorite baking ingredient deep dives, I wrote a little bit about my staple pantry items over here. Having the right tools and basic ingredients makes everything so much easier!
Step-by-Step Instructions for This Sugar Cookie Icing Recipe
Alright, this is where the magic happens! Even though this is an easy cookie icing recipe, the timing is everything for getting that perfect, firm texture. We want to introduce the liquids slowly to ensure everything incorporates beautifully. Trust me, if you just dump it all in at once, you’ll end up with something lumpy, and nobody has time for that when decorating!
First things first, make sure your bowl is totally clean—no grease allowed! Add all your dry stuff—the sifted powdered sugar and the meringue powder—and give it a quick whisk just to get them acquainted.
Then, pour in the warm water and both extracts right on top. Now, don’t grab a spoon! You need the power of the mixer for this part. Start slow, maybe on the ‘stir’ setting, just until the dry ingredients are mostly hydrated. We don’t want a sugar cloud exploding all over the kitchen, oops!
The crucial part for firmness? Speed and time. Turn that mixer up to medium-high and let it go for a solid five, maybe even seven, minutes. I know it feels like forever, but you’re whipping actual air into that icing, and it’s what turns it from soft sugar paste into rock-solid decoration. When it’s ready, it should look thick, incredibly glossy, and actually hold a stiff peak when you stop the mixer.
How to Make Stiff Icing for Cookies (Outlining Consistency)
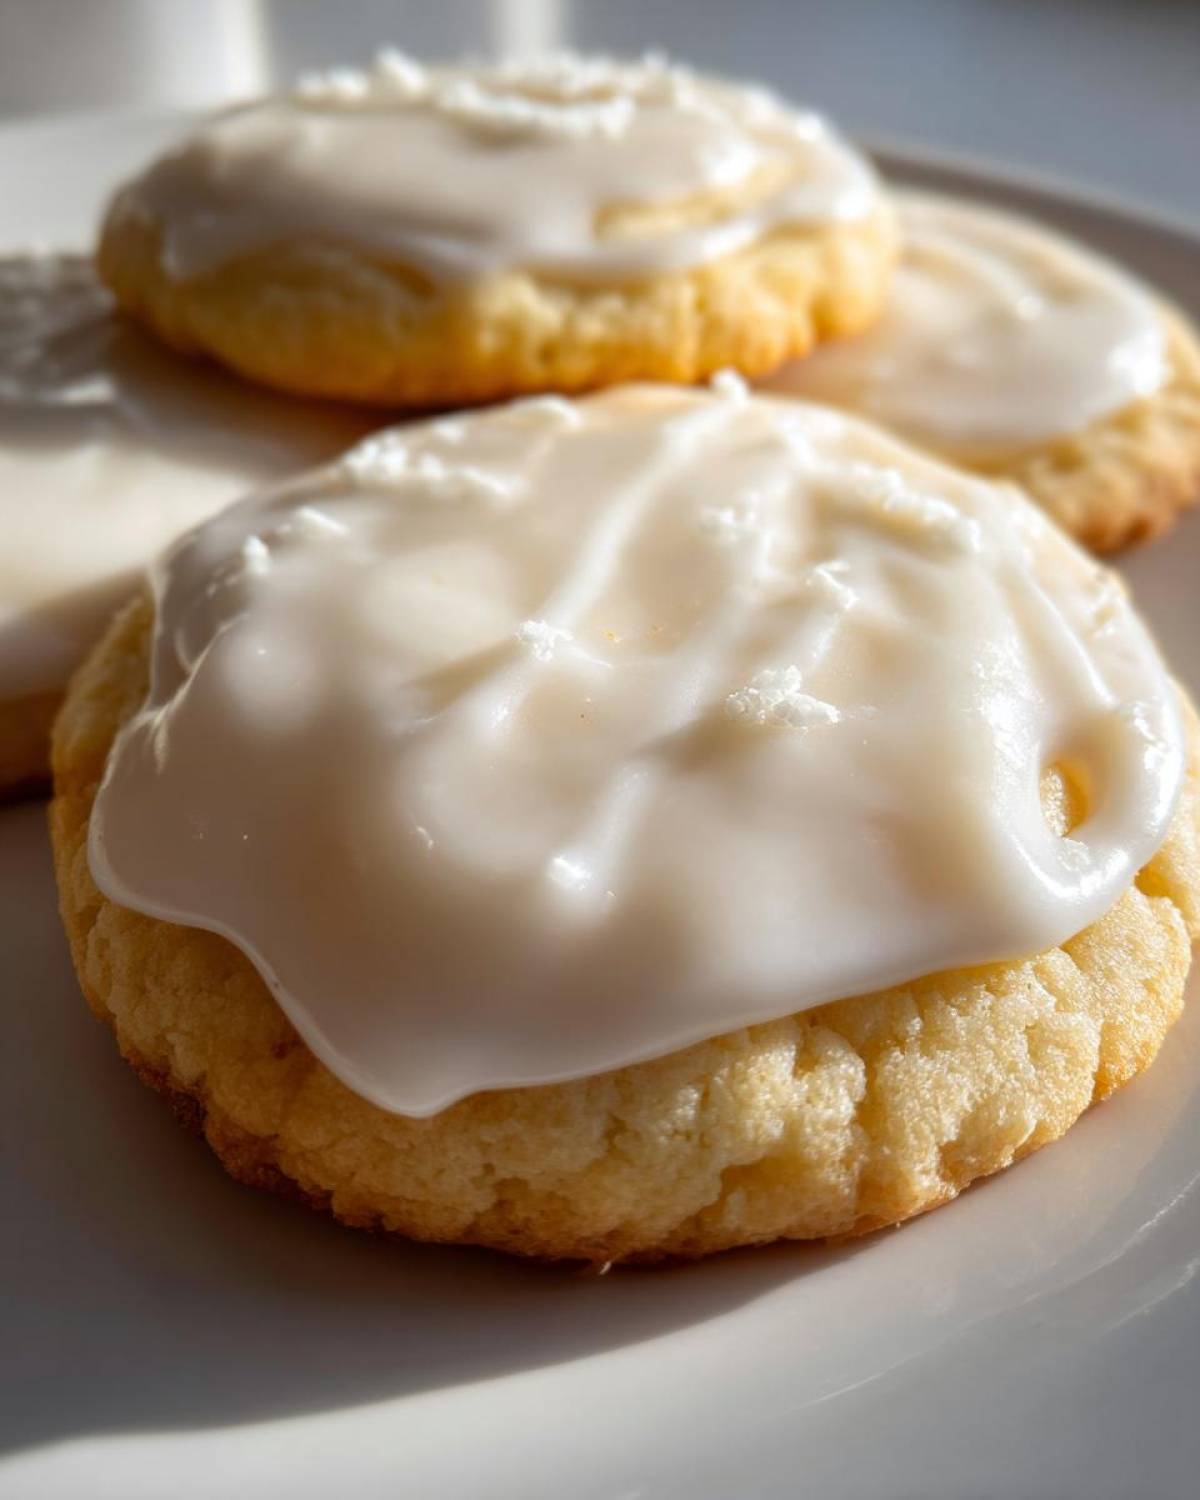
Great news! When you finish that 5-to-7-minute beat session, you’ve already got your stiff icing ready to go. This is exactly what you want for outlining your cookies, drawing those fine details, or making those cute little dots! Scoop it right into a piping bag fitted with your smallest tip. This consistency is perfect because it holds its shape beautifully on the cookie surface and won’t slump while it dries. It’s the backbone of any great, durable cookie design.
Cookie Flooding Icing Recipe: Thinning for Coverage
Now, if you want to fill in those outlines—the flooding part—we need to thin this out just a little. This is essential for that smooth finish you’re looking for! Take a small bowl of your stiff icing, and add water, just half a teaspoon at a time. Mix it gently with a fork or small whisk after every drop. We’re aiming for what I call the ’10-second ribbon test.’
How do you do the test? Lift your spoon up and let the icing ribbon back into the bowl. If that ribbon line slowly sinks back into the surface and disappears completely in around 8 to 10 seconds, you have the perfect cookie flooding icing recipe consistency. If it disappears instantly, add more sugar! If it sits there like a blob, it’s still too stiff.
Need some ideas for what to mix this icing with? Check out this recipe for Watermelon Mint Lemonade—even though it’s a drink, sometimes I need a bright palate cleanser after hours of mixing sugar!
Tips for Perfect Smooth Cookie Icing for Decorating
You’ve mixed it, you’ve flooded it, but now what? Even after you’ve gotten the consistency right, two little things can ruin that picture-perfect finish: air bubbles and color clumping. Trust me, I’ve learned this the hard way when I was trying to get that incredibly smooth cookie icing for decorating look for a big holiday order.
If you see little tiny pinpricks or bumps on the surface of your icing while it’s wet, those are air bubbles, and they will absolutely dry into hard imperfections. Right before you set your cookies aside to dry, take a scribe tool—or even just the point of a clean toothpick—and gently tap those little guys. They pop instantly, and the surface levels out itself. It’s a total game-changer for getting that professional, high-gloss finish that pops!
Another quick tip for applying color: if you’re dividing your batch, mix your gel colors into small amounts of icing right before you are ready to use them. Don’t color the whole giant batch at once, because you might need some plain white later, and trying to match a color is just painful. Also, when adding color, start with a toothpick dip of gel color—you can always add more, but taking it out is impossible!
If you accidentally over-thin your flood icing and it starts looking a little too runny halfway through decorating, don’t panic! Just stir in a tiny bit more sifted powdered sugar until it passes the 10-second ribbon test again. This icing is super forgiving, which is why this recipe is my go-to for stress-free decorating sessions. If you want some inspiration for fall baking while you wait for the cookies to dry, I shared my favorite Pumpkin Spice Latte Overnight Oats recipe—great for breakfast while you decorate!
Storage and Handling of Your Sugar Cookie Icing Recipe
So you’ve got extra, right? Or maybe you’re just done for the night and need to save the rest before it turns into a rock. The number one rule for storing leftover icing is this: plastic wrap must touch the surface of the icing. I mean touch it! If there’s any air gap, you’ll wake up to a thick crust, and nobody wants to remodel their icing!
You can keep it airtight on the counter for a day or two. If it gets too stiff the next morning, just stir in a few drops of warm water—that’s it! And a quick reminder about those beautiful cookies you just decorated: this icing dries surprisingly fast. For stacking or boxing up for gifts, give them at least four hours at room temperature. That solid, durable shell means they’re ready to travel safely!
Frequently Asked Questions About This Durable Sugar Cookie Frosting
I get so many questions after people try this recipe for the first time, mostly once they realize how great it works! Decorating can feel intimidating, but once you understand the consistency, you’re golden. Here are a few things I hear most often when people are trying to master this durable sugar cookie frosting.
Can I make this sugar cookie icing recipe without meringue powder?
You certainly *can* try, but I’m gonna preach the gospel of meringue powder for a second. It’s the backbone of this drying power! If you are completely out and need an royal icing alternative recipe, you can substitute powdered egg whites (which you can buy online or in some specialty stores) or even fresh egg whites. However, using fresh egg whites makes this less reliable and introduces food safety concerns because it isn’t fully cooked or processed like the powder is. For guaranteed safety and that hard, glossy finish, stick to the meringue powder. It’s worth the extra trip to the store, I promise!
How long does this icing take to dry completely?
This is the best part! Because we beat this icing so hard and it has that meringue structure, it dries much faster than simple glazes. At room temperature, usually within two to four hours, the top surface is solid enough that you can gently touch it or very carefully move it. But here’s my pro tip for gifting: if you are stacking the cookies or putting them in close contact in a tin, wait overnight! Letting them sit uncovered for about 8 hours ensures that the entire layer, even the thick parts you used for outlining, is rock solid and won’t stick to anything.
If you have had a blast with this recipe and want to ask me anything else while you’re waiting for those cookies to set, please feel free to drop a line on my contact page! I love hearing about everyone’s decorating successes!
Nutritional Estimates for This Simple Sugar Cookie Frosting
I know some of you like to keep track of what goes into your baking projects, even when it’s just frosting for cookies! While I promise this recipe is mostly sugar and happiness, I did pull the standard estimates for this simple sugar cookie frosting so you have a rough idea. Remember, these numbers are all based on that 1/4 cup serving size outlined in the recipe card preparation.
Please take these figures with a grain of salt, or should I say, a grain of sugar! Because every brand of powdered sugar or meringue powder is different, your final numbers might wobble a bit. This is just my best guess based on the standard ingredients I use when I whip up a batch for my hungry family.
- Serving Size: 1/4 cup prepared icing
- Calories: 180
- Sugar: 45g
- Sodium: 5mg
- Fat: 0g
- Protein: 1g
- Carbohydrates: 45g
You’ll notice we are pretty low down on the fat and cholesterol, which is great, but yes, it’s definitely a sugar-heavy topping! That’s how we get that incredible shine and hardness, after all. When you’re dealing with this kind of specialized icing, knowing what you’re looking at helps everyone stay informed! For more details on how I calculate these estimates, you can check out my full disclaimer page.
Share Your Holiday Cookie Decorating Icing Creations
Now that you have the absolute best, durable, and glossy sugar cookie icing recipe in your arsenal, I’m dying to see what you create! Seriously, decorating cookies is my favorite form of therapy, and I always love seeing how creative you all get with outlines and flooding techniques.
If this recipe saved your holiday baking project and you ended up with cookies that didn’t smear when stacked—please, PLEASE let me know! Head down right now and leave me a rating. A quick five-star review tells me this method is still working its magic for everyone, and it helps other bakers who are struggling with sticky icing find a reliable solution.
And when you post those stunning pictures on Instagram or Pinterest of your perfectly set, non-smearing cut-out cookies, tag me! It genuinely makes my day to see my little household tip making someone else’s baking life easier. If you share your masterpieces online, feel free to send a link over on my privacy policy page—I love checking out the results!
Go forth and decorate! You’ve got the power now to make cookies that look beautiful on the counter and survive the journey straight to grandma’s house. Happy baking!
PrintThe Ultimate Sugar Cookie Icing Recipe That Dries Hard & Smooth

A reliable recipe for sugar cookie icing that sets firm, dries smooth, and is ideal for detailed decorating, outlining, and gifting.
- Prep Time: 10 min
- Cook Time: 0 min
- Total Time: 10 min
- Yield: Covers approximately 3 dozen standard cookies
- Category: Dessert Component
- Method: Mixing
- Cuisine: American
- Diet: Vegetarian
Ingredients
- 4 cups powdered sugar, sifted
- 3 tablespoons meringue powder
- 6 tablespoons warm water
- 1 teaspoon clear vanilla extract
- 1/4 teaspoon almond extract (optional)
Instructions
- In a large bowl, whisk together the sifted powdered sugar and meringue powder until fully combined.
- Add the warm water and extracts to the dry ingredients.
- Mix on low speed with an electric mixer until the ingredients are just combined.
- Increase the speed to medium-high and beat for 5 to 7 minutes until the icing is very stiff, glossy, and holds peaks.
- Divide the icing into separate bowls for coloring, if desired.
- To achieve outlining consistency (stiff peaks), use the icing as is.
- To achieve flooding consistency (thinner), add water, 1/2 teaspoon at a time, mixing well after each addition until the icing slowly flows off a spoon in a ribbon that disappears after about 10 seconds.
- Apply icing to cooled cookies using piping bags or spreaders. Let dry completely before stacking or handling.
Notes
- If the icing becomes too thick while decorating, add a few drops of water and mix gently.
- For a perfectly smooth finish, use a scribe tool or toothpick to gently pop any surface air bubbles before the icing sets.
- This icing dries hard within a few hours at room temperature.
- Store unused icing covered tightly with plastic wrap directly touching the surface to prevent a crust from forming.
Nutrition
- Serving Size: 1/4 cup prepared icing
- Calories: 180
- Sugar: 45g
- Sodium: 5mg
- Fat: 0g
- Saturated Fat: 0g
- Unsaturated Fat: 0g
- Trans Fat: 0g
- Carbohydrates: 45g
- Fiber: 0g
- Protein: 1g
- Cholesterol: 0mg