

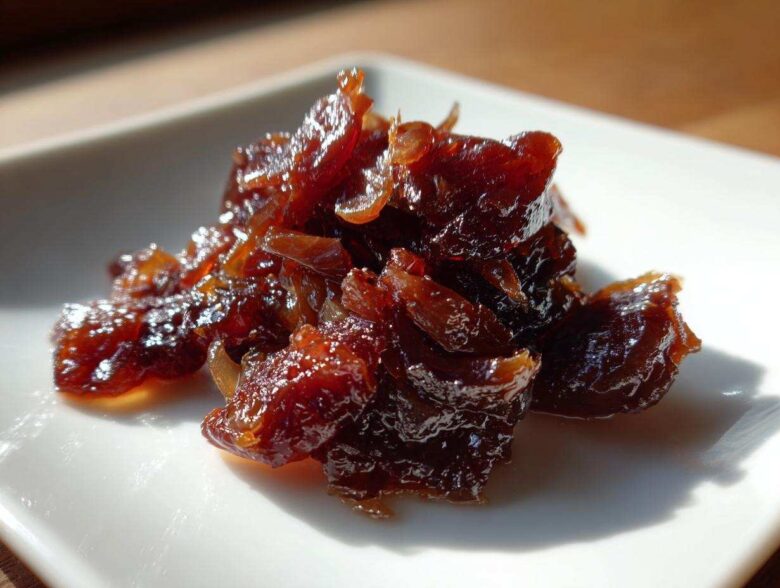
Okay, let’s be honest. Onions are the backbone of flavor in so many amazing dishes, but turning them into those dark, jammy, sweet wonders? That used to feel like sorcery to me! I’d try the ‘quick’ method, and I’d end up with soggy, slightly browned onions that just tasted… tired. I remember burning a whole batch once because I walked away for two minutes to answer the phone. Total kitchen disaster!
But I finally figured out the secret—it’s all about patience and respecting the low heat. When you get it right, those **caramelized onions** aren’t just an ingredient; they’re the whole show. They turn sweet, rich, and develop this unbelievably decadent texture. Trust me when I say that once you master this technique for perfectly **caramelized onions** (sweet, jammy perfection, remember that!), your burgers, dips, and pasta will jump straight onto the gourmet menu.
This guide isn’t just a list of steps; it’s the culmination of every sticky pan and slightly bitter batch I’ve ever cooked. Come learn the *real* way to do it, and you’ll never look back! I learned this technique through trial and error, and now I want to share that hard-won knowledge with you. You can read more about our commitment to sharing reliable cooking methods over at our About Page.
Why Mastering Caramelized Onions is Essential for Gourmet Flavor
People think onion cooking is just about softening them up, but that’s where most folks go wrong! Sautéing onions—which is just cooking them fast over medium heat—gets them soft, sure. But we aren’t aiming for soft; we are going for magic! That deep, rich, almost wine-like sweetness only comes out when you cook them low and slow.
This process uses the natural sugars in the onion, triggering amazing chemical magic—it’s basically the same breakdown that makes a steak brown beautifully. Honestly, the **difference between sautéed and caramelized onions** is the difference between adding background flavor and adding a total flavor bomb to your meal. If you want that true, deep, savory-sweet complexity, you have to commit the time. It builds our trust, showing you I know the science behind the deliciousness!
The Best Onions for Caramelizing Success
When picking your onion stars, you absolutely can’t go wrong with standard yellow onions. They have the perfect sugar content! If you want something slightly milder for a real gourmet touch, sweet onions like Vidalia are wonderful, but they brown faster, so watch them closely. Knowing the **best onions for caramelizing** means knowing your heat!
Essential Tools: The Best Pan for Caramelizing Onions
Okay, you can have the best ingredients, but if your pan can’t handle the heat, you’ll end up frustrating yourself. Seriously, the pan choice matters a lot here. You need something chunky and substantial! That’s why I always go heavy-bottomed, like cast iron or a good stainless steel skillet.
Those thin, lightweight aluminum pans you might have will create hot spots, and those hot spots turn your lovely onions black before the rest have even softened up. A thick bottom ensures the heat spreads evenly, which is the absolute key to slow cooking everything consistently. If you’re making a huge batch destined for a party, make sure your pan is big enough—onions look enormous when they go in, but they shrink down to nothing! Don’t crowd them; they need room to breathe and slowly weep their moisture out! Finding the **best pan for caramelizing onions** means choosing one that retains heat beautifully.
The Ultimate Stovetop Technique for Perfect Caramelized Onions
This is where the magic, and a little bit of required dedication, happens! Forget everything you thought you knew about quick cooking; we are essentially coaxing the sugars out of these onions over a long period. It’s therapeutic, I promise, once you realize you don’t need to hover over them constantly, just check in often.
Before we even turn on the heat, we need to make sure everything is measured perfectly. Getting that ratio of fat to onion just right prevents burning and promotes that beautiful, even breakdown we are dreaming of. You’ll notice I recommend a mix of butter and oil—that gives us the buttery flavor without sacrificing the smoke point of the oil. Don’t even think about touching that dial until everything is prepped. If you have questions about our recipe process, feel free to reach out via our contact page!
Ingredients for Classic Caramelized Onions
Grab these items before you start your journey toward jammy greatness. Remember, the amount matters here, so use those measuring spoons!
- 3 large yellow onions
- 2 tablespoons unsalted butter
- 1 tablespoon olive oil
- 1 teaspoon salt
- 1/2 teaspoon sugar (optional, just a little helper for speed on the browning stage)
- 2 tablespoons water or broth (we need this for scraping up the tasty bits!)
Step-by-Step Instructions for Jammy Caramelized Onions
Follow these closely, especially step four, and you will have the deepest flavor possible. This slow, dedicated process is what separates a good side dish from a memory!
- First things first, you have to peel those onions, and then slice them thin—I mean consistently thin, about 1/8 of an inch. If you have big thick chunks next to thin shreds, they won’t cook evenly, and that ruins the texture later on!
- Time to get the pan hot, but not *too* hot. Set your heavy pan over medium-low heat. Add your butter and oil. Wait until that butter foams up and then settles down before moving on. We want the fat nice and warm.
- Toss everything in! Add all those beautiful onion slices and the salt. Give it a serious stir so every single piece gets coated in that fat mixture.
- This first phase is just about softening. Cook for about 10 to 15 minutes, stirring every few minutes. They’ll start looking translucent. If you see color starting to develop too fast here, turn the heat down instantly. We aren’t browning yet!
- Now for the commitment: the slow cook. Drop the heat right down to low. You’ll need to stir every 5 to 10 minutes. This is where the volume drops dramatically and the natural sugars begin to release. If you notice crusty brown bits sticking to the bottom—that’s the *fond*, the flavor gold! Add just 1 tablespoon of water or broth and scrape that goodness right back into the onions as you stir.
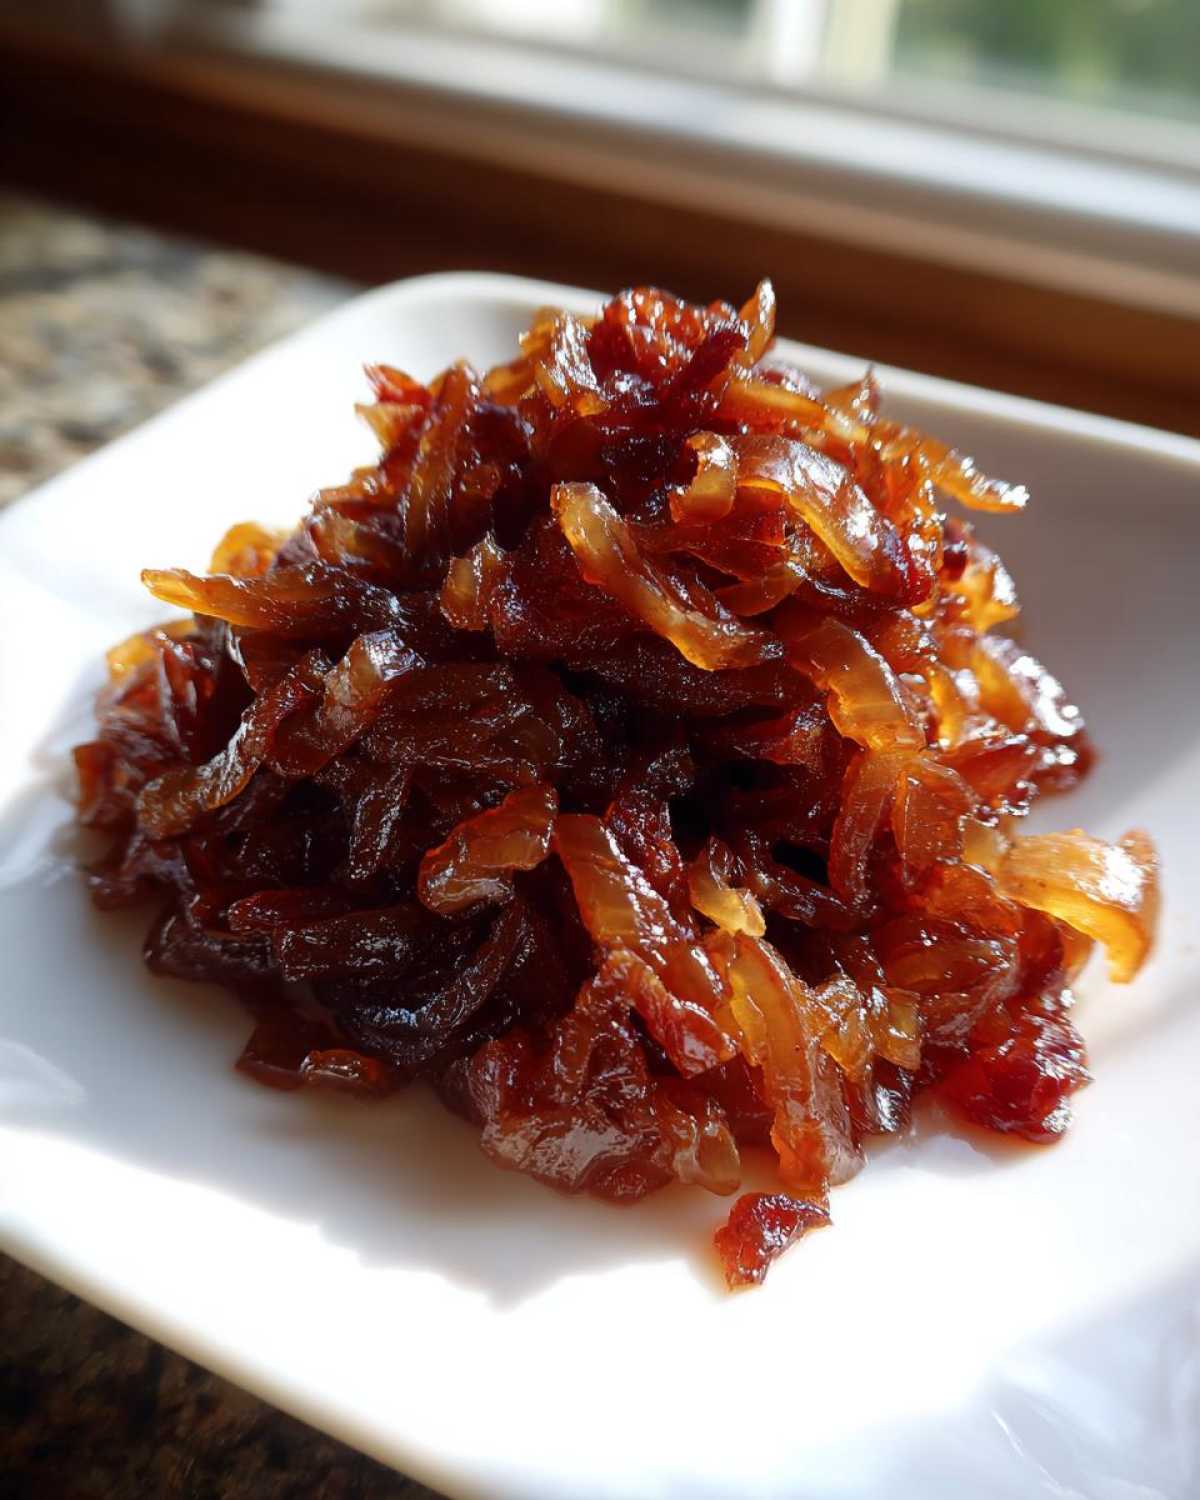
- Once your onions have reduced by about half and feel very soft, you can increase the heat slightly to medium-low if you are feeling brave. Stir constantly now—we want even color. If you are using that optional sugar, sprinkle it over now. This stage is when you really determine **how long to cook caramelized onions** to get them just right. Keep stirring until they hit that gorgeously deep mahogany brown.
- When they look like thick, sweet onion jam, you are done! Pull them off the heat right away so they don’t burn on the residual heat.
Speeding Up the Process: Quick Caramelized Onions Recipe
Now, listen, I know life gets busy. Sometimes, waiting an hour and a half for onions just isn’t an option, even when you know that’s where the *ultimate* flavor lives. If you need a faster batch for a weeknight, I can give you a shortcut, but you need to know the trade-off.
This is where you try my **quick caramelized onions recipe**. The key difference? We increase the heat just a bit, usually staying on medium heat, and you absolutely must add that half teaspoon of sugar from the main recipe—it jump-starts the browning process. You’ll get onions that are soft, nicely browned, and sweet in about 20 to 30 minutes, not sixty. Just be prepared: they won’t have that deep, nearly black, jammy intensity of the slow-cooked batch.
The cost of speed is depth! You have to stir constantly in this version, almost every minute, so they don’t burn. If you’re using this on a dish where the onions are just one component, like a quick topping, this works great. If you’re making soup base, stick to the long haul! You can find my other quick cooking tips over on the Blog Index.
Flavor Variations: Easy Balsamic Caramelized Onions
If the standard sweet onions aren’t quite cutting it for you, or maybe you just want that extra layer of tang to pair with cheese or a good steak, you have to try adding balsamic vinegar near the end. This is my go-to trick for taking things up a notch!
When you are just about done with the long cooking process—say, the onions are a deep brown but still a touch looser than jam—that’s the perfect moment. Pull your pan off the heat for a second, pour in about two tablespoons of good balsamic vinegar, and stir like crazy! The acid hits the heat, sizzles, and instantly thickens everything up. That tangy, rich flavor is exactly what we want for **easy balsamic caramelized onions**. It adds a serious gourmet punch!
Applying Your Caramelized Onions: Savory Sweet Onion Spread and Toppings
Now you have a jar of pure, jammy gold sitting in your fridge! What on earth do you do with it? Honestly, the options are endless because that deep, rich sweetness works in almost every savory dish imaginable. I use these things constantly because they turn even the simplest plate of food into something special.
They are perfect as a fantastic **sweet caramelized onion topping** for grilled meats or even toasted bread. Think about slicing a grilled chicken breast and piling these right on top—instant upgrade! They mix beautifully into cream cheese or brie for an amazing appetizer base, creating this irresistible **savory sweet onion spread**. I promise, once you try them as a **gourmet onion topping for burgers**, you will never go back to plain old grilled onions again. They add texture, sweetness, and that smoky depth all at once. If you’re looking for a dip that steals the spotlight, you have to check out how these would work in something like my Campfire Queso Dip!
Using Caramelized Onions in Viral Caramelized Onion Pasta Recipe
If you have seen those gorgeous, creamy pasta dishes flooding the internet lately, you know that caramelized onions are the secret weapon making that sauce shine. They melt right into the cream or broth, giving the entire dish an incredible, savory-sweet backbone that tastes like it simmered all day. You absolutely need these onions to nail that depth of flavor in that famous pasta. I’ve got a great guide on getting it right at home; that deep, rich onion base is key for any authentic French Onion Pasta homemade experience!
Making Caramelized Onions for Vegan Diets
One of the best things about mastering the technique is how easily this recipe adapts to different dietary needs. If you are cooking completely plant-based, don’t worry one bit—you can absolutely make incredible, jammy **caramelized onions**!
The only change you need to make for **vegan caramelized onion recipes** is swapping out the dairy butter. Just use an extra tablespoon of your good olive oil, or better yet, grab some high-quality vegan butter sticks. The caramelization process relies on the fat content, not the dairy, so the texture will remain perfect.
Serve these vegan onions piled high on a slice of crusty artisan bread with a little sprinkle of flaky salt. It’s simple perfection! If you are looking for other great plant-based ideas, check out my recipe for Vegan Zucchini Muffins.
Storage and Make Ahead Caramelized Onions Storage Tips
I always make a gigantic batch because, honestly, going through the hour-long process for just one burger topping isn’t efficient! The good news is that these onions keep beautifully, which is why **make ahead caramelized onions storage** is a game-changer in my house.
Once they are completely cooled—this is important, don’t jar them hot!—transfer them to a clean, airtight container. They’ll happily live in the fridge for about a week. If you want them to last longer, you can freeze them perfectly well! Spread them out on a baking sheet first, freeze until solid, and then transfer them to a freezer bag to avoid clumping.
When you want to use them later, reheat them gently on the stovetop with just a tiny splash of water or broth. This wakes up the flavor and moisture without having to fry them again. This consistency check really proves you know what you’re doing!
Understanding Onion Caramelization Nutrition
I know some of you are tracking everything, so I wanted to give you a quick peek at what’s in these flavor bombs, even though they are mostly just vegetables cooked in fat! Keep in mind that these numbers are just my best estimates based on the full recipe yield and how much each serving gets. Since we are using butter and oil, there’s fat content, but most of the sugar is natural onion sugar that cooked down, not added refined sugar.
You can see the full breakdown below, but these numbers are based on using the whole yield divided into four servings. For all the legal specifics, always check out our official disclaimer regarding nutritional information.
- Serving Size: 1/4 cup
- Calories: 85
- Fat: 5g
- Carbohydrates: 10g
- Protein: 1g
- Sugar: 9g (Mostly natural!)
Your Next Culinary Project Using Caramelized Onions
Whew! You have successfully navigated the sweet, slow path to **caramelized onions** nirvana. Seriously, give yourself a pat on the back! Now that you have your jammy, mahogany gold ready to go, the real fun begins: putting them to work!
Don’t let those beautiful onions sit in the fridge unused! I want to see what you’re making! Are you planning an epic French onion soup base? Are you dolloping spoonfuls over baked Brie for an appetizer? Or are you finally ready to tackle that viral onion pasta that needs that deep, savory sweetness?
Let me know in the comments below what you decided to pair your perfect onions with! And hey, if this guide helped you stop burning your onions and finally achieve that deep brown color, please give the recipe a star rating—it really helps other home cooks find the way! If you have any burning questions about swapping ingredients or techniques we didn’t cover, you know where to find me on the contact page. Happy cooking, everyone!
PrintThe Ultimate Guide to Perfectly Caramelized Onions: Techniques for Sweet, Jammy Perfection
Learn the proper techniques to slowly cook onions until they are deeply sweet, jammy, and brown. This guide covers the best onions, pans, and methods for achieving perfect caramelization.
- Prep Time: 10 min
- Cook Time: 60 min
- Total Time: 70 min
- Yield: About 1.5 cups
- Category: Side Dish
- Method: Stovetop Cooking
- Cuisine: General
- Diet: Vegetarian
Ingredients
- 3 large yellow onions
- 2 tablespoons unsalted butter
- 1 tablespoon olive oil
- 1 teaspoon salt
- 1/2 teaspoon sugar (optional, for faster browning)
- 2 tablespoons water or broth (for deglazing)
Instructions
- Prepare the onions: Peel the onions and slice them thinly and uniformly, about 1/8 inch thick. Uniformity helps them cook evenly.
- Heat the fat: Place a large, heavy-bottomed skillet or Dutch oven over medium-low heat. Add the butter and olive oil. Allow the butter to melt completely.
- Start cooking: Add all the sliced onions and the salt to the pan. Stir well to coat all the onions in the fat.
- Initial softening (10-15 minutes): Cook the onions, stirring every few minutes. They will release moisture and soften significantly. Do not let them brown yet. Reduce heat to low if they start browning too quickly.
- The slow cook (30-60 minutes): Continue cooking on low heat. Stir every 5 to 10 minutes. This slow process draws out the natural sugars. If brown bits stick to the bottom (fond), add 1 tablespoon of water or broth and scrape the bottom of the pan while stirring.
- Achieving color (60+ minutes): Once the onions are deeply reduced and soft, increase the heat slightly to medium-low. Stir more frequently (every 2-3 minutes) to encourage even browning. If using, sprinkle the sugar over the onions during the last 15 minutes.
- Finish: Cook until the onions are a deep, rich mahogany brown color and have a jammy consistency. This can take anywhere from 45 minutes (quick method) to 1.5 hours (ultimate flavor).
- Use or store: Remove from heat. Use immediately as a topping or store cooled onions in an airtight container in the refrigerator for up to one week.
Notes
- Use yellow onions for the best balance of sugar and sharpness. Sweet onions like Vidalia work well but may cook faster.
- A stainless steel or cast iron pan works best as it retains heat well and allows for good fond development. Avoid non-stick if you plan to scrape the bottom aggressively.
- The difference between sautéed and caramelized onions is time; sautéing takes 10-15 minutes, while caramelizing requires 45 minutes or more to fully develop the sugars.
- For a quick version, use 1 tablespoon of sugar and cook over medium heat, stirring every minute, but expect a lighter color and less depth of flavor.
Nutrition
- Serving Size: 1/4 cup
- Calories: 85
- Sugar: 9
- Sodium: 380
- Fat: 5
- Saturated Fat: 2
- Unsaturated Fat: 3
- Trans Fat: 0
- Carbohydrates: 10
- Fiber: 2
- Protein: 1
- Cholesterol: 5