

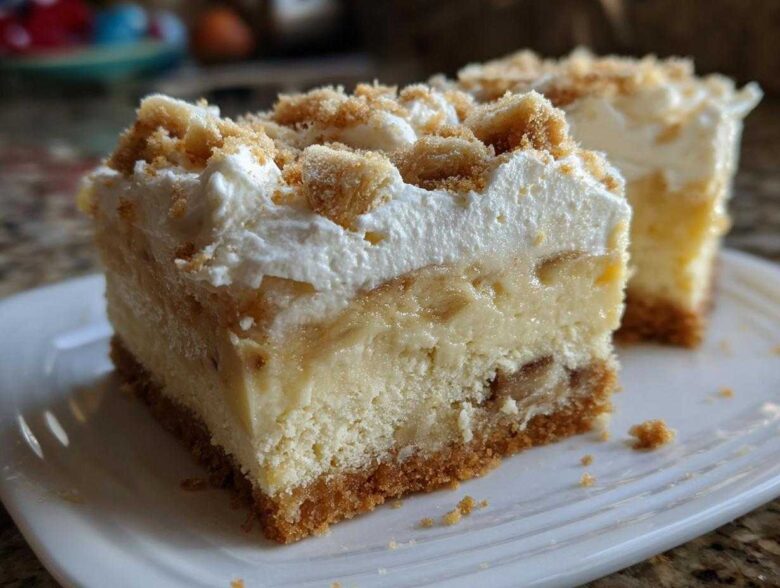
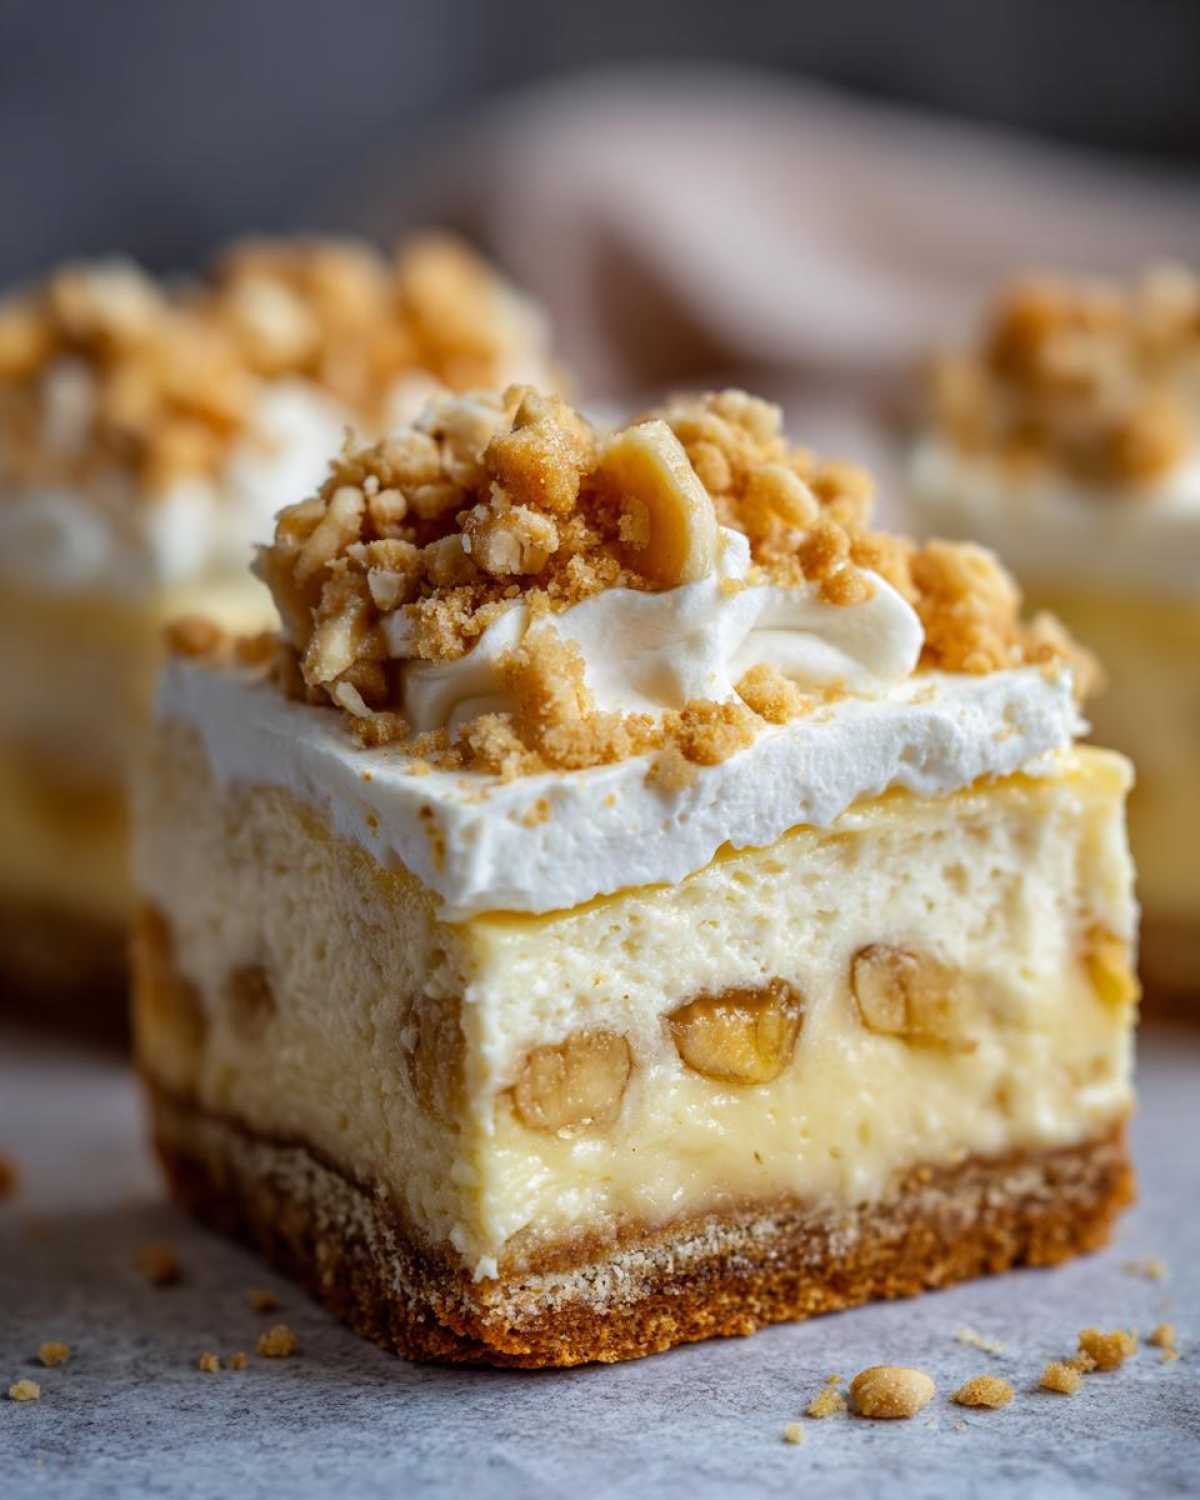
Oh, hybrid desserts! They are just the absolute best, aren’t they? Why choose between a tangy, smooth cheesecake and a cozy, comforting Southern banana pudding when you can have both staring at you on one plate? That’s exactly what we’ve managed to capture here with these incredible Banana Pudding Cheesecake Bars. Trust me when I say I had to make this recipe about seven times before I got the layers exactly right—especially making sure those bananas didn’t brown hiding under the cream cheese. But wow, the final result married that perfect crunch from the icebox cake inspiration right into the density of true cheesecake. It’s rich, it’s creamy, and it’s exactly what your next potluck needs.
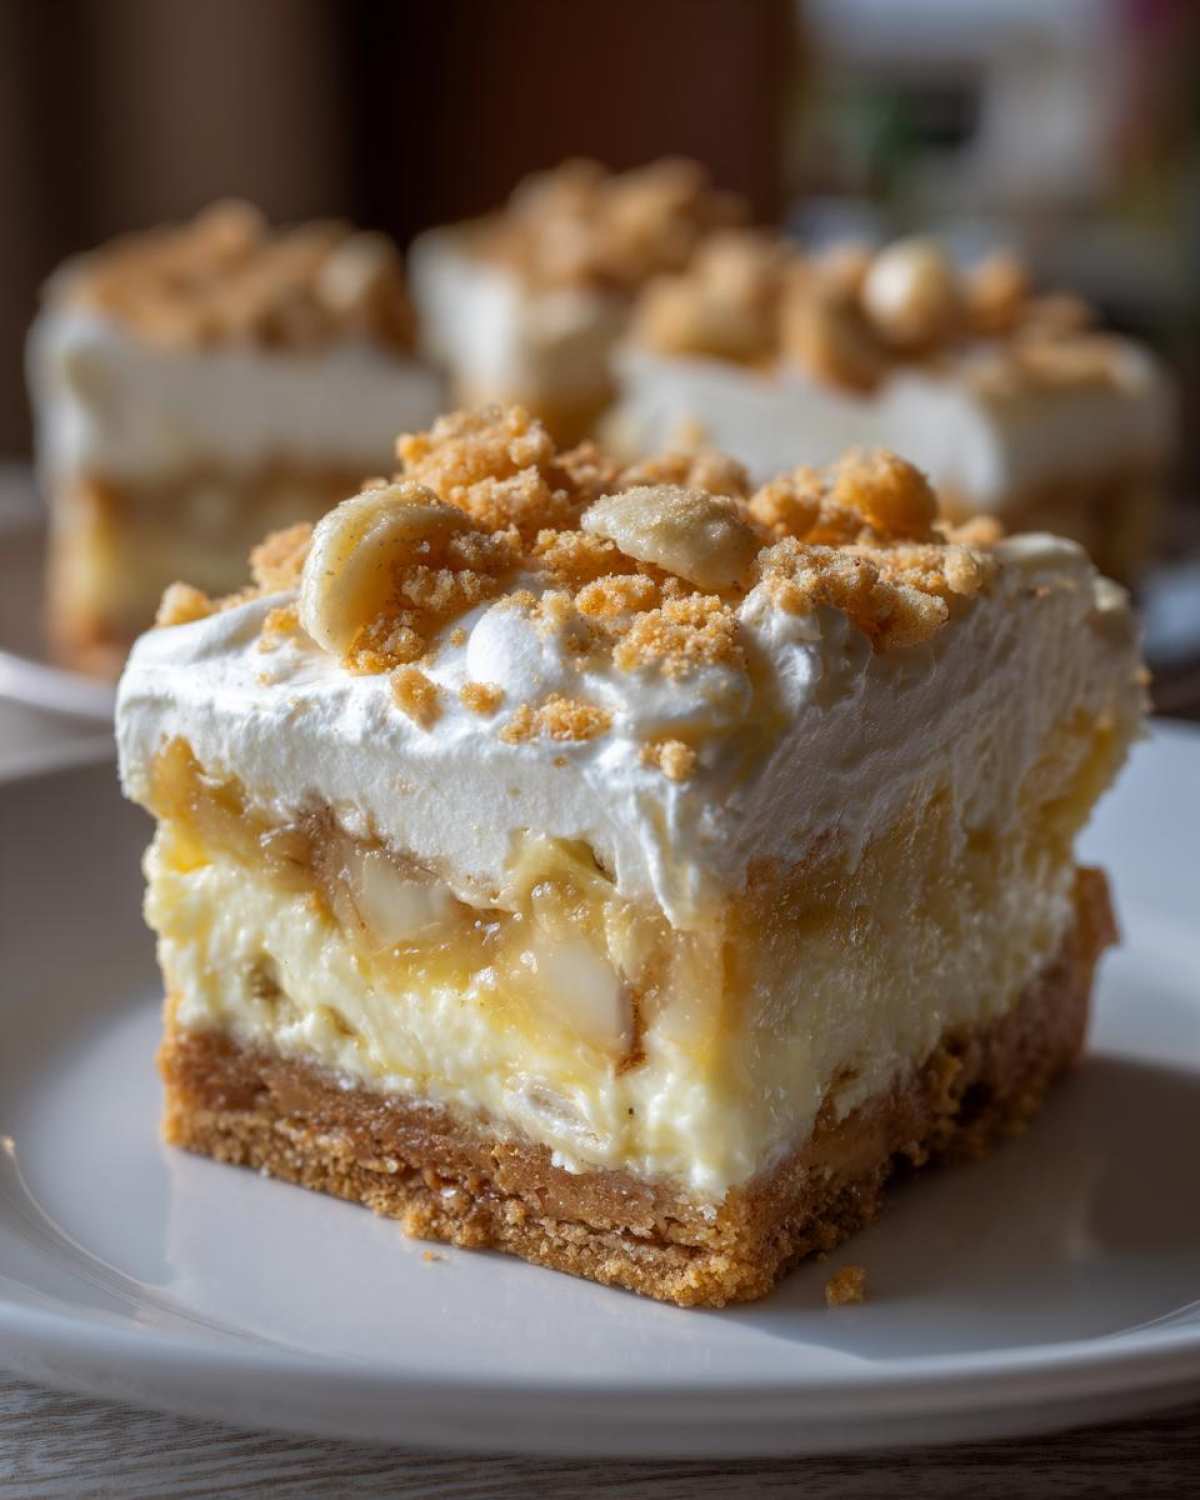
Why You Will Love These Banana Pudding Cheesecake Bars
You’re going to obsess over these bars because they hit every high note dessert lovers look for. They manage to feel fancy without requiring you to sacrifice your whole afternoon in the kitchen. Seriously, the texture contrast alone is enough to make you weak in the knees!
- The base is pure nostalgia: a buttery, crunchy vanilla wafer crust that just begs to be pressed firmly into the pan.
- That middle layer? It’s pure, tangy cheesecake heaven. It bakes up beautifully smooth, and the bananas melt right into the richness.
- They are an absolute dream for making ahead! You actually *want* to bake these the day before, which means less stress on party day. You can check out my secrets for handling all my favorite make-ahead treats here!
- The topping is light! We aren’t dealing with super heavy meringue; it’s a fluffy, creamy cloud of vanilla pudding and whipped topping that keeps the whole bar feeling decadent but not too heavy after a big dinner.
Essential Ingredients for Perfect Banana Pudding Cheesecake Bars
Okay, listen up, because this layered dessert is only as good as the ingredients you put into it. We aren’t doing any sneaky shortcuts here—especially not on that creamy layer! For the best results, pay attention to the texture instructions. You want soft, room-temperature cream cheese and very cold milk and heavy cream when we get to the top layer. I’ve broken down everything you need by component so you can grab your supplies easily. For a rock-solid foundation on that crust, make sure your vanilla wafer crumbs are practically powder!
For the Vanilla Wafer Crust
This is the crunch that makes the whole bar sing. You need to crush your wafers nice and fine—don’t leave big chunks! I usually pulse them in a food processor until they are just sand.
- 1 1/2 cups vanilla wafer crumbs – remember, we want fine crumbs!
- 1/4 cup granulated sugar
- 6 tablespoons unsalted butter, melted – make sure it’s fully melted, not just soft.
For the Cream Cheese Layer
This is where the cheesecake magic happens! The absolute most important thing here is the cream cheese; it *must* be softened completely. If your cream cheese is cold, you will end up with lumps, and we just can’t have that in these rich dessert bars.
- 16 ounces cream cheese, softened (do not skip the softening step!)
- 1 cup granulated sugar
- 1 teaspoon vanilla extract
- 3 large eggs – these should also be room temperature if possible.
- 2 medium bananas, sliced – these go layered right into the batter.
For the Pudding Whipped Topping
This light, fluffy layer is what pulls the whole banana pudding vibe together on top of that structured cheesecake. It needs two separate mixing jobs here—one for the pudding and one for the whipped cream.
- 1 (3.4 ounce) package instant vanilla pudding mix
- 1 1/2 cups cold milk – using very cold milk helps the instant pudding firm up fast!
- 1 cup heavy whipping cream
- 1/4 cup powdered sugar
- 1 teaspoon vanilla extract (for the whipped cream)
- 1/2 cup whipped topping (like Cool Whip), thawed, for topping – this gives it extra stability!
- Extra vanilla wafer crumbs or banana slices for garnish
Step-by-Step Guide to Making Banana Pudding Cheesecake Bars
Alright, here’s where we put it all together! If you follow my lead, you won’t end up with a cracked, sad cheesecake layer. We’re building these layers carefully, just like the best layered banana cream desserts should be built. Grab your 9×13 pan and let’s get to work making these incredible easy cheesecake bars.
Preparing and Baking the Vanilla Wafer Crust
First things first, we need heat! Preheat that oven to 325 degrees Fahrenheit. Line your pan with parchment paper, leaving a good overhang on the sides—this is your built-in handle for lifting them out later, trust me, you’ll thank me when you go to slice them!
Mix up those wafer crumbs, the quarter cup of sugar, and that melted butter until it looks like wet sand. Press it down nice and firm in the pan. We just need to set this crust, so pop it in for 10 quick minutes. Pull it out and let it cool off a tiny bit while you tackle the filling.
Creating the Rich Cream Cheese Layer
Now for the star of the show! Get that softened cream cheese in a big bowl. Beat it with the full cup of sugar until it’s buttery smooth—no lumps allowed! Mix in your vanilla, and then this is important: add the eggs one at a time. Mix only until they disappear into the batter after each addition. Stop mixing once they’re incorporated, or you’ll get too much air!
Time to layer! Pour half of that creamy goodness over your crust. Sprinkle half of your banana slices evenly over that first layer. Pour the rest of the batter right over the top, and then dot the top surface with the remaining banana slices. It’s going to look beautiful.
Baking and Essential Cooling for Banana Pudding Cheesecake Bars
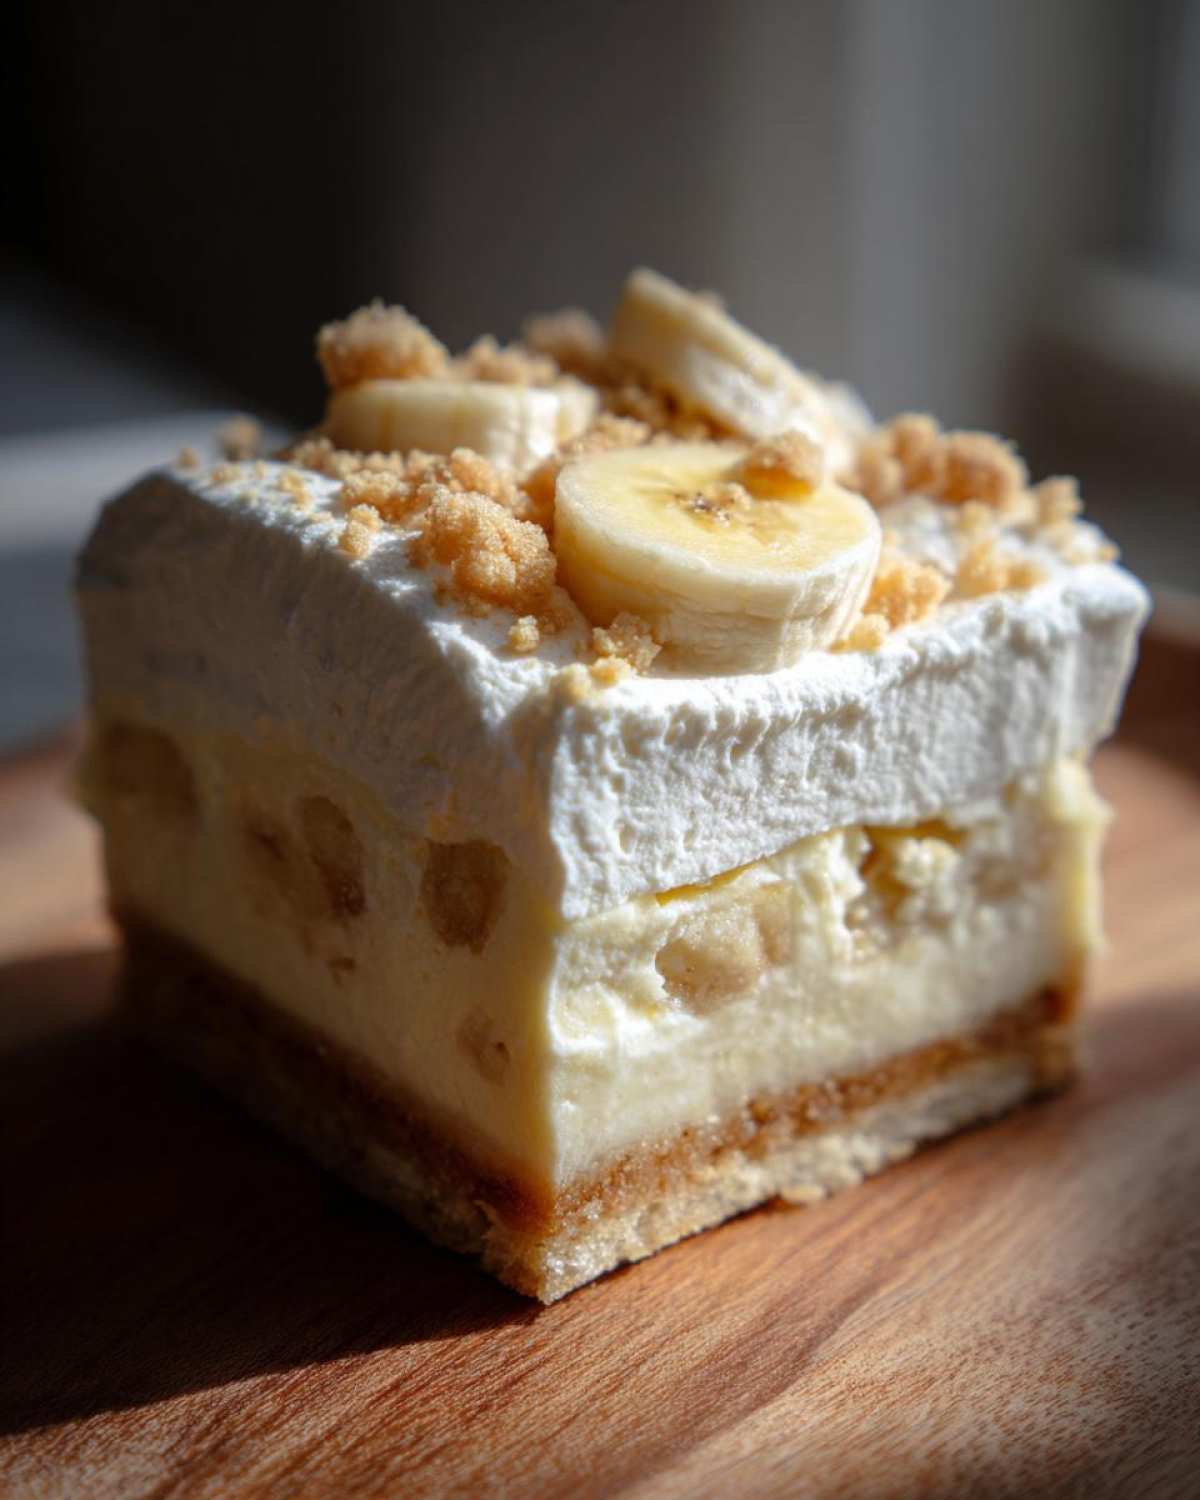
Bake these for about 30 to 35 minutes. You’re looking for edges that look totally set, but the very center should still have just a tiny wobble when you gently nudge the pan. Don’t bake them solid! The chilling process finishes the cooking.
Here’s the secret that stops them from ever cracking: turn the oven off completely, prop the door open just a crack, and leave the bars inside for 30 minutes to gradually adjust. Once that’s done, move them to a wire rack to cool to room temperature, and then they *must* chill in the fridge for at least four hours—overnight is truly best for these!
Assembling the Layered Banana Cream Desserts Topping
Once that cheesecake is cold and solid, we bring in the pudding magic. Whisk your instant vanilla pudding mix with the cold milk until it thickens up nicely—it sets fast, maybe two minutes of whisking. Let that sit for just five minutes so it can completely gel.
In a separate bowl, whip your heavy cream, powdered sugar, and vanilla until you get stiff, glorious peaks. Now, gently fold that pre-set pudding mixture right into that whipped cream. Be gentle here! Once it’s lovely and uniform, spread that whole cloud over your chilled cheesecake base. Then, you can add that final layer of thawed whipped topping and serve them chilled!
Tips for Success with Your Banana Pudding Cheesecake Bars
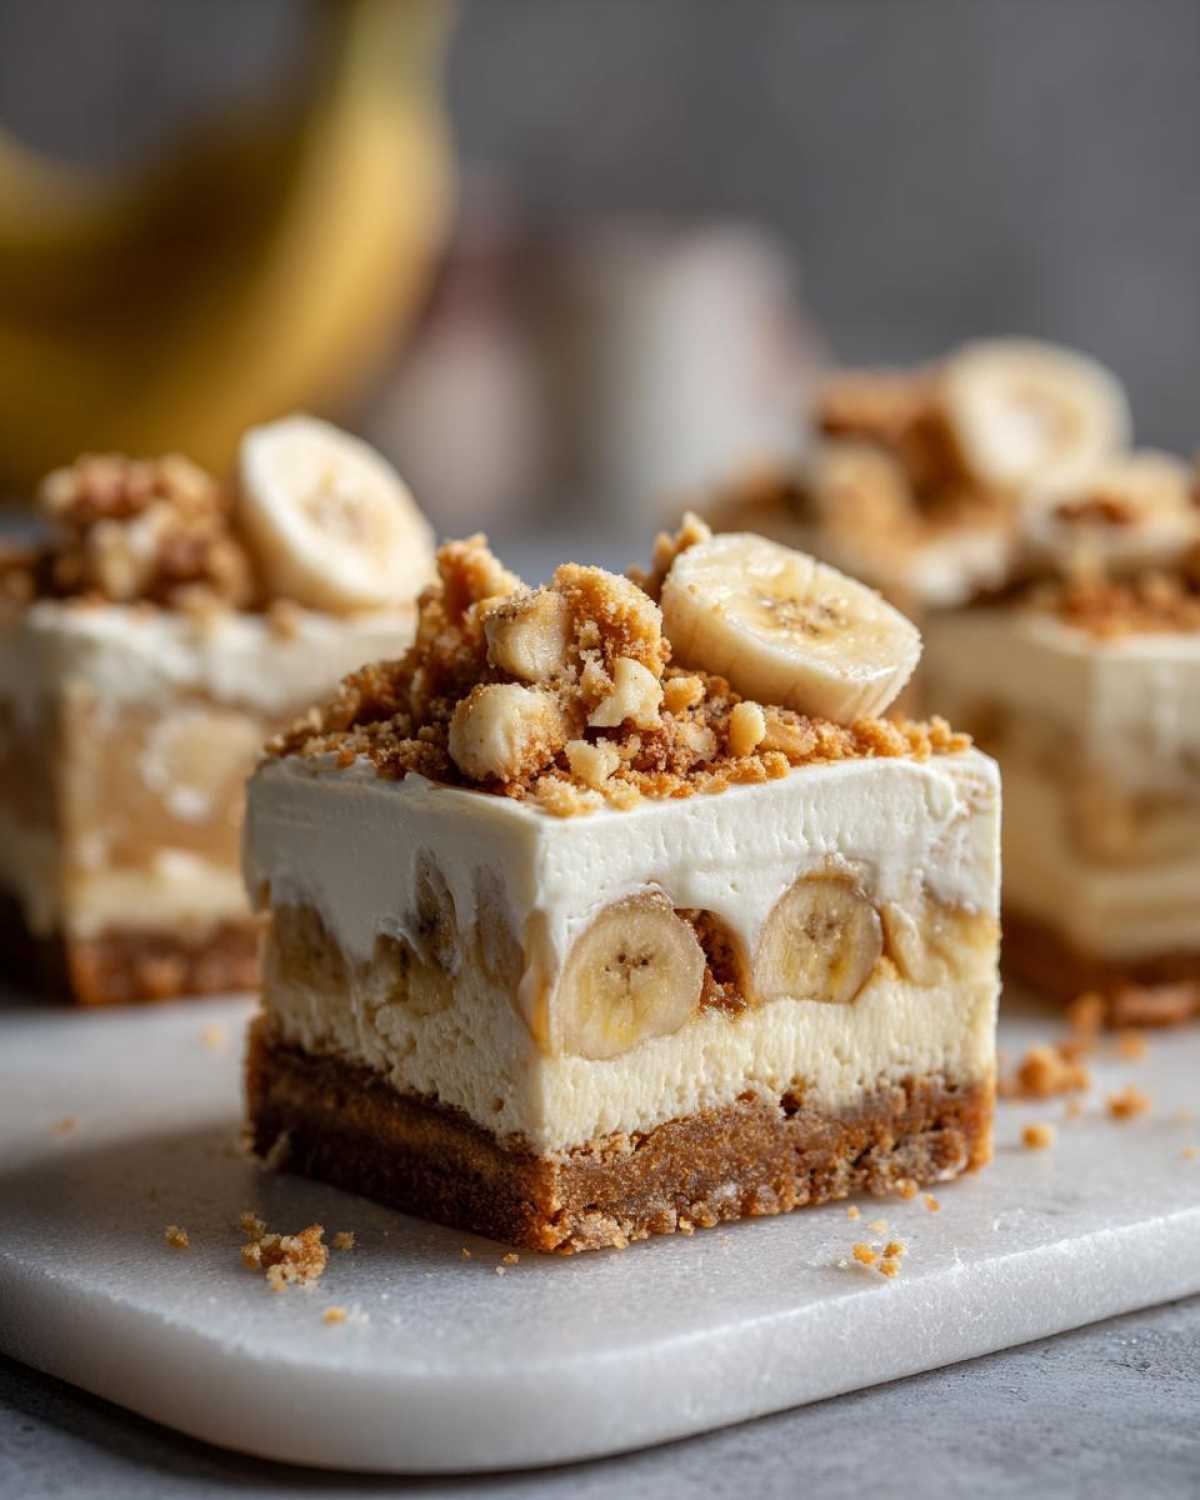
I’ve learned a few tricks over the years of making this hybrid dessert, and they really make the difference between a good bar and a show-stopping one. Presentation matters with layered desserts, so let’s talk about getting those perfect squares!
The biggest thing people struggle with, and I did too at first, is slicing. If you try to cut these while they are rock cold from the fridge, you’ll end up with messy, crumbly edges, and that beautiful vanilla wafer crust will just fight you. So, here’s the trick: when you are ready to cut, pull the whole slab out using the parchment paper overhang—it makes moving it so easy! Then, grab a nice, long, sharp knife and run it under very hot water for about twenty seconds. Wipe it completely dry, and make your first cut.
You must repeat that hot water bath and dry wipe between *every single cut*. It melts the butter and fat just enough on the blade to glide right through the cheesecake and the whipped topping without smearing anything. It’s fussy, I know, but it’s the difference between a messy potluck contribution and a perfectly neat slab ready for serving!
Also, don’t be tempted to rush the chilling time. While you *can* technically serve them after four hours of chilling, I promise you, these bars are vastly better if you let them hang out in the fridge overnight. This gives the instant pudding time to fully integrate its flavor into the cheesecake, and the bananas just taste sweeter and softer. It really lets all those wonderful Southern Banana Pudding Desserts flavors meld perfectly. If you’re focused on making desserts ahead of time, this is your champion!
Lastly, if you are worried about the bananas on top browning too much before you serve them, just skip garnishing until right before you bring them out. A final light dusting of powdered sugar helps hide any minor changes, or just pile on a few extra vanilla wafer crumbs for texture!
Storage and Reheating Instructions for Chilled Cheesecake Bars
This is one of the best parts about these bars: they absolutely thrive on being made ahead! Because we layered that creamy, dairy-heavy mixture on top of the baked cheesecake, these need to stay cold to keep their shape. Don’t even think about leaving them out on the counter!
Once you have finished assembling and chilling those bars (preferably overnight, remember?), you need to store them properly. Keep them tightly covered in the refrigerator. You can either leave them in the 9×13 pan if you wrapped the whole thing up really well, or, if you’ve already cut them, transfer the squares into an airtight container. Just separate the layers with small wax paper sheets so the whipped topping doesn’t stick to the bars beneath it.
If you keep them covered and cold, they should stay absolutely gorgeous for up to four days. I know, four days of cheesecake and pudding goodness hanging out in the fridge! I’ve found they tend to taste even better on day two and three; the vanilla flavor just deepens.
Now, about reheating—this is where we get minimalist, because they are meant to be served chilled. You don’t reheat a cheesecake bar; you bring it to the perfect serving texture. If you pull these bars out of the fridge straight from the Arctic cold, they might be a tiny bit too firm, especially that crust. So, maybe give them about 15 to 20 minutes sitting out on the counter before you plan on slicing or serving them. That little bit of time softens the cream cheese just enough so it melts beautifully in your mouth, but it stays cool enough that the whipped topping won’t even think about deflating or weeping.
If you’re feeling really aggressive and you want to eat one later but it’s softening too fast? Pop it back in the fridge for 20 minutes. Honestly, keeping these in that sweet spot—cool, but not cold enough to crack a tooth—is the key to enjoying these rich dessert bar recipes.
Variations on Classic Southern Banana Pudding Desserts
I absolutely adore sticking to traditions, especially when it comes to Southern flavors, but sometimes you just need a little tweak, right? These Banana Pudding Cheesecake Bars are already amazing, but if you want to totally customize them for your crowd, I have a couple of simple ways you can mess (in a good way!) with the textures and flavors. None of these changes should throw off that perfect bake time, which is a win in my book.
Think about that crust we lovingly pressed in there. While those vanilla wafers are the absolute gold standard for true banana pudding flavor, they aren’t the only game in town if you’re in a pinch or just love texture. If you’re out of Nilla Wafers, crushed shortbread cookies make a phenomenal crust—it adds a slightly buttery, almost sandy crumb that is divine against the creamy top. You might lose a touch of that specific pudding flavor, but you gain a beautiful richness. Just use the same amount of crumbs and melt that butter the same way!
Another little flavor boost I sometimes sneak in, especially when I’ve got a little extra time, is spice. A tiny dash of cinnamon or even a pinch of ground cloves mixed right into that cream cheese layer (before you add the eggs!) just gives everything this lovely warmth that pairs shockingly well with the banana. It’s nothing heavy, just enough to make people wonder what that secret flavor is!
Now, let’s talk about the super fluffy cloud on top. Most of my family prefers the sweet, stable whipped cream topping we made, since it cuts through the richness of the cheesecake so well. But if you’re feeling fancy—maybe you’re making these for a holiday where you usually bring a pie—you can swap that out for meringue! If you want to try a slightly crispier, more traditional topping, you can gently dollop meringue over the completely chilled cheesecake layer and then stick it under the broiler for just 30 seconds to get those lovely toasted peaks. Watch it like a hawk though; meringue burns faster than anything. You can see some of my other favorite twists on classic pudding recipes to get ideas!
Honestly, once you master this base recipe, it’s so fun to experiment. But these three small tweaks—shortbread crust, a pinch of spice in the middle, or a quick meringue finish—are easy wins that honor the spirit of Southern Banana Pudding Desserts while keeping that cheesecake backbone intact.
Frequently Asked Questions About Banana Pudding Cheesecake Bars
I always get questions once people see photos of these layered beauties! It makes sense; it’s a lot of delicious magic happening in one pan. Here are the things I get asked most often about making these hybrid dessert bars.
Can I turn these into No Bake Banana Pudding Cheesecake Bars?
That’s a popular thought! While the crust still needs a quick bake to firm up, yes, you absolutely can turn the entire center layer into a no-bake situation—but it changes the texture quite a bit. If you want to skip the oven totally, you can use my specific recipe for no-bake banana pudding cheesecake bars instead. For this baked version, skipping the oven bake will leave you with a much softer, less structured layer that might not slice cleanly at all. The slow baking and cooling are what give this version its satisfying density.
What is the best way to handle the bananas? Should I use fresh or frozen?
Oh, absolutely use fresh bananas! You want firm, ripe-but-not-mushy guys for this recipe. Frozen bananas just turn into watery soup when they thaw, and we certainly don’t want that seeping into our cheesecake layer. Slice them evenly, maybe about a quarter-inch thick, right before you are ready to layer them. They should be layered *twice*—once in the middle of the batter and once on top—to really distribute that banana flavor throughout the filling.
Do I have to use instant vanilla pudding mix for the topping?
You don’t *have* to, but I strongly recommend it for this specific recipe setup! The instant pudding mix is designed to set up very quickly when blended with cold milk, and that quick setting action helps stabilize the heavy cream when you fold it in. If you use homemade, cooked pudding, you must cook it down, let it cool completely in the fridge until it’s rock solid, and then proceed with folding it in. If it’s even slightly warm, it will melt your whipped cream mixture instantly. Stick to the instant mix for the easiest, most reliable topping for these chilled cheesecake bars!
How far in advance can I make these Banana Pudding Cheesecake Bars?
I mentioned it before, but it bears repeating: make-ahead is your friend here! I find these are best served on the second day after they are made. You need at least four hours of chilling time for the cheesecake to set, but the flavors really integrate beautifully after a full 24 hours in the fridge. They will hold up wonderfully for up to four days, as long as they are covered tightly. These are truly the best potluck dessert bars because you can make them on Thursday for a Saturday gathering!
What happens if I overmix the cream cheese filling?
If you overmix when you add in those eggs, you’re whipping too much air into the filling. When it bakes, that air expands, and when it cools down, it collapses, leading to cracks and a less smooth texture. Always mix the cream cheese and sugar until fluffy, but as soon as those eggs go in, slow down and mix only until they vanish. Remember that slow cooling process in the oven? That’s our backup safety net against cracking, but prevention by not overmixing is always the best strategy for these rich dessert bar recipes!
Estimated Nutritional Data for Rich Dessert Bar Recipes
Now, I know you might be thinking about digging into these beauties, but before you grab that third square, we should probably talk about the fuel factor! Remember, because we’re using real butter, three eggs, and a full block of cream cheese in that middle layer, these are definitely on the decadent side of the spectrum. That’s okay! We bake for joy, right?
I ran the numbers based on cutting this recipe into 24 lovely little bars. These figures are just estimates, though. If you use lighter cream cheese or skip the extra whipped topping, your numbers will shift a bit. But for a standard, wonderfully rich layered banana cream dessert, this is a solid baseline for what you’re getting!
- Serving Size: 1 bar
- Calories: 310
- Fat: 18g (and yes, that’s mostly the good stuff from real butter!)
- Saturated Fat: 10g
- Carbohydrates: 34g
- Sugar: 28g – Remember, that sugar is spread across several delicious layers!
- Protein: 5g
Just keep in mind, since these are such rich dessert bar recipes, a little slice goes a long way. These are meant to be enjoyed slowly, maybe with a cup of coffee later in the evening. Don’t sweat the numbers too much; just appreciate the sheer wonderfulness of combining cheesecake and pudding!
Share Your Best Banana Cheesecake Hybrids
Now that you’ve got the secret recipe for these spectacular Banana Pudding Cheesecake Bars, I absolutely want to see what you come up with! I poured my heart into perfecting the balance of tanginess and sugary comfort, but I know you creative bakers out there probably have your own spin on it.
Did you decide to add some toasted pecans to the crust? Maybe you went wild and added just a hint of rum extract to mimic that grown-up version of the pudding? Whatever little tweaks you made to blend your favorite dessert ideas for parties into this bar format, let me know!
Drop a comment down below—I read every single one, I really do! Tell me what you thought of the texture, how easy or hard you found layering it all up, and if your family loved this hybrid. If you made these bars for an event, please share a picture on social media and tag me so I can see your gorgeous presentation! Rating the recipe is a huge help, too. Did this earn five stars in your house? If so, shout it out! Happy baking, everyone!
PrintBanana Pudding Cheesecake Bars
A recipe for layered dessert bars combining a vanilla wafer crust, a rich cream cheese filling, bananas, and a whipped topping, mimicking classic banana pudding flavors.
- Prep Time: 30 min
- Cook Time: 40 min
- Total Time: 5 hours 10 min
- Yield: 24 bars
- Category: Dessert
- Method: Baking
- Cuisine: American
- Diet: Vegetarian
Ingredients
- 1 1/2 cups vanilla wafer crumbs
- 1/4 cup granulated sugar
- 6 tablespoons unsalted butter, melted
- 16 ounces cream cheese, softened
- 1 cup granulated sugar
- 1 teaspoon vanilla extract
- 3 large eggs
- 2 medium bananas, sliced
- 1 (3.4 ounce) package instant vanilla pudding mix
- 1 1/2 cups cold milk
- 1 cup heavy whipping cream
- 1/4 cup powdered sugar
- 1 teaspoon vanilla extract
- 1/2 cup whipped topping (like Cool Whip), thawed, for topping
- Extra vanilla wafer crumbs or banana slices for garnish
Instructions
- Preheat your oven to 325 degrees Fahrenheit. Line a 9×13 inch baking pan with parchment paper, leaving an overhang for easy removal.
- Prepare the crust: Combine the vanilla wafer crumbs, 1/4 cup sugar, and melted butter in a bowl. Press the mixture firmly and evenly into the bottom of the prepared pan. Bake the crust for 10 minutes. Set aside to cool slightly.
- Prepare the cheesecake layer: In a large bowl, beat the softened cream cheese with 1 cup of sugar until smooth. Beat in 1 teaspoon of vanilla extract and the eggs one at a time, mixing just until combined after each addition. Do not overmix.
- Pour half of the cheesecake batter over the cooled crust. Arrange half of the sliced bananas evenly over the batter. Pour the remaining cheesecake batter over the bananas. Arrange the remaining banana slices on top of the cheesecake layer.
- Bake for 30 to 35 minutes, or until the edges are set and the center has only a slight jiggle.
- Turn off the oven and prop the door open slightly. Let the cheesecake cool in the oven for 30 minutes. Remove from the oven and cool completely on a wire rack. Then, chill in the refrigerator for at least 4 hours, or preferably overnight.
- Prepare the pudding layer: Whisk the instant vanilla pudding mix and cold milk together in a medium bowl until thickened, about 2 minutes. Let it sit for 5 minutes.
- Prepare the whipped topping: In a separate bowl, beat the heavy whipping cream, powdered sugar, and 1 teaspoon of vanilla extract until stiff peaks form. Gently fold the prepared pudding into the whipped cream mixture.
- Spread the pudding/whipped cream mixture evenly over the chilled cheesecake layer. Top with the thawed whipped topping.
- Chill the bars for at least 1 hour before slicing. Garnish with extra crumbs or banana slices before serving.
- Use the parchment paper overhang to lift the bars out of the pan before cutting into squares.
Notes
- For cleaner slices, run your knife under hot water and wipe it dry between each cut.
- You can use store-bought vanilla pudding instead of instant mix if you prefer a cooked pudding base, but you must cool it completely before layering.
- This dessert tastes best when made a day ahead to allow the flavors to meld.
Nutrition
- Serving Size: 1 bar
- Calories: 310
- Sugar: 28g
- Sodium: 210mg
- Fat: 18g
- Saturated Fat: 10g
- Unsaturated Fat: 8g
- Trans Fat: 0g
- Carbohydrates: 34g
- Fiber: 1g
- Protein: 5g
- Cholesterol: 55mg