

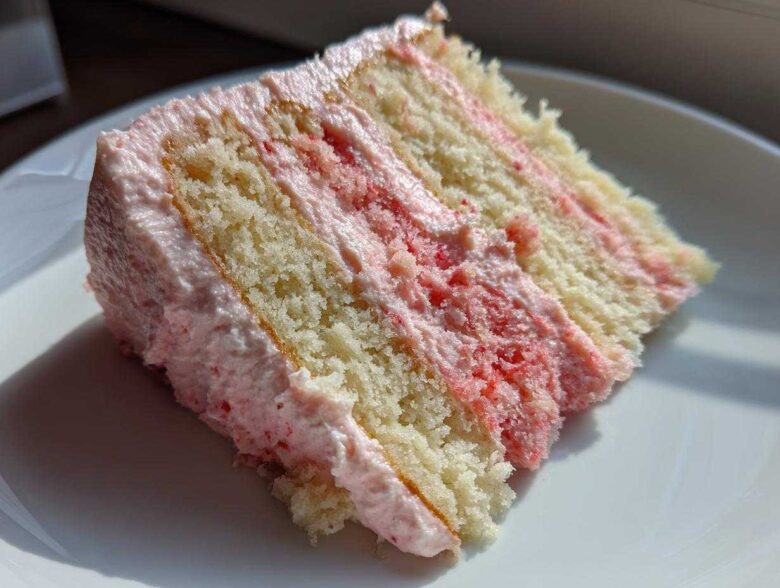
Oh, friends, when it comes to a big celebration—birthdays, anniversaries, or just making Tuesday feel special—nothing beats a towering, perfect layer cake. Honestly, I used to stare at those bakery masterpieces and think, “Nope, too complicated for my kitchen.” I struggled for years getting my layers even and my frosting not to just slide right off!
But I finally cracked the code, and I am so excited to share my absolute favorite centerpiece: this stunning Strawberry Vanilla Cake with Strawberry Frosting. It’s this incredible marriage of sweet, creamy vanilla sponge and the brightest, freshest strawberry punch you can imagine in the buttercream. Trust me, this recipe walks you through every little tricky step for assembly, so you end up with something that looks like it came from a fancy bakery, but tastes like pure homemade love.
Why This Strawberry Vanilla Cake with Strawberry Frosting Stands Out
Seriously, there are a million strawberry cake recipes out there, but mine—this beautiful creation—hits just right every single time. It’s all about that perfect marriage of flavors and textures, which is why I rely on these tried-and-true construction phases:
- The Balance is Everything: We aren’t making a heavy, overly dense cake. The vanilla batter stays light and springy thanks to the careful whisking of the dry ingredients and using room temperature components. It supports the frosting without weighing the whole thing down.
- Intense Strawberry Flavor, Zero Soggy Cake: We use strawberry puree *in* the cake batter, yes, but we strain it first! This is a total game-changer for keeping those moist layer cake techniques working—you get the pink hue and flavor without compromising the rise.
- The Frosting Factor: We’re not messing around with artificial syrups. By reducing the fresh strawberry puree, we concentrate that real, vibrant berry tang. It cuts through the sweetness of the vanilla beautifully so you want another slice immediately.
- Looks Expensive, Feels Easy: Honestly, this cake looks like a superstar for special occasions, but the process is straightforward if you follow the steps. It’s elegant home baking without needing a pastry degree! Check out my guide on achieving ultimate moisture if you want even more background on keeping it perfect.
Essential Ingredients for Your Strawberry Vanilla Cake with Strawberry Frosting
Listen, you can’t rush greatness, especially when we’re making something as special as this Strawberry Vanilla Cake with Strawberry Frosting. The ingredients list looks long, I know, but they all have a job to do! If you stick to the measurements here, especially regarding the butter and eggs, you are halfway to success. Remember that key tip I always preach? Everything—the butter, the eggs, the milk—needs to be at room temperature. It lets everything emulsify beautifully during the mixing process, creating the perfect structure.
Don’t even think about trying to sneak in hardened butter! Cold ingredients separate the batter, and that leads to a dense, crumbly cake which is the opposite of what we want for those moist vanilla cake layers.
For the Moist Vanilla Cake Layers
For the cake sponges themselves, we are keeping things classic but adding that hint of hidden fruit flavor:
- 1 3/4 cups all-purpose flour
- 1 1/2 cups granulated sugar
- 1 tablespoon baking powder
- 1/2 teaspoon salt
- 1/2 cup unsalted butter, softened (remember, room temperature!)
- 2 large eggs (room temperature helps so much!)
- 1 teaspoon vanilla extract (use the good stuff here!)
- 1 cup whole milk
- 1 cup fresh strawberries, pureed and strained (this strain step is non-negotiable to get about 1/2 cup of smooth puree—we don’t want chunky bits in the cake itself!)
For the Reduced Strawberry Puree and Creamy Strawberry Frosting
This is where the main flavor punch comes in for our stunning Strawberry Vanilla Cake with Strawberry Frosting. That reduced puree is my little secret to making sure the frosting tastes like summer and holds its shape!
- For the Frosting Base: 1 cup unsalted butter, softened
- 4 cups powdered sugar, sifted (please sift it, or you’ll be picking out lumps later!)
- 1/2 cup fresh strawberry puree, which must be reduced (Simmer 1 cup of puree down until you have half the amount, then cool it completely before adding it to the butter. This concentrates the flavor and keeps your frosting stable!)
- 1 teaspoon vanilla extract
- Pinch of salt
Step-by-Step Guide to Baking the Perfect Strawberry Vanilla Cake with Strawberry Frosting
Okay, let’s roll up our sleeves! This is where the real fun begins, and if you follow my lead here, you’ll ace this entire project. We’re walking through this whole Step by Step Cake Baking process together, so don’t feel intimidated by that three-layer look! I learned so much about making sure my cakes didn’t sink, especially when I first tried my hand at complex recipes like this one. You can see how I approached a different challenge in my guide to making homemade chocolate cake, which really taught me about mixing technique.
First things first, set your oven to 350°F (175°C). Get those two 8-inch round pans greased up really well. I usually dust mine with a little flour and then line the bottom with parchment circles just to be extra safe. A stuck cake is a recipe for frowns!
Preparing the Cake Batter and Baking
In your big bowl, take a moment to whisk the flour, sugar, baking powder, and salt together thoroughly. That’s step one for smooth sailing! Now, dump that softened butter, your room temperature eggs, the vanilla, and the milk right on top. Fire up the mixer on medium speed, but only beat until it’s just combined. See those dry spots? Scrape down the sides with a spatula.
This is super important: gently fold in that strained strawberry puree we prepared earlier. And I mean gently. As soon as you see the last streak of yellow disappear into pink, stop mixing! Overmixing develops gluten, and we want fluffy cake, not chewy cake. Divide it up and bake for about 30 to 35 minutes. Let them settle in the pans for ten minutes; they’re delicate when warm!
Creating the Strawberry Buttercream Frosting Tutorial
While those layers cool down completely—and I mean *cool*; hot cake melts frosting, guaranteed—we whip up the star of the show! This is my detailed Strawberry Buttercream Frosting Tutorial, so pay close attention to the sequence.
Beat that softened butter until it looks pale and creamy—we need air in there! Then, slowly, I mean *slowly*, start adding your sifted powdered sugar, alternating with splashes of that cooled, reduced strawberry puree. If you dump it all in, you’ll end up with a sugar cloud explosion, trust me! Keep mixing until it’s light and fluffy. If it seems a little too thick to spread nicely, add a teaspoon more puree. If it’s too soupy, add a little more sugar. A pinch of salt wakes up all that sweetness!
Mastering Layer Cake Assembly Guide for Your Strawberry Vanilla Cake with Strawberry Frosting
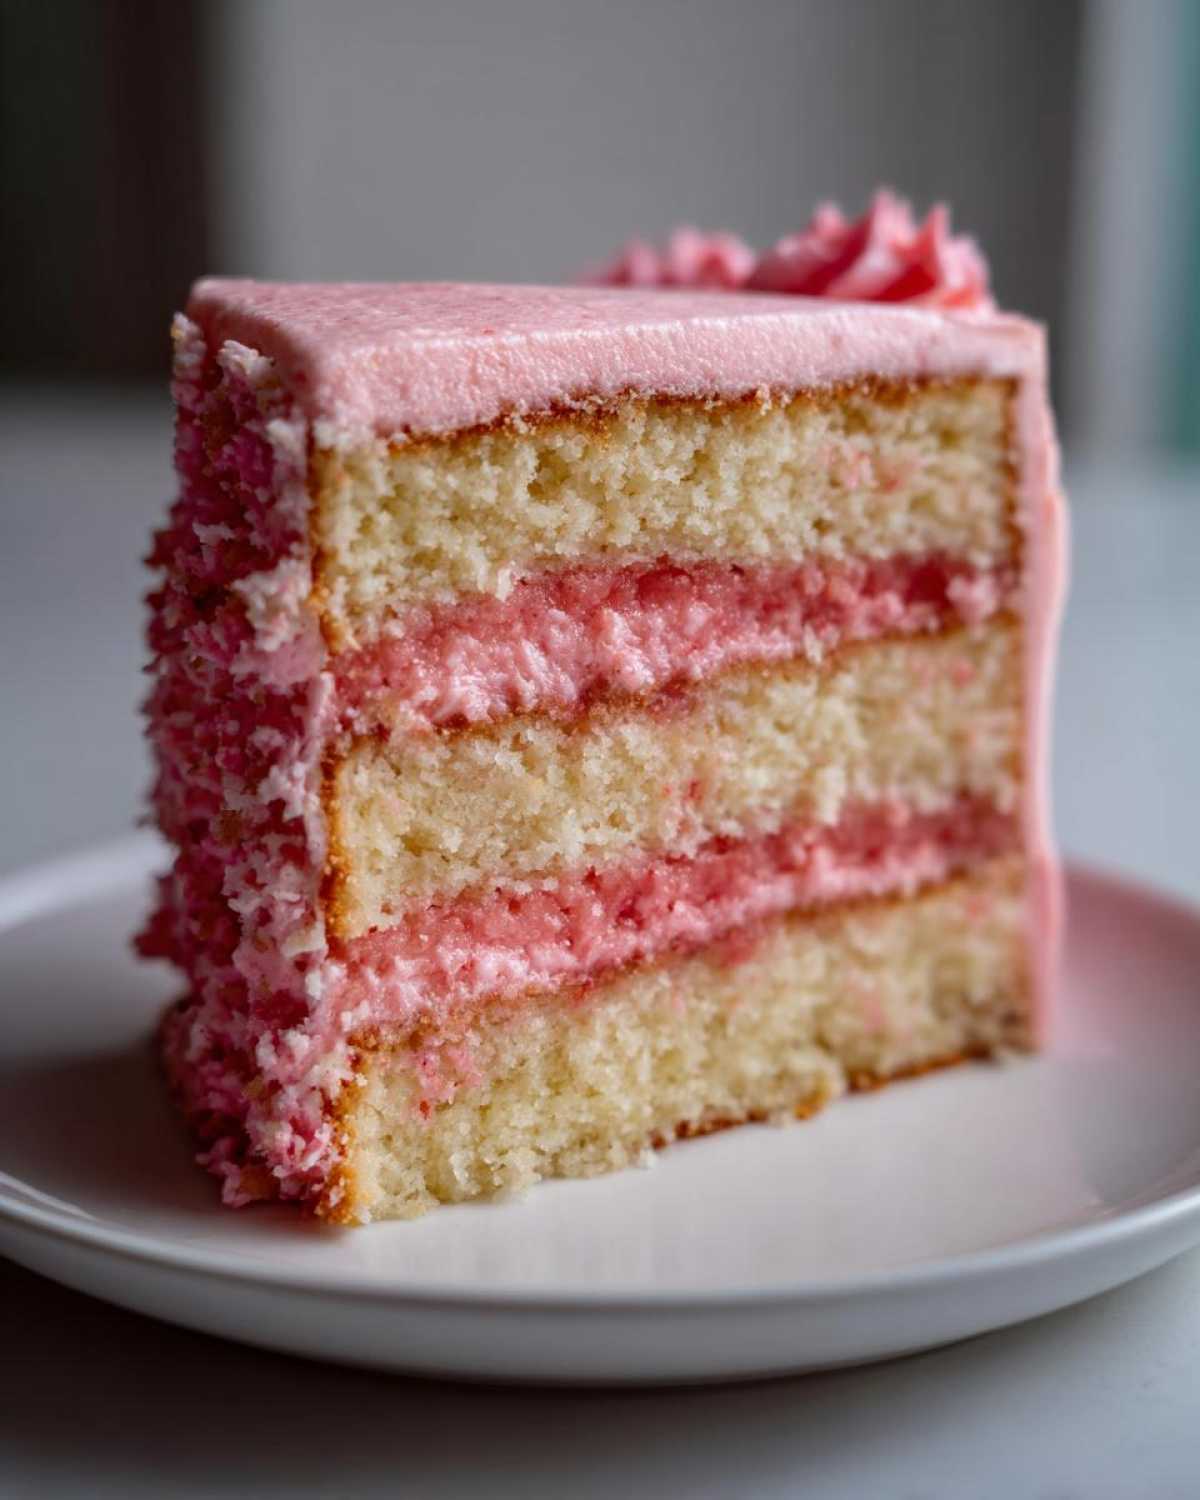
Now we turn our beautiful baked layers into a showstopper! This is the moment where all those baking steps finally pay off. If you’ve been waiting for the perfect moment to tackle a proper tiered look, this Layer Cake Assembly Guide is my personal instruction manual for you. Don’t skip leveling those cakes; it’s the key to a stable stack that doesn’t lean like the Tower of Pisa!
Once those layers are totally cool—and I mean stone cold, folks—grab a long, serrated knife. Carefully slice off the dome from the top of each cake. I know it feels like you’re cutting off the best part, but trust me, this gives you the flat surface needed for a professional look. Don’t worry if you lose a few crumbs!
Put your first layer down on your serving plate or cake stand. Take about a third of that gorgeous strawberry buttercream and spread it right to the edges. It should be a nice, even layer—not too thick, not too thin. Gently place the second layer on top. If you struggle with spreading frosting on the very top, try chilling the frosted first layer for ten minutes before adding the second layer on top. It locks it in place!
After you’ve stacked the second layer, use a small offset spatula to cover the entire top surface. Then, take the remaining frosting and cover the sides. My secret for that clean side finish? Coat the whole thing in a thin layer first—this is called the ‘crumb coat’—and chill it for twenty minutes. That locks in any loose crumbs. Then, apply your final, thicker layer of frosting. If you want that smooth finish you see in magazines, use a bench scraper held vertically against the side while spinning your cake stand. It works like magic! If you need inspiration on handling frosting, take a peek at how I manage my brown butter frosting; the technique for smoothing is exactly the same!
Tips for Success with Homemade Vanilla Cake Baking from Scratch Ideas
Even though this is a fantastic recipe for baking from scratch ideas, sometimes the environment plays tricks on us when baking! Humidity is the sworn enemy of perfectly whipped frosting, and it can totally derail your beautiful homemade vanilla cake layers. If it’s a super damp day where you live, you might need to add a tiny bit more powdered sugar to the frosting mix—start slow so you don’t use too much!
Also, don’t be afraid to experiment with your extracts. A vanilla cake is only as good as its vanilla, right? You can find my favorite tips on keeping your baked goods fresh even when you stash them away in my banana bread tutorial—the storage tips are identical for keeping these vanilla layers tasting fresh.
Ingredient Quality Matters for Flavor Depth
I know it sounds like something your mom would say, but honestly, when you rely heavily on just a few flavors, quality counts! Since this cake relies so heavily on that subtle vanilla and bright strawberry profile, skip any imitation vanilla extract. Even if it seems pricier, pure vanilla extract blooms differently in the oven, giving you that warm, cozy background note that perfectly complements the sweet fruit.
The same goes for the strawberries. If you use those rock-hard, flavorless berries in January, you won’t get that vibrant pink color or that punchy flavor we need for the puree in the frosting. If you must use frozen berries when fresh aren’t available, make sure you thaw them completely and drain off *all* the excess watery juice before cooking them down. We need intense fruit flavor, not just watery disappointment!
Storing and Serving Your Beautiful Strawberry Vanilla Cake with Strawberry Frosting
You finally did it! You have this gorgeous, perfectly frosted Strawberry Vanilla Cake with Strawberry Frosting sitting on your counter, and you are probably wondering, “Can I leave this out?” The answer is sadly no, not for long. Because we used real, fresh fruit puree in that creamy strawberry buttercream, it needs a little chill time to keep that frosting stable and safe, especially if your kitchen is warm.
I always store leftovers right in the cake carrier in the refrigerator. It keeps everything firm! If you’re not cutting into it right away, wrap the entire cake loosely with plastic wrap after the first day, making sure not to squash the frosting.
When you’re ready to serve, try to pull it out about 30 to 45 minutes before you cut the first slice. Cakes taste a million times better when they aren’t ice cold! That little bit of time lets the vanilla sponge relax and softens up that buttercream just perfectly. It’s so much better than trying to reheat anything—just let the ambient air work its magic.
For serving suggestions, keep it bright! A few extra sliced fresh strawberries sprinkled over the top right before serving always looks fantastic. If you want fresh strawberry dessert ideas for another time, check out my recipe for the watermelon smoothie—it uses that same principle of fresh fruit concentration! This cake needs nothing else, but a strong cup of coffee pairs perfectly with that sweet-tart frosting.
Frequently Asked Questions About This Celebration Cake
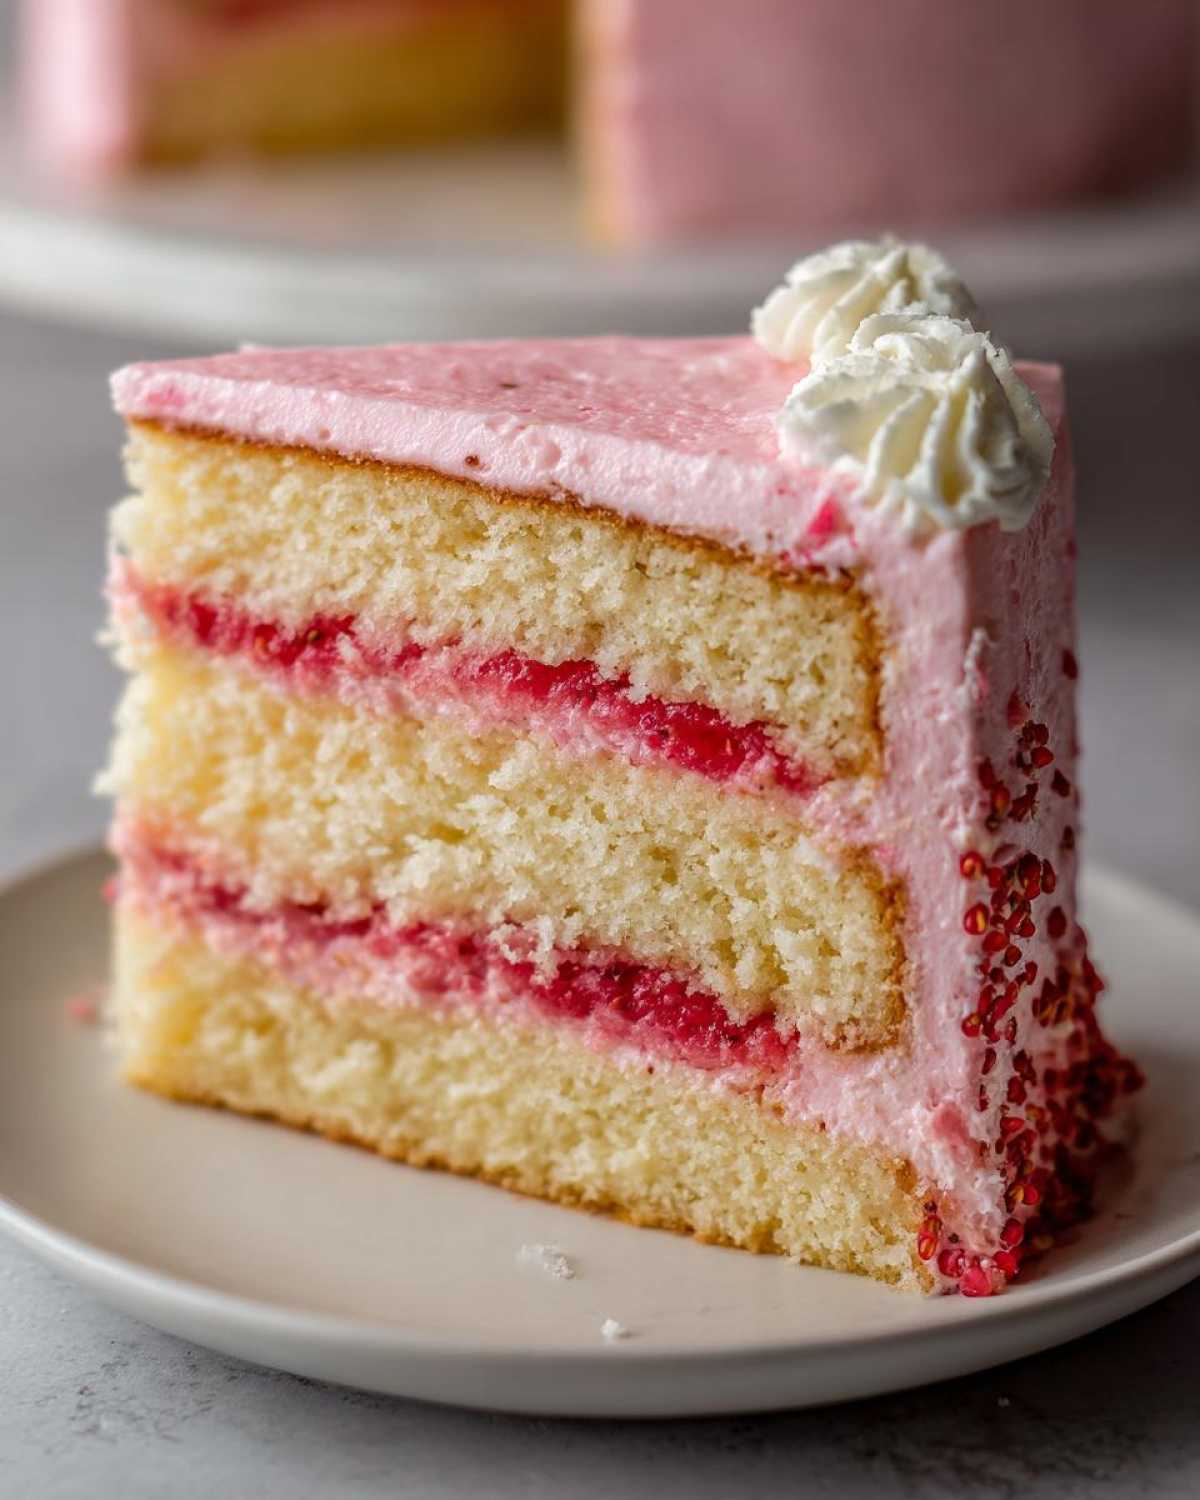
I always get so many questions whenever I post photos of this cake because it’s such a showstopper for celebration cake recipes! It’s totally normal to have questions, especially when you’re aiming for that perfect layered look. Here are the things folks ask me most often when tackling this strawberry dream machine.
Can I use frozen strawberries instead of fresh for the puree?
Yes, you absolutely can! Trust me, winter berries can be frustrating, but if you’re in a pinch, frozen works just fine for the puree. Just buy a bag of plain frozen strawberries—no added sugar! You’ll need to thaw them completely first, and you must drain off every ounce of extra water. Put them in a strainer over a bowl for a good 20 minutes. Because frozen fruit releases more liquid when cooked, you might need to simmer the puree just a touch longer than if you were using fresh berries to ensure you still hit that target of 1/2 cup reduced slightly thickened puree for the frosting. It might take a little more watching!
How far in advance can I make the cake layers?
This is key for timing out your baking! You can definitely make the cake layers ahead of time to save stress on the big day. Once the layers are completely cool—and I mean 100% cool, no residual heat—wrap each one tightly with plastic wrap. Like, wrap it twice! Then stash them in the fridge for up to two days, or even freeze them for up to a month. If you freeze them, thaw them still wrapped on the counter for a few hours before unwrapping and leveling them. This keeps all the moisture locked inside those vanilla sponges!
What if I only have one 8-inch round pan?
Oh dear, that happens! If you only have one pan, you just have to bake it in batches. Be sure to clean out the pan, re-grease it, and perhaps line the bottom with parchment again before pouring in the second half of the batter. You’ll need to add about 7 to 10 minutes to the baking time for the second batch since the pan will be hotter when you pour the batter in, but keep testing with that toothpick until it comes out clean. Just be sure to let the first layer cool completely before you slice it; you don’t want a warm layer trying to support a thick dollop of frosting!
Estimated Nutritional Data for This Dessert
Okay, let’s talk the grown-up stuff for a second! I know we aren’t baking this cake because it’s health food, but it’s good to have a ballpark idea of what you’re diving into, especially when you’re serving this glorious thing at a party. Because we are using real butter and fresh fruit, the numbers reflect a decadent, homemade experience.
Please remember that these figures are just estimates based on the specific ingredients I listed. If you use a different brand of shortening in your frosting or half the sugar, the numbers will shift! Also, this cake is cut for 10 servings, but if you choose to cut giant wedges like my Uncle Joe does, your numbers will climb!
Here is the breakdown we calculated based on one generous slice:
- Serving Size: 1 slice
- Calories: 450
- Sugar: 55g (That’s the fruit and butter talking!)
- Sodium: 210mg
- Fat: 22g
- Saturated Fat: 14g
- Carbohydrates: 60g
- Protein: 4g
It’s a true celebration dessert, so enjoy it completely—you earned it after all that whipping and folding!
Share Your Baking Creations
I honestly can’t wait to see all your gorgeous Strawberry Vanilla Cake with Strawberry Frosting creations out there! When you spend the time making something this beautiful and delicious from scratch, you absolutely have to show it off. It really makes my day when I see one of my family-tested recipes turn into someone else’s favorite new tradition.
So please, tag me on social media when you finish assembling your layers! I want to see how you decorated the top—did you go for a fancy rosette border, or did you just pile fresh berries on top? Snap a picture and share it!
And if you have a moment, leave a rating and a quick comment right here on the recipe page. It helps other bakers know that this recipe is reliable, which builds our little baking community. If you ran into a snag or had a brilliant idea for a substitution, share that too! We all learn from each other’s experiments. If you need to reach out directly for any tricky questions, my contact page is ready for you over at my contact form. Happy baking, sweet friends!
PrintStrawberry Vanilla Layer Cake with Strawberry Frosting
A recipe for a moist vanilla layer cake topped with a rich, fresh strawberry buttercream frosting.
- Prep Time: 30 min
- Cook Time: 35 min
- Total Time: 65 min
- Yield: 10 servings
- Category: Dessert
- Method: Baking
- Cuisine: American
- Diet: Vegetarian
Ingredients
- 1 3/4 cups all-purpose flour
- 1 1/2 cups granulated sugar
- 1 tablespoon baking powder
- 1/2 teaspoon salt
- 1/2 cup unsalted butter, softened
- 2 large eggs
- 1 teaspoon vanilla extract
- 1 cup whole milk
- 1 cup fresh strawberries, pureed and strained (about 1/2 cup puree)
- For the Frosting: 1 cup unsalted butter, softened
- 4 cups powdered sugar, sifted
- 1/2 cup fresh strawberry puree, reduced
- 1 teaspoon vanilla extract
- Pinch of salt
Instructions
- Preheat your oven to 350°F (175°C). Grease and flour two 8-inch round cake pans.
- In a large bowl, whisk together the flour, sugar, baking powder, and salt.
- Add the softened butter, eggs, vanilla extract, and milk to the dry ingredients. Beat with an electric mixer on medium speed until just combined, scraping down the sides of the bowl.
- Gently fold in the 1/2 cup of strained strawberry puree until just incorporated. Do not overmix.
- Divide the batter evenly between the prepared pans. Bake for 30 to 35 minutes, or until a toothpick inserted into the center comes out clean.
- Let the cakes cool in the pans for 10 minutes before inverting them onto a wire rack to cool completely.
- To make the frosting, beat the softened butter until creamy. Gradually add the sifted powdered sugar, alternating with small amounts of the reduced strawberry puree.
- Add the vanilla extract and salt. Beat until the frosting is light and fluffy, adding more powdered sugar if the frosting is too thin, or a touch more puree if it is too stiff.
- Once the cake layers are completely cool, place one layer on a serving plate. Spread about one-third of the frosting evenly over the top.
- Place the second layer on top and frost the top and sides of the entire cake.
Notes
- For the best strawberry flavor in the frosting, simmer 1 cup of strawberry puree until it reduces to about 1/2 cup. Cool completely before using.
- Level the cake layers with a serrated knife before assembly for a flat, stable stack.
- Use room temperature eggs and butter for the cake batter to ensure a smooth emulsion.
Nutrition
- Serving Size: 1 slice
- Calories: 450
- Sugar: 55g
- Sodium: 210mg
- Fat: 22g
- Saturated Fat: 14g
- Unsaturated Fat: 8g
- Trans Fat: 0g
- Carbohydrates: 60g
- Fiber: 1g
- Protein: 4g
- Cholesterol: 75mg