

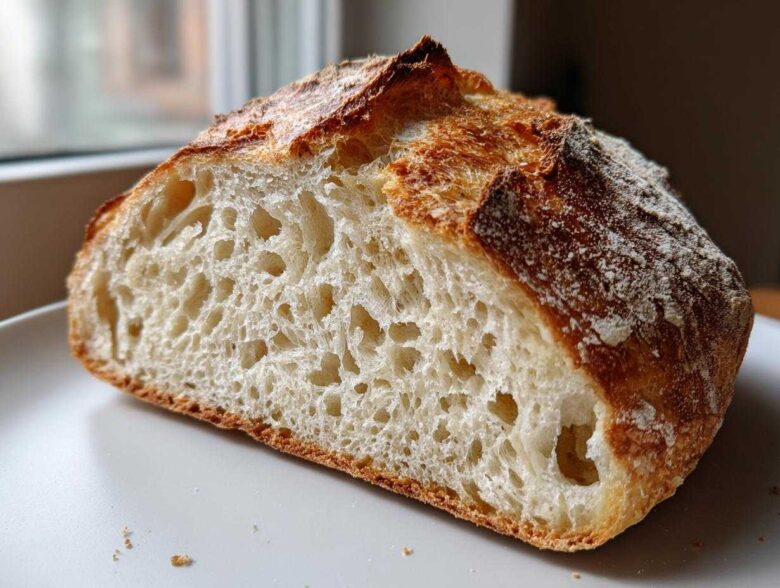
If you’ve always dreamed of pulling a truly crusty, artisan loaf from your own oven—the kind that cracks and sings when it cools—but you absolutely dread the thought of kneading for hours, then stop right now. Seriously, stop. This is the moment everything changes for you in the world of homemade bread! I remember the first time I tried a no-knead recipe. I was skeptical, expecting a dense brick, but when I heard that crackle? Wow! This No Knead Dutch Oven Bread isn’t just easy; it’s foolproof. It’s my absolute favorite recipe because it gives you bakery results with less than ten minutes of actual work. You’re going to love this magic!
Why This No Knead Dutch Oven Bread Recipe Works (Expertise & Trust)
Okay, so why are we just mixing flour, water, salt, and a tiny bit of yeast and walking away for nearly a full day? It all comes down to time doing the heavy lifting that your arms usually handle! This long, cool resting period is crucial. It lets the wild yeast slowly develop incredible flavor notes. We’re talking deep, complex, slightly tangy flavors you usually only get in a real artisan bakery. That long rest builds structure in the dough without needing any aggressive kneading. Then, that cast iron beauty—the Dutch oven—traps all the steam escaping from the dough. That steam is the secret weapon. It keeps the surface of the dough soft enough to expand fully, which is what gives you that gorgeous, crackly crust on your finished bread.
The Magic of Long Fermentation for Great Bread
Think of the 12 to 18 hours as a slow, quiet flavor bath for the ingredients. When you go slow, the yeast produces more interesting organic acids instead of just gas. That’s the difference between plain white bread and truly flavorful homemade bread. You don’t need to punch it down or reform it at all during this rest. Just cover it tightly. When you come back, the dough will be full of bubbles and look totally different—ready to bake, no effort required! That’s the beauty of this method.
Essential Ingredients for Perfect No Knead Bread
You won’t believe how few things you actually need for this fantastic loaf of bread! Honestly, the ingredient list is dirt simple, which is another reason I adore it. We are sticking to the absolute basics here because the long rest is doing all the heavy lifting on the flavor front. You’ll need three cups of all-purpose flour, one and a half teaspoons of salt, just a quarter teaspoon of instant yeast, and one and a half cups of cool water. That’s it! Measure carefully, because in a recipe this simple, those measurements really matter. Don’t try to substitute the yeast type unless you read the note below!
Ingredient Notes and Substitutions for Your Bread
The most critical note is the yeast: we are using instant yeast here, not active dry. Instant yeast doesn’t need to be proofed in warm water first; it just mixes right in with the dry bits. Keep your water cool—not warm or hot! Warm water will rush the activation, and we want that slow, 18-hour ride. If you happen to only have active dry yeast, use that, but just know you might need to let the dough rest slightly longer, maybe aiming for 15 hours minimum. For a slightly different texture, you can sub out half the all-purpose flour for bread flour, which will give you a slightly chewier interior, though AP flour generally yields a softer result.
Step-by-Step Instructions for Artisan Bread Baking
Following these steps ensures you get the crackly, airy, perfect loaf of bread every single time. Don’t rush the resting period, and absolutely do not skip the preheating step—that hot pot is non-negotiable for the crust we want! Once we mix, it’s mostly waiting time, but pay close attention when you finally move the dough to the oven. Timing those bake periods makes all the difference between a slightly pale loaf and a deep golden masterpiece!
Mixing and The Long Rest for Your Yeast Bread From Scratch
First things first: dry ingredients meet in a big bowl—flour, salt, and that tiny pinch of instant yeast. Then you just pour in the cool water and mix it with a sturdy spoon until it’s all combined into a shaggy, sticky mess. See? No kneading! Cover that bowl super tight with plastic wrap. Now, forget about it for 12 to 18 hours. When you check it later, you’ll see tons of bubbles on the surface, and the whole mass of your bread dough will look alive and puffy. It’s ready when it looks like that!
Preheating and Baking Your Crusty Bread Loaf
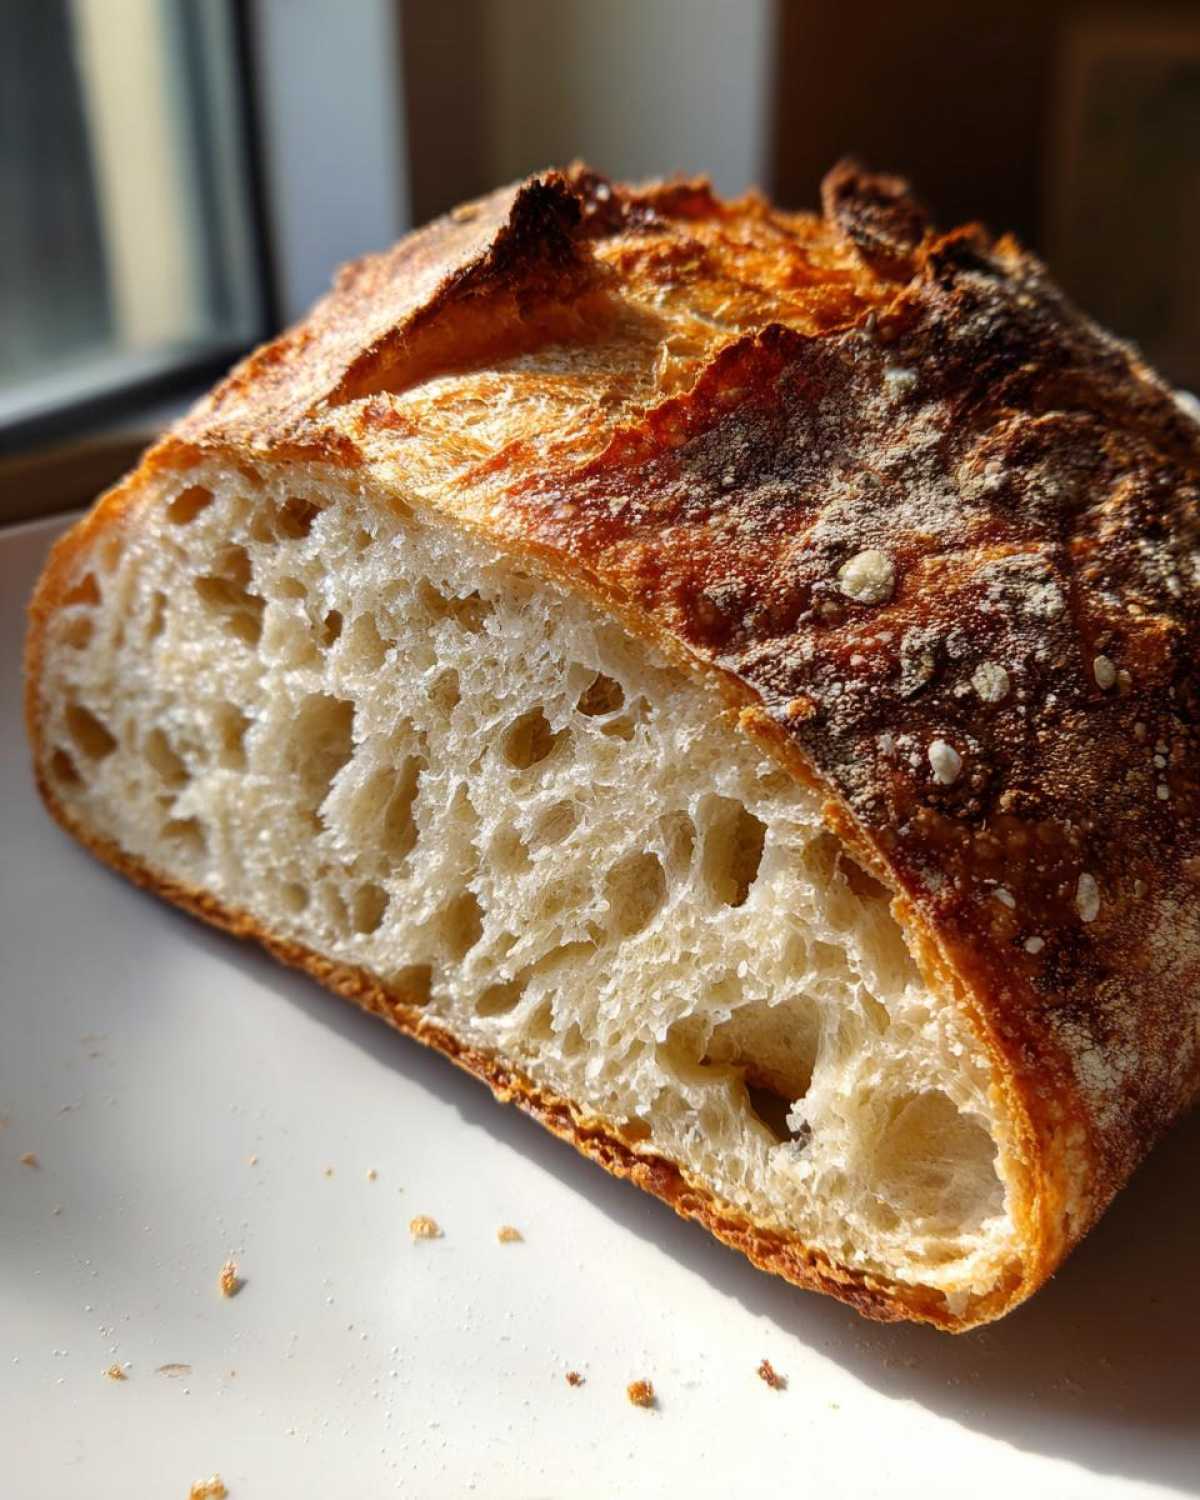
This is where you need to focus! About 30 minutes before you’re ready to bake, put your empty Dutch oven, lid and all, straight into the oven (set to 450°F). It needs to get screaming hot. When it’s ready, carefully pull that scorching hot pot out—use serious mitts, please! Gently scrape your dough onto parchment paper and use that paper like a sling to lower your dough right into the preheated pot. Cover it up and bake for exactly 30 minutes. Then, whip the lid off to let the steam escape. Bake for another 15 to 20 minutes more until your bread crust is dark brown and gorgeous. That two-stage approach really seals in the moisture before crisping up that wonderful crusty bread loaf.
Tips for Success When Making Beginner Bread Baking
I totally get it: handling super sticky dough can freak out a beginner baker, but don’t panic about that messy look! Remember, this dough is supposed to be wet; it’s the whole point of skipping the kneading! When you go to move it onto parchment paper, just dust your bench scraper and your hands lightly with flour. Don’t add too much, or you’ll lose that precious, open crumb structure we worked so hard to develop during the long rest of our bread! If you are worried about the center of the loaf not being fully baked, try this little trick I learned: for the last five minutes of baking, carefully remove the loaf right from the Dutch oven and place it directly onto the oven rack. This lets the heat circulate all around the bottom, guaranteeing an extra crisp exterior on your spectacular homemade bread.
Storing and Reheating Your Homemade Bread
Figuring out how to keep this amazing bread perfect after you’ve baked it is almost as important as baking it! Once it’s totally cool—and I mean completely cool on a wire rack—you need to treat that crust gently. Don’t seal it tightly in plastic right away, or you’ll steam the crust right off! I usually wrap leftover bits tightly in a clean kitchen towel and leave it on the counter for a day or two. If you’ve got more than that, then you can wrap it well in foil before freezing. When you’re ready for a treat, just pop the loaf (or a slice!) back into a 350-degree oven for about five minutes. That blast of dry heat will resurrect that crust beautifully!
Serving Suggestions for This Artisan Bread
Now that you have this stunning, crusty loaf, what are you going to do with it? Honestly, eating half of it standing over the sink while it cools is totally acceptable! But if you plan to serve it, this artisan loaf shines with simplicity. It’s divine sliced thick and toasted with a generous slather of good salted butter—truly the best buttery bread side dish imaginable. It’s also the perfect partner for heartier meals. Trust me, dipping chunks of this into a hot bowl of soup, like a creamy broccoli cheddar, is just heaven on a cold night. I love serving it alongside pasta, too, just so we can sop up every single bit of sauce!
Frequently Asked Questions About No Knead Bread
I know you might have a few lingering questions, especially when you’re new to the idea of making spectacular bread without touching the dough! It’s okay to wonder about adapting things—that proactive spirit is what makes a great baker. Here are a few things people ask me all the time about this simple recipe.
Can I skip using the Dutch oven?
Oh, I wish I could tell you yes, but for that incredible, crackly, artisan crust, the Dutch oven is essential! It creates the super-humid environment needed for that initial spring and color, acting just like a professional steam injection oven would. If you absolutely don’t have one, you can bake this on a preheated baking stone or even an upside-down baking sheet. Just be sure to place a pan of hot water on the bottom rack while you bake to create some steam. The crust won’t be quite as perfect, but you’ll still get a fantastic loaf of bread!
What if I want soft, fluffy dinner rolls instead of this artisan loaf?
This long-fermentation dough is designed for an open, rustic structure, so it won’t turn into a traditional square loaf or fluffy rolls easily. If you want those soft fluffy dinner rolls, you are definitely better off looking up a dedicated yeast bread recipe that uses milk and butter and requires kneading. This no-knead dough is happiest when it’s baked into one big, rustic loaf.
How do I make this recipe into sourdough bread for beginners?
That’s a great ambition! Moving to sourdough means swapping out that instant yeast completely and introducing a mature sourdough starter in place of the yeast and some of the water. While this core recipe is built on commercial yeast, once you get comfortable with the timing here, the principles transfer. You’ll need to feed your mature starter first and then adjust the liquid content, as starter hydration varies wildly. It’s a whole other adventure, but once you master this basic yeast bread, sourdough will be the next logical step!
Can I use this recipe for bread machine recipes easy?
Honestly, this dough isn’t ideal for the standard bread machine cycle. Bread machines are designed to knead, heat, and bake in a contained, relatively quick cycle. Our method relies on that very long, cool, passive rest, which a machine can’t replicate. You could potentially put the mixed ingredients into the pan, let it rest on your counter for 12 hours (if your machine allows that long without turning on the heat), and *then* run the basic dough cycle, but I haven’t had much luck getting decent results that way. It’s just easier to stick to the pot on the stovetop for this one!
Estimated Nutritional Data for This Bread
I always feel a little guilty looking at the numbers after eating such glorious, crusty bread, but here we are! Since this recipe has zero added sugars, it keeps the totals nice and manageable. Based on the ingredients listed and divided into 16 slices—which is a huge slice, mind you—here’s the rough rundown per piece. Don’t forget, these numbers are just estimates; they can change quite a bit depending on how much water your particular flour ends up absorbing! Use this as a general guide for your lovely homemade loaf.
- Serving Size: 1 slice
- Calories: 220
- Fat: 0.5g
- Protein: 8g
- Carbohydrates: 47g
- Sugar: 0.5g
- Sodium: 350mg
Share Your Homemade Bread Creation
Seriously, I’m so proud of you for making this loaf! I want to see your crackly crust; please, snap a picture and tag me online! If you loved pulling this simple bread from your oven, leave a rating below so other folks know this method is the real deal. Let me know in the comments what you slathered on your first warm slice!
PrintEasy No Knead Dutch Oven Bread
Make crusty, artisan-style bread at home with this simple no-knead recipe using a Dutch oven.
- Prep Time: 10 min
- Cook Time: 50 min
- Total Time: 13 hours 0 min
- Yield: 1 loaf
- Category: Baking
- Method: Baking
- Cuisine: American
- Diet: Vegetarian
Ingredients
- 3 cups all-purpose flour
- 1 1/2 teaspoons salt
- 1/4 teaspoon instant yeast
- 1 1/2 cups cool water
Instructions
- In a large bowl, mix the flour, salt, and yeast together.
- Pour in the cool water and mix with a wooden spoon until a shaggy dough forms. Do not overmix.
- Cover the bowl tightly with plastic wrap and let it rest at room temperature for 12 to 18 hours. The dough will become bubbly and increase in volume.
- About 30 minutes before baking, place a 6-quart or larger Dutch oven, with the lid on, into your oven. Preheat the oven to 450 degrees Fahrenheit (232 degrees Celsius).
- Carefully remove the hot Dutch oven from the oven. Gently scrape the dough out of the bowl and place it onto a piece of parchment paper.
- Using the parchment paper as a sling, carefully lower the dough into the hot Dutch oven.
- Cover the Dutch oven with the lid and place it in the preheated oven.
- Bake for 30 minutes with the lid on.
- Remove the lid and continue baking for another 15 to 20 minutes, or until the crust is deep golden brown.
- Carefully remove the bread from the Dutch oven and let it cool completely on a wire rack before slicing.
Notes
- For a crispier crust, you can remove the bread from the Dutch oven for the last 5 minutes of baking and place it directly on the oven rack.
- If you do not have a Dutch oven, you can bake this on a baking stone or sheet pan, but the crust will be less defined.
- This dough can be refrigerated for up to two weeks after the initial rise for slower fermentation.
Nutrition
- Serving Size: 1 slice
- Calories: 220
- Sugar: 0.5
- Sodium: 350
- Fat: 0.5
- Saturated Fat: 0.1
- Unsaturated Fat: 0.4
- Trans Fat: 0
- Carbohydrates: 47
- Fiber: 2
- Protein: 8
- Cholesterol: 0