

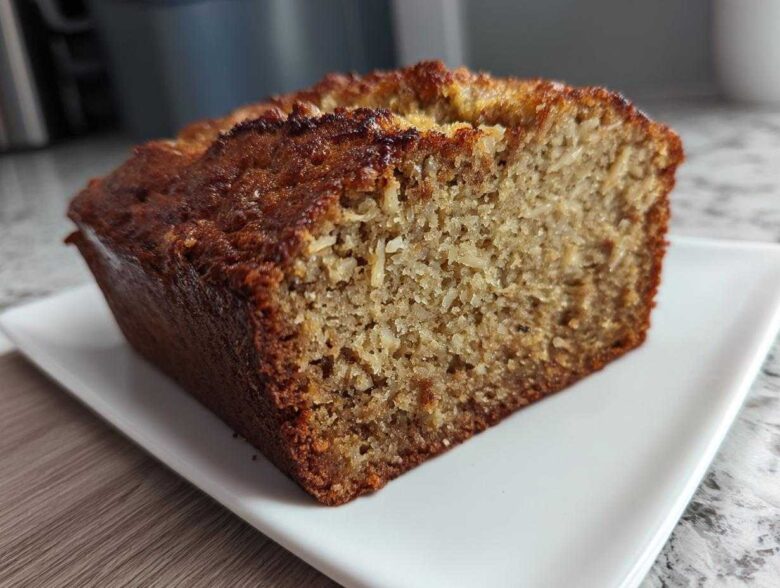
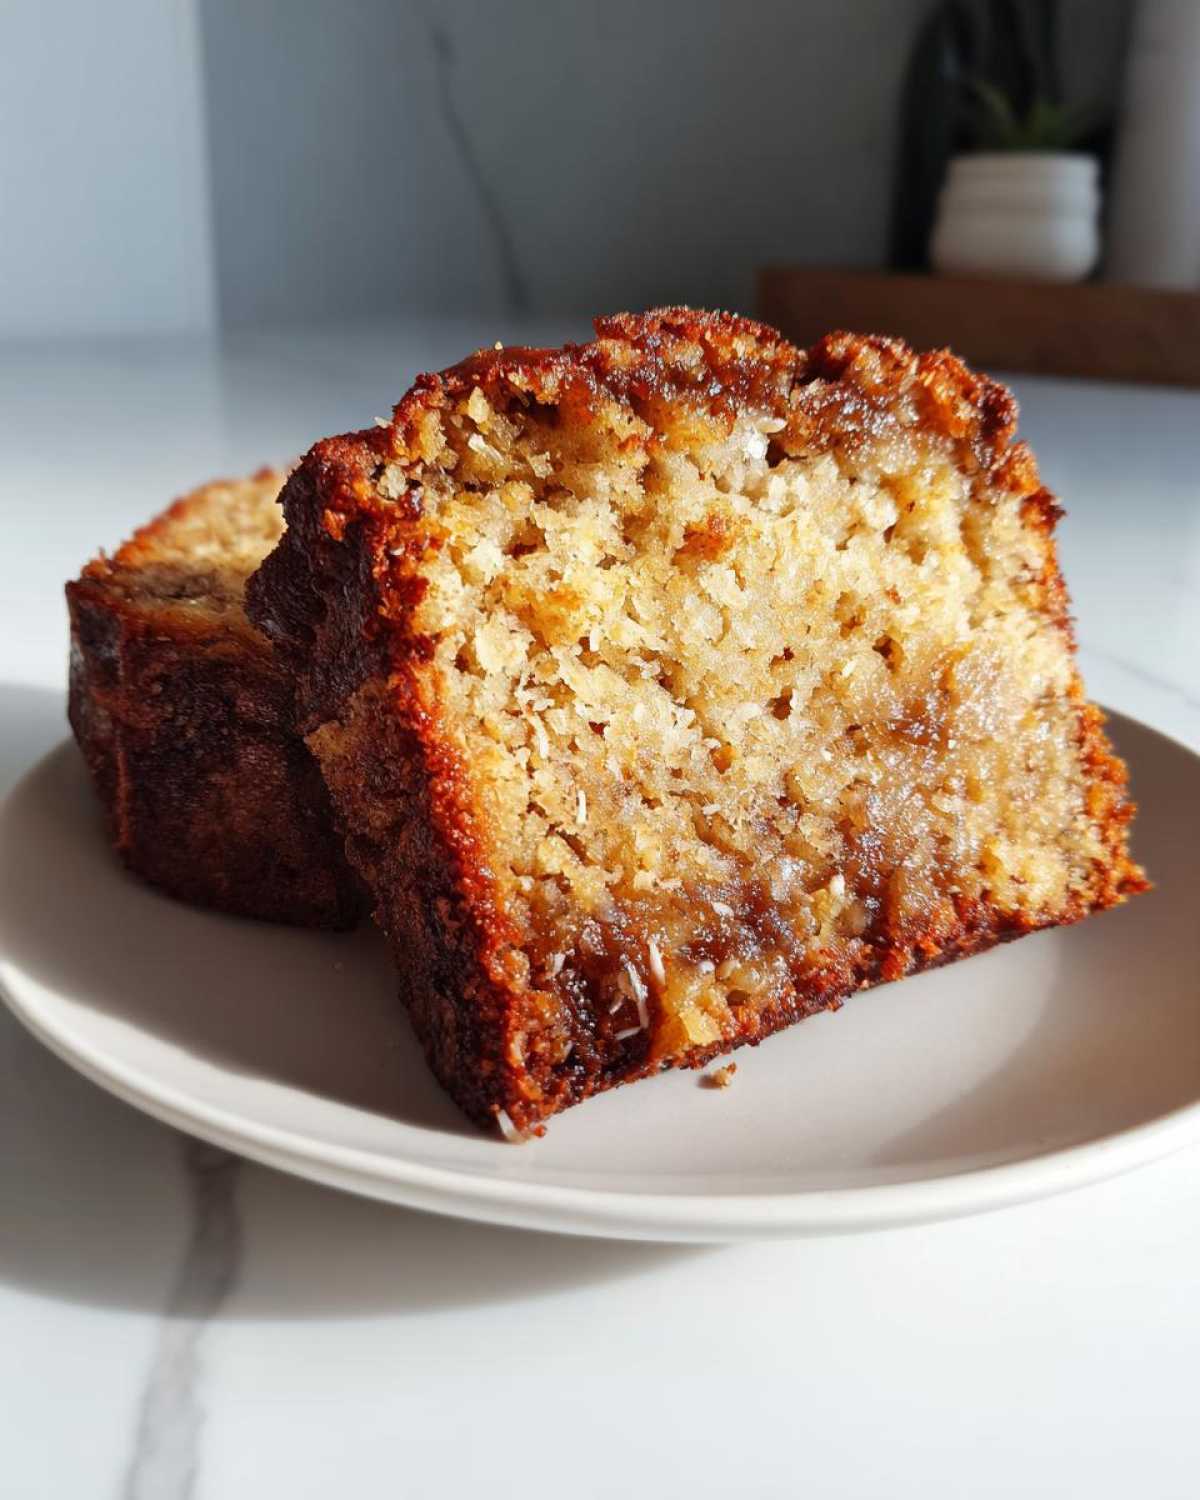
Forget those dry, sad loaves you sometimes find! If you want to close your eyes, take a bite, and instantly smell salt air and sunshine, you have to try my absolutely ultimate moist hawaiian banana bread recipe. I spent ages tweaking this because I wanted that bakery-style tenderness, and I finally cracked the code using the classic tropical trio: plenty of mashed bananas, crushed pineapple, and sweet coconut flakes. Trust me, mastering this tropical quick bread is easier than you think, and it will instantly become your favorite weekend baking project. It’s pure vacation in one loaf, and I can’t wait for you to try it!
I always have a loaf ready to share, and you can find more of my best breakfast and brunch bakes over here: check out my breakfast collection.
Why This is the Best Hawaiian Banana Bread Recipe (Moist & Tropical)
What makes this *the one*? It’s all about that texture! We are aiming for the most moist banana bread you have ever sunk your fork into, no kidding. While some recipes fall flat, mine succeeds because of the tropical additions. That crushed pineapple works overtime to keep things wet, and the coconut gives it just the right chew.
Honestly, this tropical quick bread comes together faster than I can brew my morning coffee. You throw it all into the pan, you bake it, and bam—you have something that smells like you brought the islands right into your kitchen. If you’re looking for simple, foolproof dessert bread, this is where you stop searching. Find more easy baking ideas here: our pancake recipes are great too, but this loaf is superior!
Gathering Ingredients for Authentic Hawaiian Banana Bread
Okay, let’s talk about what you need to make this happen! When I bake this loaf, I make sure I have every single item ready to go before I even turn the oven on. It keeps things calm, especially when you’re dealing with tropical fruit mixes!
You can find all the measurements written out fully below, but I wanted to give you a quick peek at the stars of the show—the pineapple and the nuts. If you’re interested in learning the best way to select and store your fruit for baking, I wrote a whole guide on baking with ripe bananas!
Dry Ingredients for Your Hawaiian Banana Bread Loaf
We keep the dry side simple so the tropical favors really shine through. You just need a few things whisked up together.
- All-purpose flour – standard stuff, nothing fancy needed here!
- Baking soda – this is what gives us that little lift.
- Salt – you absolutely need salt to balance all the sweetness coming from the sugar and fruit. Don’t skip it!
- Ground cinnamon – just a tiny bit to give that warm background note, nothing overwhelming.
Wet Ingredients and Tropical Add-Ins for Moist Banana Bread
This is where the magic really happens, especially with that crucial draining step for the pineapple. Seriously, don’t just dump that can in there!
- Unsalted butter, softened – make sure it’s soft enough to actually cream with the sugar; don’t melt it in the microwave!
- Granulated sugar.
- Large eggs.
- Vanilla extract – a splash makes everything better.
- Mashed ripe bananas – the spottier, the better, I always say!
- Crushed pineapple, drained really, really well. This is vital so our loaf sets up perfectly and isn’t gummy.
- Sweetened shredded coconut.
- Chopped macadamia nuts – these are optional, but if you use them, toast them beforehand for the best crunch!
Step-by-Step Instructions for Perfect Hawaiian Banana Bread
Don’t let all those amazing ingredients scare you—putting this banana loaf recipe together is genuinely super easy once you have everything measured out. I like to think of this as assembly rather than complicated baking! We need to work quickly but gently, especially when we start mixing things together. You can check out my guide on apple cinnamon overnight oats if you want another low-fuss breakfast idea, but let’s focus on this amazing bread!
Prep Work and Combining Dry Ingredients for the Banana Loaf Recipe
First things first: get that oven humming at 350 degrees F (175 degrees C)! And don’t forget to grease and flour your standard 9×5 inch loaf pan. Seriously, skip greasing and flouring at your own risk—we want this beauty to slide right out!
Grab a medium bowl and just whisk your dry stuff together: the flour, baking soda, salt, and cinnamon. Whisking is better than stirring here because it truly distributes the leavening agents evenly. Set that bowl aside and let’s move on to the wet side.
Mixing Wet Ingredients and Folding in the Tropical Elements of Hawaiian Banana Bread
Time for the big bowl! Use your mixer (or a strong arm) to cream that softened butter and sugar until it looks genuinely light and fluffy—it should pale out a bit. Then, beat in the eggs one by one, making sure each one is fully incorporated before adding the next splash of vanilla extract.
Now comes the banana mash. Mix in your 1 1/2 cups of mashed ripe bananas gently until it’s *just* combined. And here’s the crucial moment for texture: gradually add those dry ingredients to the wet mixture, but only mix on low speed until you see streaks of flour disappear. I mean it—DO NOT OVERMIX! Overmixing turns this tropical dream into something tough.
Once the batter is *just* combined, switch to a spatula. This is where you gently fold in the stars: your well-drained crushed pineapple, the shredded coconut, and those optional macadamia nuts. Fold until you no longer see streaks of white, but stop immediately once everything is incorporated. You need to protect those air bubbles!
Baking and Cooling Your Delicious Coconut Banana Bread
Pour that beautiful, chunky batter into your prepared loaf pan and smooth the top slightly. This loaf usually takes between 55 and 65 minutes to bake perfectly at 350 degrees F. You’ll know it’s ready when a wooden skewer stuck deep into the center comes out clean, maybe with a few moist crumbs attached, but no wet batter.
The cooling process is just as important as the mixing! Let the bread rest right there in the pan for 10 minutes. If you try to rush it out, it might collapse! After those 10 minutes, carefully turn the loaf out onto a wire rack. Let it cool completely before slicing if you can stand the waiting—it really sets the crumb structure nicely.
Expert Tips for the Best Moist Banana Bread
Listen, anyone can dump ingredients in a bowl. But to get that perfect, almost tropical-bakery-level texture that defines the best banana bread? That takes a couple of little secrets I learned the hard way (and through many failed, crumbly loaves!). Following these tips moves you from making a nice loaf to making something truly spectacular.
If you need some inspiration for adapting this loaf into an even richer dessert, I have a fantastic chocolate zucchini cake recipe that uses similar mixing techniques!
Ingredient Secrets for Ultra-Moist Hawaiian Banana Bread
The secret to ultra-moist everything usually comes down to the bananas and the fruit prep. If you ignore everything else, pay attention here, because this keeps our bread out of the dry zone!
When it comes to bananas for baking with ripe bananas, I mean *black*. They should be covered in brown and black spots—the mushier they look, the sweeter and moister they will make your bread. Soft, nearly liquid bananas are your friend here; they contribute flavor and moisture without you needing to add extra fat.
Now, about the pineapple—this is non-negotiable for our tropical vibe. Canned crushed pineapple is amazing, but it’s packed in juice. If you skip draining it all out, you’ll end up with a soup in the middle of your loaf that just won’t set right. I open the can, dump the contents into a fine-mesh sieve, and then I take a couple of paper towels and physically press down hard on the pineapple chunks to squeeze out every last drop of excess liquid. Think of it as wringing out a wet sponge! Doing this ensures you get the sweet pineapple flavor and texture without introducing a gummy center to your otherwise perfect Hawaiian banana bread.
Variations on Your Tropical Quick Bread
While this recipe nails that classic island vibe with pineapple and coconut, sometimes I like to switch things up just a little, especially if I’m making a fresh batch for friends. Experimenting with quick bread favorites doesn’t mean losing the essential moistness, though! We just need to respect the moisture balance we already achieved.
Before you start swapping, remember that we already have macadamia nuts as an option, but if you don’t have those on hand for your sweet bread for brunch, I hear really good things about toasted pecans, though they are definitely less tropical!
If you need something cool and refreshing to serve alongside this sweet treat, check out my recipe for watermelon mint lemonade—it’s heavenly on a warm afternoon!
Boost the Nuts: Toasting Macadamias for Better Flavor
If you opt for the macadamia nuts, please, please promise me you’ll toast them! It takes maybe five extra minutes but the payoff is huge. Raw nuts are bland; toasted nuts are buttery and fragrant. You just spread them out on a small tray and pop them in the oven while the oven is preheating for the bread—around 350 degrees F for about seven minutes until you can smell them.
Once they cool down a hair (be careful!), you chop them up and fold them in with your pineapple and coconut. It adds such a deep, rich flavor to this banana coconut treat.
Adding Color with Dried Fruits
Sometimes I like a little pop of color, so I add dried fruit, but you have to treat them right first! Dried fruit tends to suck moisture out of the batter when they bake, which defeats the purpose of our super moist banana bread.
My go-to addition here is dried, chopped cherries. They look stunning against the pale yellow crumb. To keep them soft, soak those chopped cherries (or even golden raisins if you love them!) in a tablespoon of hot water, a splash of rum if you’re feeling fun, or even just orange juice for about 15 minutes before you drain and fold them in. This plumps them up so they nicely texture your fruity bread recipe without stealing moisture from the batter.
Make it a Loaf Recipe Variation with Espresso Powder
This is a slightly bold move, but it’s amazing! If you love how coffee deepens chocolate flavor, guess what? It does the same thing for banana! Add just half a teaspoon of instant espresso powder (not instant coffee, espresso powder) right into your dry ingredients when you whisk them up. You won’t taste coffee, trust me—you just get a richer, deeper banana flavor in your final loaf. It’s a marvelous little trick for your dessert bread loaf!
Storing Your Homemade Island Bread
This Hawaiian banana bread is so moist that storage is really important to keep it tasting perfect for days. You want to keep that tropical freshness intact, right? Since we packed this loaf with fruit, it retains moisture really well, but humidity is the enemy!
The best spot depends on how quickly you plan to eat it. If you think you’ll finish the whole thing within two days, keeping it on the counter is absolutely fine. But if you need it to last longer, the fridge is your best friend for this homemade island bread.
Room Temperature Storage for Quick Snacking
If keeping it on the counter, wrap the cooled loaf tightly—and I mean *tightly*—in plastic wrap first. Then, I like to slip that wrapped loaf immediately into an airtight container or a sealable zip-top bag. Don’t leave any air pockets! This keeps the outside from getting hard while it locks in the moisture from the pineapple and bananas inside. It shouldn’t need refrigeration for about 48 hours if your kitchen isn’t super hot and humid.
Refrigerating Your Tropical Quick Bread for Longer Life
If you’re making this ahead of time for a brunch gathering next week, you need to refrigerate it. Again, wrap it super securely in plastic wrap, then maybe a layer of foil on top just to be extra safe against fridge odors. It should stay great in the fridge for about a week!
When you take it out of the fridge, it will feel a bit stiff because the butter hardens up in the cold. Don’t panic! Just don’t try to slice it rock-hard.
The Trick to Reheating Slices of Your Moist Banana Bread
My favorite way to eat leftovers is warm, so they taste almost freshly baked again. You can definitely microwave a slice for about 10 to 15 seconds, but I find that can sometimes make the fruit part a little odd.
For the absolute best results—especially if you refrigerated the bread—slice what you need and warm those slices gently in a toaster oven or a conventional oven set to a low heat, maybe 300 degrees F, for about 5 to 7 minutes. The gentle heat brings back that soft crumb texture perfectly! For more tips on making sure your stored food stays perfect, I have some great advice on refrigerator pickles that applies to any homemade good.
Frequently Asked Questions About Hawaiian Banana Bread
I get so many emails about this recipe, which shows how many of you are diving into tropical baking! Most questions are about texture because we are aiming for *super* moist, and that takes a little precision. Here are the things folks ask me the most about making this the absolute best banana bread.
If you want to know more about my own baking journey and why I love sharing these recipes, you can read all about it on my About Me page!
Can I make this Banana Bread without Pineapple?
You totally *can*, but you need to know you’re changing the dynamics of the bread! The crushed pineapple in this recipe isn’t just for flavor; it’s a massive source of moisture. If you skip it, your bread will still be lovely because of the mashed bananas, but it won’t achieve that signature, ultra-moist, almost cake-like quality unique to this Hawaiian banana bread.
If you must omit it, I suggest adding half a cup of unsweetened applesauce or yogurt when you mix the wet ingredients to compensate for the moisture loss. It won’t taste tropical anymore, but at least it won’t dry out!
What is the best way to slice the finished Banana Loaf Recipe?
Patience is the final ingredient in this recipe, I swear! The best way to slice your finished banana loaf recipe is definitely after it has cooled completely, or at least until it is only slightly warm to the touch. If you try to slice it while it’s hot, the interior is still setting, and you risk tearing the crumb.
I know it’s tough waiting, but cutting it warm often squishes the texture, especially right where the crushed pineapple is concentrated. For those beautiful, clean slices that look like they came straight out of a bakery case where coffee shops are selling sweet bread for brunch, use a long, sharp, serrated knife and saw gently back and forth once the loaf is room temperature.
How do I make sure my Coconut Banana Bread has that bakery-style dome?
Ah, the dome! That’s something everyone wants for their homemade island bread. Usually, a nice dome happens naturally when you cream your butter and sugar really well (hello, air bubbles!), and when you mix the dry ingredients in just enough without overdoing it.
But here’s a bakery secret: If you want to encourage a higher rise and a beautiful crown, try this little trick. After you get the batter smooth from mixing the dry ingredients in, gently mix in a teaspoon of baking powder *along with* the baking soda at the beginning. That extra bit of lift, combined with the sugar caramelizing on top as it bakes, usually gives you a gorgeous, slightly cracked dome that looks professionally made!
Nutritional Estimate for This Sweet Bread for Brunch
I know some of you are watching macros or just curious about what goes into this amazing tropical quick bread! Since this recipe is loaded with fruit, butter, and those tasty nuts we talked about, it definitely packs a punch. I ran the numbers through my usual calculator, and here is a quick look at what one standard slice of this Hawaiian banana bread gives you.
Keep in mind these are just estimates, because depending on what kind of butter you use or if you go heavy on the coconut, things shift a little. My numbers are generally based on using standard ingredients and the optional macadamia nuts included in the count.
- Calories: About 280 per slice
- Fat: Around 13g
- Carbohydrates: Roughly 40g
- Protein: About 4g
It’s technically a dessert bread, of course, so it has more sugar (around 25g), but remember that most of that sugar comes naturally from those super-ripe bananas and the pineapple!
If you want to read the fine print on how I calculate these things, or check out nutrition information on my other baked goods, you can look over my official site disclaimer page. Enjoy this slice guilt-free—it tastes like sunshine!
Share Your Tropical Baking Success
Well, there you have it! My absolute favorite way to bake up a batch of the best moist banana bread this side of the equator. I hope you loved learning all the little tricks that make this Hawaiian banana bread so incredibly tender and flavorful.
Now that you’ve got the recipe, I want to hear all about it! Did you add the macadamia nuts? Did your kitchen smell amazing while it was baking? Don’t be shy!
Please take a moment to rate this recipe using the star system at the top of the page. Seeing your ratings really helps me know which recipes to keep featuring! And if you took a gorgeous photo of your finished homemade island bread with the sun shining on that coconut topping—please share it!
Tag me on social media so I can see your beautiful tropical loaves! If you have any burning final questions that I didn’t cover in the FAQs, you can always reach out directly through my contact page. Happy baking, friends, and enjoy every bite of that sweet taste of the islands!
PrintMoist Hawaiian Banana Bread
This recipe yields an exceptionally moist banana bread packed with tropical flavors from crushed pineapple and coconut, perfect for a sweet treat.
- Prep Time: 15 min
- Cook Time: 60 min
- Total Time: 75 min
- Yield: 1 loaf (about 10 slices)
- Category: Dessert
- Method: Baking
- Cuisine: American/Tropical
- Diet: Vegetarian
Ingredients
- 1 3/4 cups all-purpose flour
- 1 teaspoon baking soda
- 1/2 teaspoon salt
- 1/2 teaspoon ground cinnamon
- 1/2 cup (1 stick) unsalted butter, softened
- 3/4 cup granulated sugar
- 2 large eggs, lightly beaten
- 1 teaspoon vanilla extract
- 1 1/2 cups mashed ripe bananas (about 3-4 medium)
- 1 (8 ounce) can crushed pineapple, drained well
- 1/2 cup sweetened shredded coconut
- 1/2 cup chopped macadamia nuts (optional)
Instructions
- Preheat your oven to 350 degrees F (175 degrees C). Grease and flour a standard 9×5 inch loaf pan.
- In a medium bowl, whisk together the flour, baking soda, salt, and cinnamon. Set aside.
- In a large bowl, cream together the softened butter and sugar until light and fluffy.
- Beat in the eggs one at a time, then stir in the vanilla extract.
- Mix in the mashed bananas until just combined.
- Gradually add the dry ingredients to the wet ingredients, mixing on low speed until just incorporated. Do not overmix.
- Gently fold in the drained crushed pineapple, shredded coconut, and optional macadamia nuts.
- Pour the batter into the prepared loaf pan.
- Bake for 55 to 65 minutes, or until a wooden skewer inserted into the center comes out clean.
- Let the bread cool in the pan for 10 minutes before turning it out onto a wire rack to cool completely.
Notes
- Drain the crushed pineapple thoroughly to prevent the bread from becoming too wet. Press out excess liquid with a paper towel if needed.
- For the best flavor, use very ripe, spotty bananas.
- To toast macadamia nuts, spread them on a baking sheet and bake at 350 degrees F for 5-7 minutes until fragrant.
Nutrition
- Serving Size: 1 slice
- Calories: 280
- Sugar: 25
- Sodium: 210
- Fat: 13
- Saturated Fat: 7
- Unsaturated Fat: 6
- Trans Fat: 0
- Carbohydrates: 40
- Fiber: 2
- Protein: 4
- Cholesterol: 55