

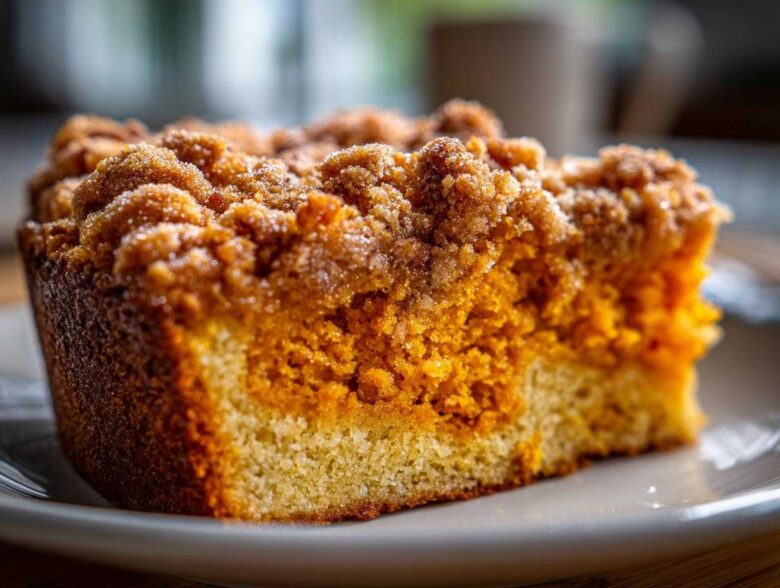
Oh my gosh, it’s officially the best time of year! You know, when the air gets crisp and all you want to bake is something deeply spiced and supremely comforting? For my family, that means one thing: the ultimate easy pumpkin crunch cake. Trust me, if you haven’t made this yet, you’re missing out on the quickest, most shockingly delicious fall dessert ever invented. The beauty here is that we cheat just a little bit—we use yellow cake mix! That is the secret weapon that gives us that amazing, buttery pecan crunch topping layered over the unbelievably moist pumpkin layer. It’s my go-to Thanksgiving dessert idea because it comes together faster than anything else, and everyone always asks for the recipe!
Why This Easy Pumpkin Dessert is a Fall Staple
Honestly, this is the recipe I pull out when I need a showstopper without the all-day commitment. Who has time for complicated scratch baking when the big holiday meal is just hours away? It hits every mark perfectly.
- It’s truly an easy pumpkin dessert—we’re talking mixing two separate components from a box and canned goods!
- The texture contrast is just divine; you get that satisfying sandy crunch followed by the silky, cool pumpkin layer. It’s total comfort food cake heaven.
- It always disappears first at every gathering, which is how you know you did something right!
Essential Ingredients for the Perfect Pumpkin Crunch Cake
Okay, let’s talk shopping. The beauty of this **pumpkin crunch cake** is how incredibly simple the ingredient list is. We aren’t messing around with fancy imported spices or obscure extracts here. This recipe leans on reliable pantry staples, which is why it works so perfectly every single time, making it one of my favorite fall baking recipes.
I always organize it in my head based on the two separate layers we build, so you can set up your prep station perfectly and avoid any last-minute scrambling. If you have these items on hand, you are ten minutes away from dessert!
For the Pecan Crunch Topping Layer
This is the magic that turns a simple pumpkin dump into an amazing crunchy topping cake. You need three things total for this crunchy base layer:
- One full box (the standard 15.25 ounces, don’t grab the family size!) of yellow cake mix.
- One cup of chopped pecans. Walnuts work too, but pecans give the best buttery flavor, trust me.
- One cup (which is two full sticks) of unsalted butter, measured out and fully melted.
For the Moist Pumpkin Cake Layer
This wet layer gets all those wonderful fall spices and that signature incredible moistness. Make sure you grab *pure* pumpkin puree, not the pumpkin pie filling—that stuff has too much sugar already mixed in and messes up the wet/dry balance drastically.
- 15 ounces of pure pumpkin puree.
- One 12-ounce can of evaporated milk. Full fat works best here!
- Four large eggs, whisked up well.
- One cup of regular granulated sugar.
- The spice trio: one teaspoon of ground cinnamon, half a teaspoon of nutmeg, and a quarter teaspoon of ginger. These are non-negotiable for that classic pumpkin spice dessert flavor!
- One teaspoon of vanilla extract for depth.
Step-by-Step Instructions for Your Pumpkin Crunch Cake
Now that we have all our wonderful ingredients lined up, let’s tackle the assembly. Even though it’s a two-part bake, I promise this whole process is really straightforward and fast. We’re building texture right from the very start, which is what separates a good fall cake recipe from the truly spectacular ones. Just stick with me through these simple steps, and you’ll see that gorgeous two-layer dessert magically appear in your oven!
Preparing the Crust and Pre-Baking
Start by getting your oven warmed up to 350 degrees Fahrenheit. Grab yourself a standard 9×13 inch baking pan—no springforms or fancy shapes needed here for this style of **pumpkin crunch cake**. Grease it up first, and then make sure you flour it well so nothing sticks later on!
Now for the topping. Mix up your dry cake mix and those chopped pecans in a bowl. Drizzle that melted butter over the top and stir it with a fork until it looks like coarse, buttery sand. Press that mixture evenly into the bottom of your prepared pan. Pop it into the hot oven for just 15 quick minutes. We aren’t baking it through, just letting it set up a touch before we pour on the creamy layer.
Mixing and Pouring the Pumpkin Layer
While that crust is setting, we whip up the filling! This is where all the moisture and spice come in. Grab a big bowl and whisk together your pumpkin puree, evaporated milk, eggs, sugar, cinnamon, nutmeg, ginger, and vanilla. You want this to get super smooth—no big lumps of pumpkin allowed! Whisk until it’s totally uniform because that ensures you get that consistent, velvety texture in your final **pumpkin crunch cake**.
When the timer dings after 15 minutes, pull the crust cautiously out of the oven. It’ll be warm but still a little loose. Now, carefully and slowly pour that beautiful wet pumpkin mixture right over the hot, partially baked crust. Go slow so you don’t disturb the base too much!
Final Bake and Cooling the Pumpkin Crunch Cake
Back into the oven she goes! This second bake takes longer, usually 40 to 50 minutes. You’ll know it’s ready when the edges look set and golden brown, and a toothpick inserted near the center comes out clean—not wet, just maybe a few moist crumbs clinging on. That’s the sign of a perfect bake!
This last part requires patience, but it’s critical for a clean slice, especially since you want that distinct layer pumpkin dessert look. Let the whole thing cool down completely on a wire rack before you even think about slicing it. Seriously, put it aside for at least an hour or two, or even chill it!
Tips for the Best Crunchy Topping Cake Results
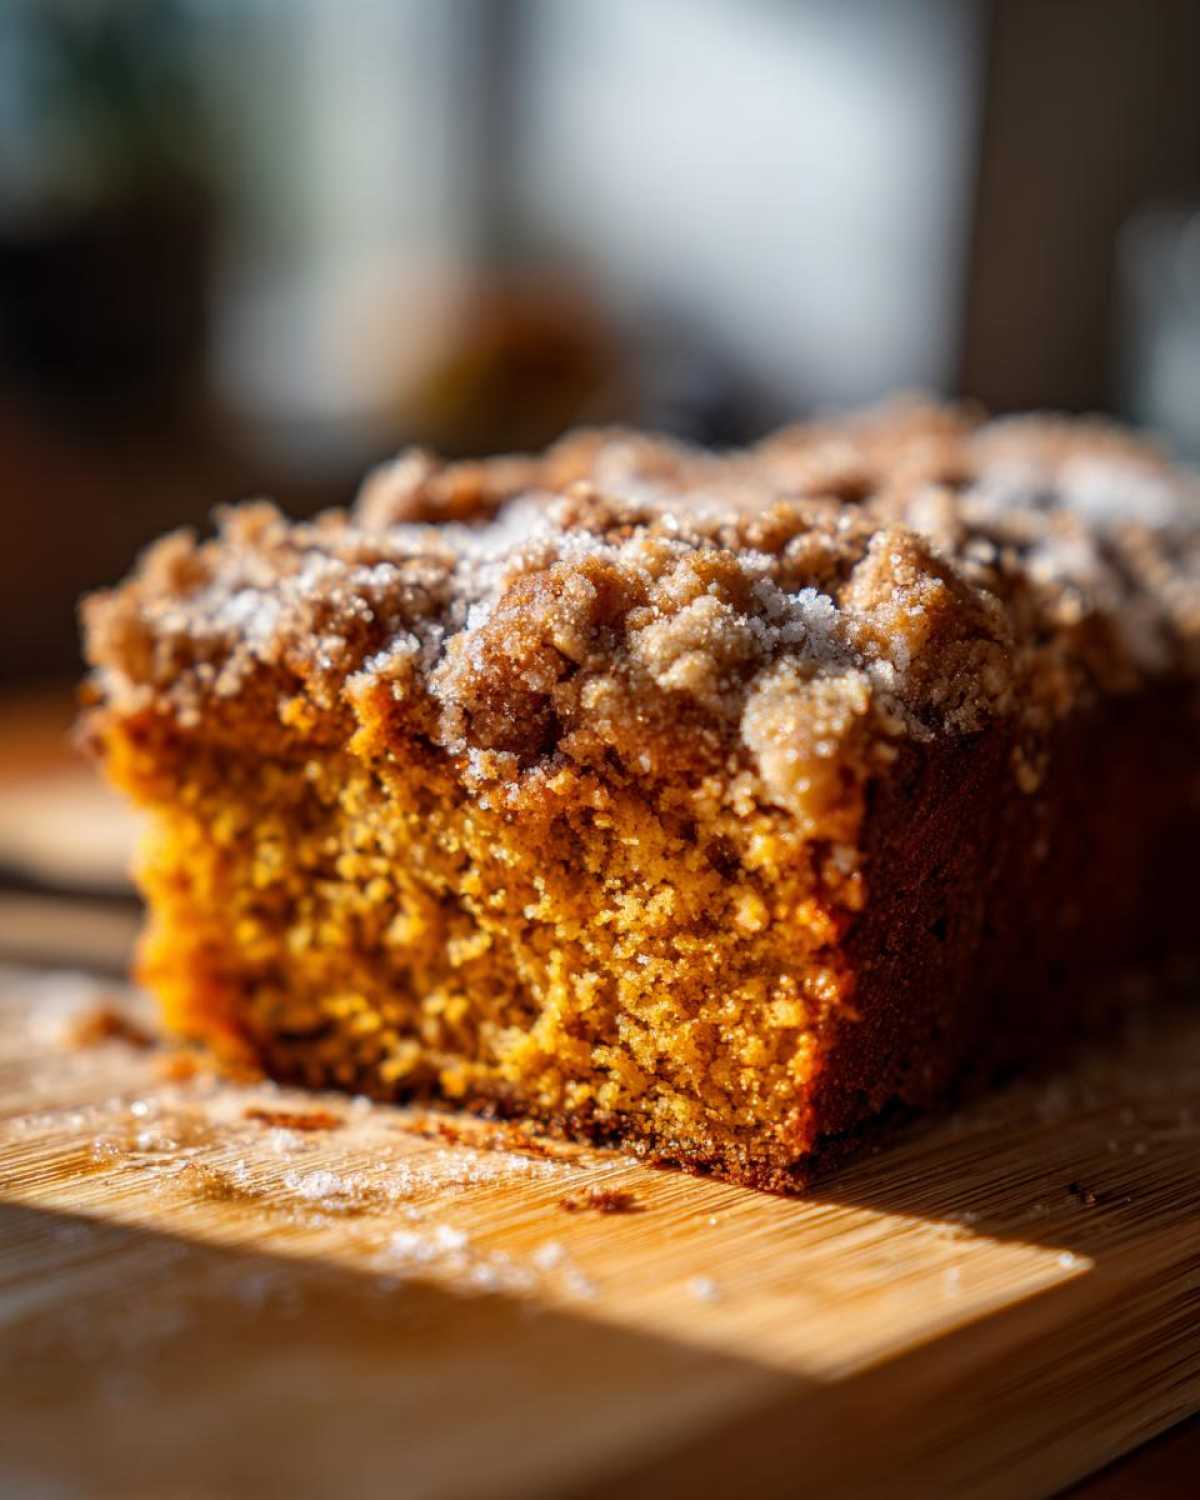
Listen, I’ve made this **pumpkin crunch cake** enough times that I know exactly where things can go wrong, even with a recipe this easy! The biggest mistake people make is rushing the temperature of the melted butter. If the butter is smoking hot when you mix it with the dry cake mix and pecans, it can start to partially cook the flour before it even hits the oven, leading to a weird texture instead of that beautiful, sandy crunchy topping cake.
When you’re pressing the crust into the pan, really take your time to make it even. If one side is thick and the other is thin, you end up with one side being perfectly crisp and the other sinking into the creamy layer below. You want that even distribution so every single slice gets that amazing textural balance of moist pumpkin cake meeting crunchy top.
And just a quick reminder: don’t stir the pumpkin layer too much once it’s poured over the crust! If you agitate it too much, you risk stirring the dry crust crumbs up into the wet mixture, and we definitely don’t want that competition for the title of best layer!
Ingredient Notes and Substitutions for Pumpkin Crunch Cake
Even though this is such a straightforward recipe, people always have questions about making little adjustments, and that’s totally fine! I want you to succeed, especially when making this crowd-pleasing **pumpkin crunch cake** for a big event like Thanksgiving. The base recipe works because of the established ratios, but we can certainly play with some of the add-ins without wrecking the whole thing.
The most important thing, as I mentioned earlier, is sticking with the true, pure pumpkin puree. The pie filling is just too sugary and sometimes has weird stabilizers that affect how the filling bakes and sets. Don’t panic if you are out of pecans, though!
My first suggestion for the topping is always toffee bits. If you have a bag of those little Heath bits lying around, you can mix about half a cup right in with your cake mix and pecans. It melts down during the bake and adds this incredible caramel note that just screams autumn. If you have extra, feel free to sprinkle them right on top of the wet pumpkin layer just before that final bake! Check out my thoughts on pumpkin chocolate chip muffins for other ways to incorporate warming spices.
What if you can’t find pecans? Walnuts are a perfectly acceptable swap; they offer a slightly earthier flavor but still provide that necessary crunch. Just make sure you chop them to a similar size as you would the pecans.
And finally, let’s talk about frostings and toppings, even though this cake is amazing plain. Grandma always just dusted it with powdered sugar. If you want a creamy contrast, though, serving it chilled with a dollop of fresh whipped cream is heavenly. If you really want to make it decadent, you can absolutely top it with a thin layer of cream cheese frosting after it has cooled completely. It just takes this simple bake and turns it into a full-fledged holiday centerpiece!
Serving Suggestions for This Layer Pumpkin Dessert
This beautiful **layer pumpkin dessert** is so versatile! People often ask me the best way to serve it, and the answer really depends on the mood you’re going for. If you make it ahead of time, chilling it completely lets that pumpkin layer firm up perfectly, which makes slicing incredibly clean. I love serving it straight from the fridge when it’s hot outside!
However, I also adore it when it’s just barely room temperature—that’s when the pecan crunch topping is at its crunchiest contrast to the creamy middle. If you want to dress it up for a big event, a simple spoonful of homemade whipped cream next to each slice is just elegant. Or, for true decadence, try a scoop of vanilla bean ice cream! It’s amazing how perfectly the cold cream melts right into that spiced pumpkin. You can also check out my recipe for caramel apple crisp skillet if you want another cozy temperature companion for your fall table.
Storage and Reheating Instructions for Pumpkin Crunch Cake
Don’t you hate when leftover baked goods go stale fast? That’s the eternal enemy of a great pumpkin spice dessert, but luckily, this **pumpkin crunch cake** holds up really well, provided you store it correctly. The key thing here is that the crunchy topping needs protection from the moisture of the pumpkin layer, which is naturally very, very moist!
The absolute best way to store any leftovers is tightly covered in the refrigerator. If you just leave it on the counter, the topping will soften way too quickly, and we want to preserve that satisfying crunch for as long as possible. Pop that 9×13 pan into the fridge. It stays fantastically fresh and delicious for about four to five days this way. Chilling it actually makes the pumpkin layer firm up, which, as I mentioned before, makes slicing cleaner, too!
Now, about reheating—this is where it gets tricky, because technically, this dessert is best served cold or room temperature. If you try to warm up the whole slice, you’re almost guaranteed to turn that perfect pecan topping a little soggy, and nobody wants that! I usually don’t bother reheating it at all.
However, if you absolutely must have it warm, try slicing off just your portion first. You can microwave that small serving for just about 10 to 15 seconds. That’s just enough time to take the chill off the pumpkin layer without steaming the topping into submission. If you want to serve it slightly warm, let it sit on the counter for about 30 minutes after taking it out of the fridge. Either way, keeping it covered is your best defense against dry air.
Frequently Asked Questions About Yellow Cake Mix Pumpkin Bakes
When you’re making a recipe this popular, I always end up fielding the same few questions! It’s totally normal, especially when you want to make sure your first attempt at this famous **pumpkin crunch cake** turns out beautifully, maybe as part of your Thanksgiving dessert ideas spread. Don’t worry if you need a quick tip before pulling the pan out of the oven—that’s what I’m here for!
Can I make this pumpkin crunch cake without pecans?
Oh yes, absolutely! Pecans are my favorite because they have that slightly oily, buttery flavor that pairs perfectly with the yellow cake mix, but you can totally skip them if you have an allergy or just don’t have them on hand. The key is using another evenly chopped nut, like walnuts, or even using pumpkin seeds if you want to keep it nut-free!
If you can’t use any nuts at all, my next best suggestion is to swap them out one-for-one with crispy fried onions! I know, I know, it sounds weird, but the salty, savory crunch mimics the texture really well and it’s delicious. You can also use an extra half cup of dry cake mix mixed in with an extra pat of butter instead of the pecans, but it won’t have that classic nutty flavor that makes it such a star.
Why is my pumpkin layer runny after baking?
This haunts every baker making a **simple pumpkin bake** for the first time! Usually, if the pumpkin layer is runny or seems too wet in the middle after the baking time is up, it means it just needed a little more heat. Don’t panic and pull it out too soon!
The recipe calls for 40–50 minutes, but for some ovens, it might need 55 or even 60 minutes. If your edges look totally done but the middle wobbles, just put it back in for another 5 to 10 minutes, maybe at a slightly lower temperature (like 325°F) to prevent the crust from burning. Also, double-check that you used evaporated milk and not regular milk—regular milk is too watery and will absolutely result in a runny mess. Remember, we are looking for a toothpick to come out with moist crumbs, not wet batter!
Is this considered a quick pumpkin dessert?
Yes, yes, and YES! This is the definition of a **quick pumpkin dessert**! Seriously, between combining the dry topping ingredients and whisking the wet ingredients, you are probably using less than 15 minutes of active hands-on time. That’s incredibly fast for a layered dessert that tastes like it took all afternoon to assemble.
The fact that we start with a box of yellow cake mix is what locks in that speed. You skip all the sifting and creaming required in a scratch recipe. Since the initial crust only needs 15 minutes of baking, you can have this amazing, spiced treat ready to go from start to finish in just over an hour! It’s perfect when you realize you forgot to bring a dessert to a friend’s house.
Estimated Nutritional Snapshot for Pumpkin Crunch Cake
So, about digging into this amazing **pumpkin crunch cake**—while we are focused on flavor and that incredible texture contrast, I know some of you are curious about the numbers. Because this recipe uses cake mix, butter, and sugar, it’s definitely a treat, not an everyday snack! I ran the numbers based on the standard ingredients listed for a 12-serving yield, but always remember that these are just estimates.
Your results will vary based on the exact brand of cake mix you use, whether you use salted or unsalted butter, and if you add any optional toppings like cream cheese frosting (which I highly recommend, by the way!). Treat this like a fun, comforting comfort food cake for special occasions, like enjoying it as part of your Thanksgiving dessert ideas spread!
Here is a quick rundown of what you can generally expect per slice:
- Calories: About 380
- Total Fat: Around 22 grams (Be mindful of that Saturated Fat, which is about 10 grams)
- Carbohydrates: High at about 45 grams
- Protein: Noticeably present at 5 grams
It’s rich, it’s satisfying, and it’s worth every single bite. Just make sure you wipe the plate clean before serving it up with coffee!
Share Your Homemade Holiday Dessert Experience
So, there you have it! That is my absolute favorite way to make a foolproof, fall-favorite **pumpkin crunch cake** that always pulls through when you need it most. I genuinely hope you give this tried-and-true recipe a shot, especially if you’re looking for a fantastic, reliable dessert to bring to your next gathering.
When you finally pull that pan out of the oven and smell those warm spices mingling with the toasted pecans, you’ll know exactly what I mean. It’s pure autumn bliss in a 9×13 pan!
I would absolutely love to hear how it turned out for you! Did you add the toffee bits? Are you a chilled serving fan or do you prefer it room temperature? Drop a comment below and let me know what you think. If you made it, please rate the recipe using the stars if you feel inspired! And if you’re looking for even more inspiration for your next kitchen adventure, you can always browse what else is cooking over on the main blog page. Happy baking, friends!
PrintThe Ultimate Easy Pumpkin Crunch Cake (Classic Yellow Cake Mix Recipe)
Make this popular layered dessert featuring a moist pumpkin base and a crisp, buttery pecan topping using yellow cake mix for simplicity.
- Prep Time: 15 min
- Cook Time: 55 min
- Total Time: 70 min
- Yield: 12 servings
- Category: Dessert
- Method: Baking
- Cuisine: American
- Diet: Vegetarian
Ingredients
- 1 box (15.25 ounces) yellow cake mix
- 1 cup chopped pecans
- 1 cup (2 sticks) unsalted butter, melted
- 1 can (15 ounces) pure pumpkin puree
- 1 can (12 ounces) evaporated milk
- 4 large eggs
- 1 cup granulated sugar
- 1 teaspoon ground cinnamon
- 1/2 teaspoon ground nutmeg
- 1/4 teaspoon ground ginger
- 1 teaspoon vanilla extract
Instructions
- Preheat your oven to 350 degrees Fahrenheit. Grease and flour a 9×13 inch baking pan.
- In a medium bowl, combine the yellow cake mix and chopped pecans. Pour the melted butter over the mix and stir until the mixture resembles coarse crumbs. Press this mixture evenly into the bottom of the prepared baking pan.
- Bake the crust layer for 15 minutes until lightly set. Remove from the oven.
- While the crust bakes, prepare the pumpkin layer. In a large bowl, whisk together the pumpkin puree, evaporated milk, eggs, granulated sugar, cinnamon, nutmeg, ginger, and vanilla extract until smooth.
- Carefully pour the wet pumpkin mixture evenly over the partially baked crust layer.
- Return the pan to the oven and bake for 40 to 50 minutes, or until a toothpick inserted near the center comes out clean. The topping will be golden brown and the center firm.
- Let the cake cool completely on a wire rack before slicing and serving.
Notes
- For an extra layer of flavor, you can sprinkle 1/2 cup of toffee bits over the pumpkin layer just before baking.
- This cake is best served chilled or at room temperature.
- If you prefer a creamier texture, serve with a dollop of whipped cream or cream cheese frosting.
Nutrition
- Serving Size: 1 slice
- Calories: 380
- Sugar: 35
- Sodium: 250
- Fat: 22
- Saturated Fat: 10
- Unsaturated Fat: 12
- Trans Fat: 0
- Carbohydrates: 45
- Fiber: 2
- Protein: 5
- Cholesterol: 75