

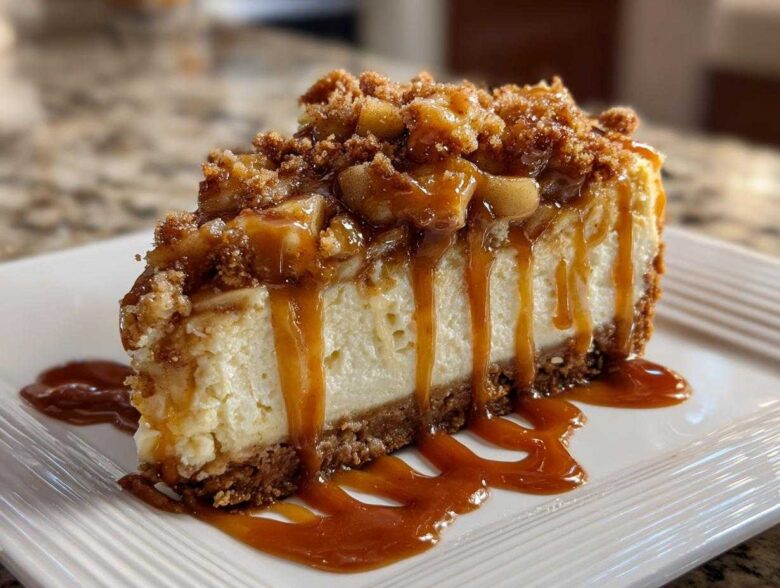
Oh my gosh, you know how sometimes you just can’t choose between sinking your teeth into a piece of flaky apple pie or digging into a decadent, creamy cheesecake? Well, I finally stopped making myself choose! After years of tinkering, tasting, and (let’s be honest) accidentally over-baking a few things, I cracked the code for the ultimate dessert mashup. Get ready, because this Salted Caramel Apple Crisp Cheesecake is going to be your new favorite fall bake. Seriously, this isn’t just a dessert; it’s the perfect Apple Pie Cheesecake experience, giving you spice, crunch, and that smooth tang all in one go.
Why This Salted Caramel Apple Pie Cheesecake is the Best Fall Dessert
When the weather starts turning crisp, I swear my sweet tooth gets ten times stronger, and this is the dessert that satisfies every craving at once. It’s everything you want in an autumn treat, packed into one show-stopping creation. It beats just serving pie OR cheesecake, hands down!
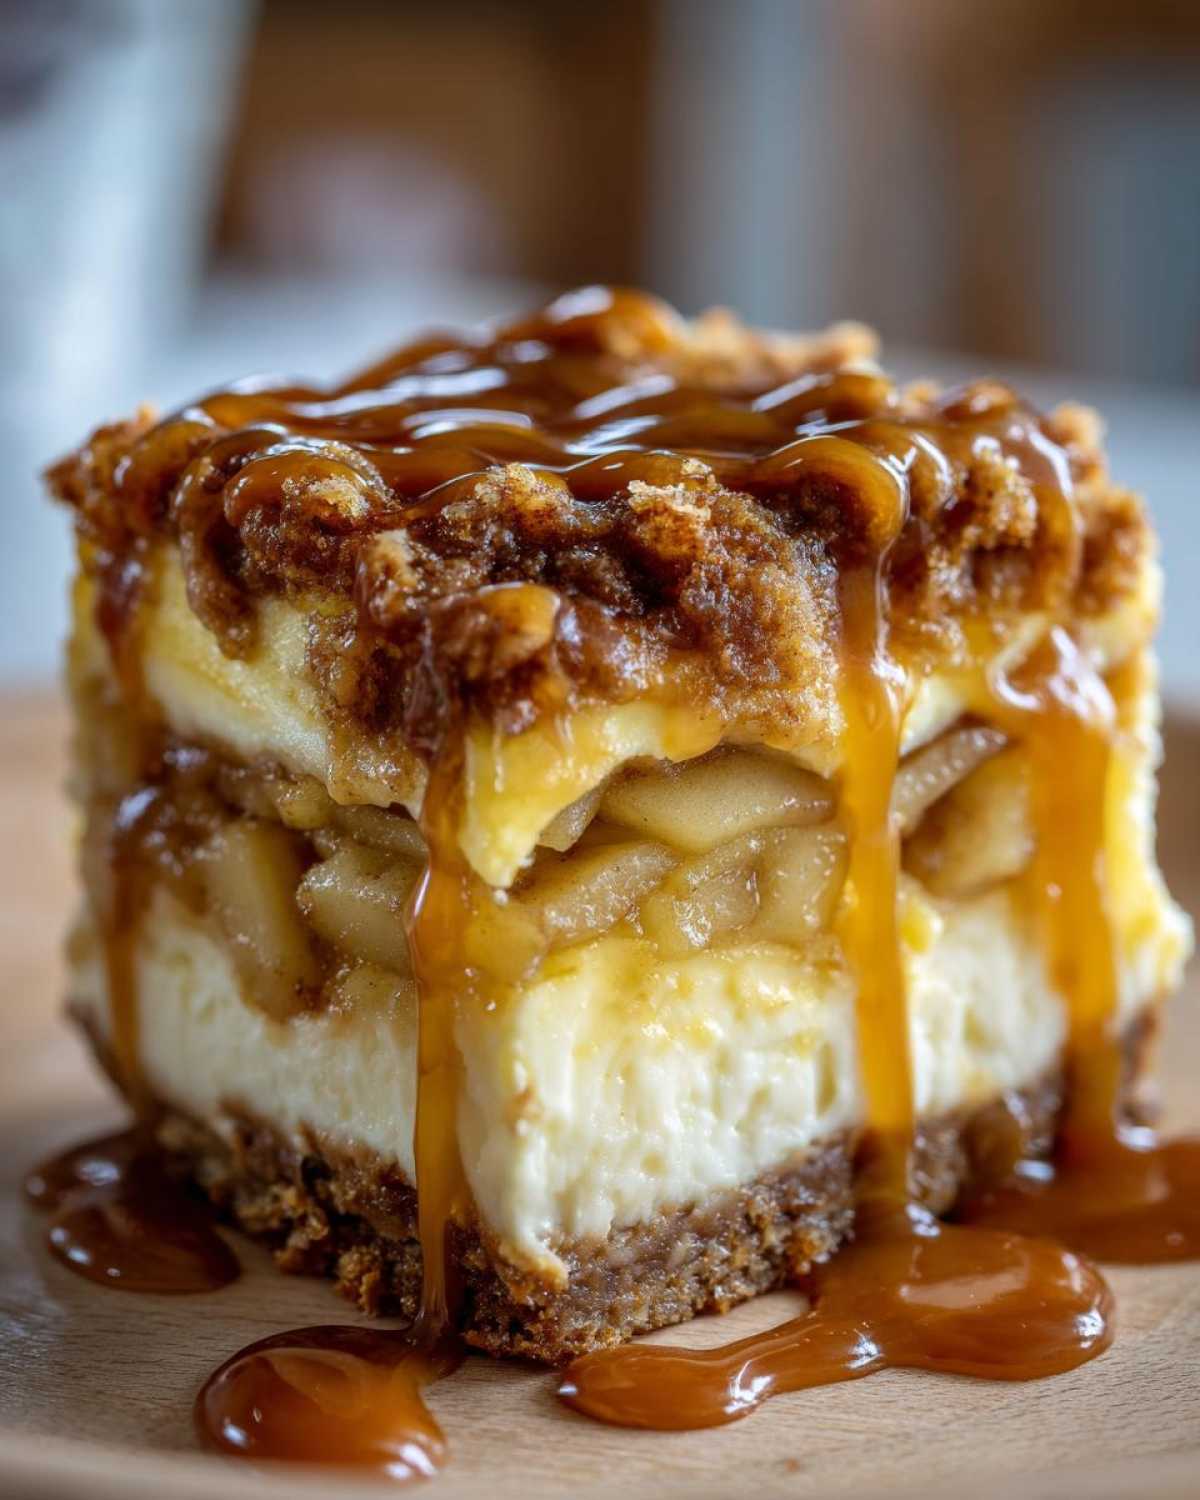
- It looks incredible! The layers of tan crust, white filling, golden apples, and dark caramel drizzles make it truly photo-worthy for any holiday table.
- It balances sweet and tangy so perfectly. You get the tartness from the apples cutting through the richness of the cheese.
- It hits all the cozy notes—cinnamon, brown sugar, and buttery oats.
Texture Contrast: Creamy Filling Meets Crisp Topping
Honestly, this contrast is what makes it truly delicious. Imagine that incredibly smooth, cool cheesecake layer melting right alongside that warm, slightly chewy, buttery apple crisp. You get a little crunch from the oats and crumbs in every single forkful. It’s just so satisfying!
The Ultimate Apple Pie Cheesecake Experience
We’re talking about taking everyone’s favorite holiday flavors and jamming them together smartly. This isn’t just a cheesecake with apples plopped on top. We are capturing the spirit of the classic apple pie cheesecake, but we kicked it up a notch with that salty, sticky caramel drizzle. Trust me, once you try this layered dessert mashup, you won’t go back to the basics!
Gathering Ingredients for Your Apple Pie Cheesecake Recipe
Okay, this is the part where we gather our arsenal! You can’t make the ultimate apple pie cheesecake without the right components. I’ve listed absolutely everything you need below, but the secret really is the quality. Make sure that cream cheese is truly soft—I mean, *really* soft—or you’ll end up with tiny lumps, and nobody wants a lumpy cheesecake!
Crust Components for the Graham Cracker Crust Desserts
For the base hug that holds this whole masterpiece together, we need simple crumb goodness. We are baking this crust slightly, which gives it a nicer bite before chilling. If you are doing the no-bake version later on, you can skip baking this part entirely, but the ingredients are the same:
- 1 1/2 cups graham cracker crumbs
- 1/4 cup granulated sugar (just a little bit extra sweetness!)
- 6 tablespoons unsalted butter, melted
Crafting the Creamy Cheesecake Filling
This is where the magic happens. The key to a stunningly smooth texture is time! Let that cream cheese sit out until you can easily press your finger into it. That ensures you get that signature, dreamy Creamy Cheesecake Filling:
- 3 (8 ounce) packages cream cheese, softened
- 1 1/2 cups granulated sugar
- 1 teaspoon vanilla extract
- 1/4 cup sour cream (this adds just the right amount of tang!)
- 3 large eggs
The Cinnamon Apple Topping and Crisp Elements
This topping is what takes us straight from ‘cheesecake’ territory into ‘pie’ heaven. I always use Granny Smith apples here because their tartness really sings against the sweet filling. If you love spice, don’t skimp on that cinnamon!
- 2 cups diced apples (Granny Smith or Honeycrisp)
- 1/4 cup brown sugar (for that deep molasses flavor)
- 1/4 cup all-purpose flour
- 1/4 cup rolled oats
- 1/4 cup cold unsalted butter, cubed
- 1/2 cup salted caramel sauce (for drizzling later—be generous!)
Step-by-Step Instructions for Salted Caramel Apple Pie Cheesecake
Alright, let’s get baking! This process has a few moving parts—the crust, the filling, and the separate crisp topping—but if you follow the timing, you’ll have yourself a showstopper. Don’t panic about the cooling time; that’s actually crucial for preventing those yucky cracks. We’re going for perfection here, remember?
Preparing and Baking the Cheesecake Base
First things first: preheat your oven to 350 degrees F. Now, listen up, because this step is important for keeping the water out, even if we aren’t doing a full water bath. Wrap the outside of your 9-inch springform pan super tightly with heavy-duty aluminum foil. I usually use two big overlapping sheets. You want to make sure no moisture can sneak in while it bakes!
Mix up your crust ingredients—crumbs, the little bit of sugar, and melted butter. Press that mixture down firmly into the base of your wrapped pan. Pop it in for 10 minutes just to set it, then pull it out. While that cools a touch, beat your cream cheese until it’s totally smooth—no lumps! Then, mix in the rest of your filling ingredients, adding the eggs one at a time, mixing barely until they disappear. Pour that lovely cream over the crust.
Bake this beauty for about 45 to 55 minutes. You know it’s done when the edges look set, but the very center still has a little wobble wiggle. That’s the secret! Then, turn the oven OFF, crack the door open a bit, and let it sit in there for a whole hour. Slowly cooling down prevents the cake from collapsing or cracking. Then, wrap it and chill it for at least six hours, but honestly, overnight is way better for the firmest texture.
Assembling the Apple Crisp Topping Separately
While your cheesecake is chilling (or while it’s baking, if you’re a multitasker!), let’s make that amazing topping. In a bowl, toss your diced apples with the brown sugar, flour, and oats. Now, take that cold, cubed butter and use your fingers—yes, your warm fingers—to cut it into the mixture. You are looking for something that looks like coarse, pebbly sand, not a paste. That cold butter makes that crisp topping!
Spread this whole apple mixture onto a small baking sheet lined with parchment paper. We bake this topping all by itself at 350 degrees F for about 15 to 20 minutes. We want those apples tender and the topping golden brown and crunchy—that’s the goal! Once it’s done, let it cool completely before it even thinks about touching your cheesecake. Having this ready before you top the cake makes putting the final Layered Cheesecake Dessert together so much easier.
Final Assembly: Making This Apple Pie Cheesecake Ready to Serve
Once your cheesecake is thoroughly chilled and firm—and I mean ROCK solid—the fun part happens! Carefully undo that springform pan, peel off the foil, and place it on your serving platter. Now, gently layer that cooled, crunchy apple topping evenly over the top surface. Don’t press down; just let it sit beautifully.
Finally, grab that salted caramel sauce. Drizzle it generously all over the apple topping. I usually do crisscross patterns, just to make it look extra intimidatingly delicious. Slice it up, and boom—you’ve mastered the ultimate apple pie cheesecake. Just remember, serving it cold keeps that creamy texture solid.
Tips for the Perfect Apple Crisp Cheesecake Topping
You know, most people mess up the topping, and then they blame the whole cheesecake! The apple crisp topping is just as important as that creamy base. Since we bake it separately, we have total control over its texture, which is just wonderful. Don’t skip baking this part first; it’s non-negotiable for a truly great crust on your Apple Crisp Cheesecake!
Here’s how you nail that perfect crunch against the soft apples: Make sure the butter you cut in is ice cold, almost frozen. That’s what creates those lovely, crisp little nuggets when they bake instead of just melting into a uniform paste. Also, don’t over-bake those apples! They need to be tender, but since they’ll sit on a cold cheesecake later, you don’t want them turning into applesauce now. Pull them out when they just start releasing their juices but still have some structure left.
If you’re worried about the topping getting soft overnight in the fridge, there’s a trick! Store the topping in an airtight container right on the counter, not in the fridge! The fridge moisture is the enemy of crispness. Then, right before you serve your amazing Apple Pie Cheesecake, just sprinkle that beautiful topping on cold. Perfect texture every time!
Making a No Bake Apple Pie Cheesecake Variation
Now, I know not everyone has an oven free, or maybe you just want something super quick when that cheesecake craving hits you out of nowhere! Believe me, I totally get it. Sometimes you just don’t want to deal with the foil wrapping and the slow cooling process. That’s why I always include notes on how to whip up a killer No Bake Apple Pie Cheesecake version for those inevitable lazy days.
The key here is ditching the eggs and the baking entirely, obviously. But we need structure! Instead of relying on baking to set the filling, we rely on fat and chilling hard. You ditch the 1 1/2 cups of sugar we used in the baked version and bring in powdered sugar instead. Powdered sugar dissolves way better in no-bake recipes, preventing that grainy texture.
Here’s the big secret: you need volume and stability. After beating your softened cream cheese with vanilla and powdered sugar, you need to fold in 1 cup of heavy whipping cream that you’ve whipped stiffly on its own. Think of it like incorporating air clouds! That whipped cream is what gives the filling its lift and allows it to set up firm overnight in the fridge, just like that amazing No Bake Apple Pie Cheesecake filling should.
You’ll still use the graham cracker crust, but you skip that initial 10-minute bake. Just mix the melted butter and crumbs, press it in, and pop the whole thing in the freezer for about 20 minutes to firm up while you make the filling. Once poured over, just give it that good 8 hours (or overnight!) in the fridge, and you’re golden. Top it with your already-prepared apple crisp topping and that salted caramel, and nobody will ever know you skipped the oven!
Serving Suggestions for Your Layered Cheesecake Dessert
Now that you’ve gone to all this trouble creating a show-stopping Layered Cheesecake Dessert, you absolutely have to make sure the presentation matches the flavor! This amazing apple pie cheesecake is perfect for Thanksgiving, Christmas, or even just a fancy Sunday dinner. It looks so impressive right out of the pan.
When you serve it, leave that caramel drizzle to the last second—it looks best when it’s still slightly goo-ey and running down the sides of the crisp topping. A tiny dollop of softly whipped cream dusted with ground cinnamon on the side of each plate really elevates things, doesn’t it? And honestly, serving this rich dessert alongside a warm cup of coffee or maybe a strong maple latte? Perfection.
Storage and Reheating Instructions for Apple Pie Cheesecake
Whew, you made an entire Apple Pie Cheesecake, and now you have glorious leftovers! If you managed to have any leftover, that is—sometimes my family attacks the kitchen before I can even slice mine properly!
The most important rule for storing any cheesecake, especially one loaded with fruit like ours, is keeping it covered and cold. If you have leftovers of this glorious dessert, you absolutely must keep it refrigerated. I use a big cake dome with a tight seal, but if you don’t have one, just cover the plate tightly with plastic wrap. Make sure the plastic wrap doesn’t actually touch the topping, though!
We really want to preserve that creamy texture, and chilling is what keeps the apple pie cheesecake perfectly firm, like it should be. It tastes even better the next day, by the way! The spices in the apple crisp topping really have time to sink into the apples overnight, making them even more deliciously complex.
Here’s my main tip for keeping the crunch factor high: if you made the apple crisp topping completely separately (which I highly recommend!), don’t put it back on the cheesecake until you are ready to serve the slices. If you completely cover the whole cake with the crisp topping and caramel, and then refrigerate it for days, that topping is going to get soggy. No one wants a soggy crisp!
So, my method looks like this: Store the plain, chilled cheesecake tightly wrapped. Keep the cooled, leftover apple crisp topping in a small, airtight container on the counter (not the fridge!) so it stays crisp. When you’re ready to enjoy another slice of your heavenly apple pie cheesecake, just slice the cake, warm up your leftover caramel sauce slightly if you want it drizzly, top with a scoop of the separate crisp topping, and enjoy that perfect texture contrast all over again!
Frequently Asked Questions About This Apple Pie Cheesecake Recipe
It’s so common to have questions when you’re tackling a big dessert mashup like this! Don’t worry about asking anything silly; I’ve fielded countless questions when I first developed this recipe and I’m happy to share the shortcuts and fixes I learned the hard way. We want your homemade cheesecake experience to be flawless!
Can I use pre-made apple pie filling instead of fresh apples for this apple pie cheesecake?
Oh, the temptation of convenience! Yes, you technically *can* use canned apple pie filling if you are really short on time, but I have to warn you: it changes the game completely. That commercial filling is already very sweet and usually quite runny. If you use it, skip adding any extra sugar or flour to the canned stuff, and definitely bake it separately for a shorter time, maybe only 10 minutes, just to get it warm. For the *best* result, though, stick to the fresh apples; that tartness is what balances the richness of the Apple Pie Cheesecake Recipe.
What is the best way to prevent cracks in my homemade cheesecake?
Cracks happen because of temperature shock! That’s the number one reason. Remember how I told you to turn the oven off and leave the cake inside for an hour? That slow cool-down is your best friend. Also, make sure your eggs aren’t ice cold when you mix them in, but the *biggest* tip is not to overmix the eggs—mix them just until they disappear. Over-beating adds too much air, and air expands too fast while baking, causing the top to collapse and crack. Slow and gentle is the way to go for a perfect surface!
How far in advance can I make the Salted Caramel Apple Pie Cheesecake?
Since this is a baked cheesecake, it needs a good, long chill to set up properly, but it actually tastes better the second day! I recommend assembling the whole thing—crust, baked filling, and chilling—at least 12 hours before you plan to serve it. This lets the flavors truly deepen, making it the ultimate Salted Caramel Apple Pie Cheesecake. However, remember my tip: keep the apple crisp topping stored separately until just before serving so that crunch stays amazing!
Nutritional Estimates for Your Apple Pie Cheesecake Slice
I always say enjoy the treat first and worry about the details later, but if you’re curious about what you’re enjoying, here are some rough estimates for one slice of this glorious dessert. Keep in mind that these are just ballpark figures since they depend on the exact brands of ingredients you use, like exactly how much caramel you drizzle!
- Serving Size: 1 slice
- Calories: 450
- Sugar: 45g
- Fat: 28g
- Carbohydrates: 48g
- Protein: 7g
This is definitely an indulgence, but every single calorie is worth it for this incredible Cheesecake with Fruit Topping experience. Keep enjoying your baking!
Share Your Autumn Baking Recipes Success
Now, I’ve told you everything I know about making this incredibly dreamy Apple Pie Cheesecake! I really, truly want to see how yours turned out. Did you add extra cinnamon? Did you manage to keep the crisp topping totally separate? Please, don’t keep it a secret!
Head over to my social pages and tag me in your photos! Leave me a rating and a comment right here on the recipe page sharing your favorite part—was it the creamy filling or the salty caramel drizzle? Your feedback always inspires my next baking adventure. Happy holidays!
Nutritional Estimates for Your Apple Pie Cheesecake Slice
I always say enjoy the treat first and worry about the details later, but if you’re curious about what you’re enjoying, here are some rough estimates for one slice of this glorious dessert. Keep in mind that these are just ballpark figures since they depend on the exact brands of ingredients you use, like exactly how much caramel you drizzle!
- Serving Size: 1 slice
- Calories: 450
- Sugar: 45g
- Fat: 28g
- Carbohydrates: 48g
- Protein: 7g
This is definitely an indulgence, but every single calorie is worth it for this incredible Cheesecake with Fruit Topping experience. Keep enjoying your baking!
Share Your Autumn Baking Recipes Success
Whew, we made it! I’ve told you everything I know about making this incredibly dreamy apple pie cheesecake! Now, honestly, the best part for me is seeing all your beautiful bakes pop up online. I really, truly want to see how yours turned out. Did you manage to get that apple crisp topping perfectly crunchy against the cool filling?
Please, don’t keep your triumphs a secret! Head over to my social pages and tag me in your photos when you’ve got that gorgeous slice of Salted Caramel Apple Pie Cheesecake ready to go. Let me know what you thought in the comments below—did you leave it plain, or did you totally load it up with extra caramel?
Your feedback always inspires me, so leave me a rating and tell me if this is officially your new favorite holiday cheesecake idea. Happy baking, friends!
PrintSalted Caramel Apple Crisp Cheesecake
A rich, creamy cheesecake topped with cinnamon-spiced apples and a buttery crisp topping, finished with salted caramel sauce.
- Prep Time: 30 min
- Cook Time: 65 min
- Total Time: 7 hours 35 min
- Yield: 12 servings
- Category: Dessert
- Method: Baking
- Cuisine: American
- Diet: Vegetarian
Ingredients
- 1 1/2 cups graham cracker crumbs
- 1/4 cup granulated sugar (for crust)
- 6 tablespoons unsalted butter, melted
- 3 (8 ounce) packages cream cheese, softened
- 1 1/2 cups granulated sugar (for filling)
- 1 teaspoon vanilla extract
- 1/4 cup sour cream
- 3 large eggs
- 2 cups diced apples (such as Granny Smith or Honeycrisp)
- 1/4 cup brown sugar (for topping)
- 1/4 cup all-purpose flour (for topping)
- 1/4 cup rolled oats (for topping)
- 1/4 cup cold unsalted butter, cubed (for topping)
- 1/2 cup salted caramel sauce (for drizzling)
Instructions
- Preheat your oven to 350 degrees F. Wrap the outside of a 9-inch springform pan tightly with heavy-duty aluminum foil.
- Prepare the crust: Mix graham cracker crumbs, 1/4 cup sugar, and melted butter. Press firmly into the bottom of the prepared pan. Bake for 10 minutes. Let cool slightly.
- Prepare the filling: Beat the softened cream cheese until smooth. Gradually beat in 1 1/2 cups sugar, vanilla extract, and sour cream until combined. Beat in eggs one at a time, mixing just until incorporated. Pour the filling over the cooled crust.
- Bake the cheesecake for 45 to 55 minutes, or until the edges are set but the center still slightly jiggles. Turn off the oven, prop the door open slightly, and let the cheesecake cool in the oven for 1 hour. Remove and cool completely on a wire rack. Chill for at least 6 hours, or preferably overnight.
- Prepare the apple crisp topping: In a small bowl, combine diced apples, brown sugar, flour, and oats. Cut in the cold cubed butter using your fingers or a pastry blender until the mixture resembles coarse crumbs.
- Bake the crisp topping separately: Spread the apple mixture on a small baking sheet lined with parchment paper. Bake at 350 degrees F for 15 to 20 minutes, until apples are tender and topping is golden brown. Let cool.
- To serve, carefully remove the cheesecake from the springform pan. Top the chilled cheesecake with the cooled apple crisp topping. Drizzle generously with salted caramel sauce before slicing and serving.
Notes
- For a No-Bake version, use a pre-made graham cracker crust and substitute the cream cheese filling ingredients with 16 ounces of softened cream cheese, 1 cup powdered sugar, 1 teaspoon vanilla, and 1 cup heavy whipping cream whipped to stiff peaks. Do not bake; chill for 8 hours.
- You can prepare the apple crisp topping a day ahead and store it covered in the refrigerator.
- Use high-quality salted caramel sauce for the best flavor contrast.
Nutrition
- Serving Size: 1 slice
- Calories: 450
- Sugar: 45g
- Sodium: 250mg
- Fat: 28g
- Saturated Fat: 17g
- Unsaturated Fat: 11g
- Trans Fat: 0.5g
- Carbohydrates: 48g
- Fiber: 2g
- Protein: 7g
- Cholesterol: 95mg