

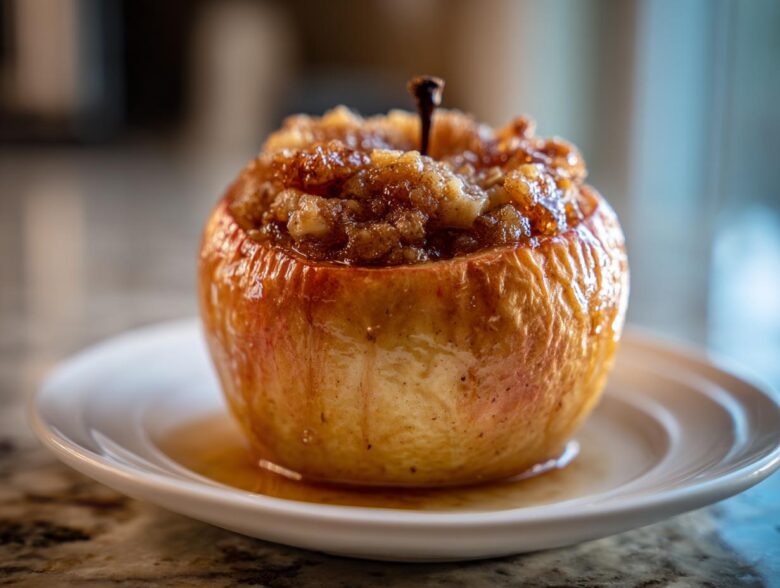
When that first chill hits the air, you know what I crave: something warm, spiced, and deeply comforting, right? Forget fussy pies for a minute! I’ve spent years perfecting the very best baked apple recipe you could ever ask for. This isn’t some complicated pastry; it’s the simplest way to create an unbelievably tender fruit dessert using just pantry staples. Trust me, making a classic whole baked apple is my absolute favorite way to kick off the cozy autumn treats season. If you love baking fruit desserts, you’ll want to check out my guide for a caramel apple crisp too! My mouth waters just thinking about that sweet, cinnamon-spiced filling bubbling up over the edges!
Why This Is the Best Baked Apple Recipe You Will Ever Make
Honestly, I think people are intimidated by baking apples, but this straightforward method makes it so simple. This really is the most easy baked apples recipe you’ll ever find! I have a dozen apple dessert ideas floating around, but I always come back to these whole ones because they deliver exactly what you want.
- The prep time is ridiculously fast—like ten minutes max!
- You get perfectly tender baked apples every single time without overcooking them.
- It uses ingredients I already have, like oats and brown sugar, which is great for spontaneous sweet cravings.
- It’s the ultimate crowd-pleaser for family dinners; everyone gets their own little sweet package.
If you’re looking for something quicker than a pie but just as satisfying, try throwing these together. You can see how I use similar flavors in my apple cinnamon overnight oats for breakfast!
Gather Ingredients for Your Classic Baked Apple Filling
Okay, let’s talk apples! For this recipe, you need firm, sturdy apples that won’t just turn to mush when they hit the heat. I swear by Honeycrisp or Fuji; they hold their shape beautifully. We are making four of these beauties today, so grab four medium apples. The filling is so simple, mostly pantry things! You need that wonderful, dark, *packed* brown sugar—don’t scoop it lightly—along with oats, cinnamon, and a tiny whisper of nutmeg. Don’t forget the little pieces of cold butter to melt over the top; they help everything blend.
For more delicious apple snacks, you should check out my recipe for apple oatmeal breakfast cookies!
Expert Tips for Preparing Your Baked Apple
Before we even turn on the oven, we need to talk technique, because that’s what turns good baked apples into truly incredible ones. Learning how to bake apples in the oven so they are tender but not soupy comes down to two main things: picking the right apple and coring carefully. Since this recipe yields four servings, make sure you grab four apples that are roughly the same size. This ensures they all cook evenly at the same time, which is crucial!
You want apples that stay firm—Granny Smith is okay if you like tart, but Honeycrisp or Fuji are my jam—because softer apples tend to collapse. When you core them, go slow and steady. You need a cavity for all that yummy spice mix, but you absolutely must leave about a half-inch of apple intact at the bottom. If you cut through the bottom, all your lovely brown sugar and butter will just leak out into the pan, and you’ll end up with watery syrup instead of a gorgeous, filled baked apple.
Choosing the Right Apples for a Perfect Baked Apple
So, why firm apples? They have less internal water content and more pectin, which keeps their structure strong against the heat. If you use something super soft like Red Delicious, you’ll end up with delicious apple sauce instead of a whole apple dessert! We are aiming for four servings, so keep your apples uniform in size so you don’t have one rock-hard apple next to a mushy one when they come out of the oven. For pairing inspiration later, check out my famous classic apple pie lattice crust recipe!
Step-by-Step Instructions for Tender Baked Apples
Now that your apples are prepped and waiting, it’s time for the oven magic! First things first: turn that oven up to 375 degrees Fahrenheit, or 190 Celsius if you prefer metric. While it heats, grab a small baking dish—just a saucer-sized one will work—and give it a quick grease. We need a little water in the bottom of that dish to create steam, which helps keep the apples from drying out while they cook.
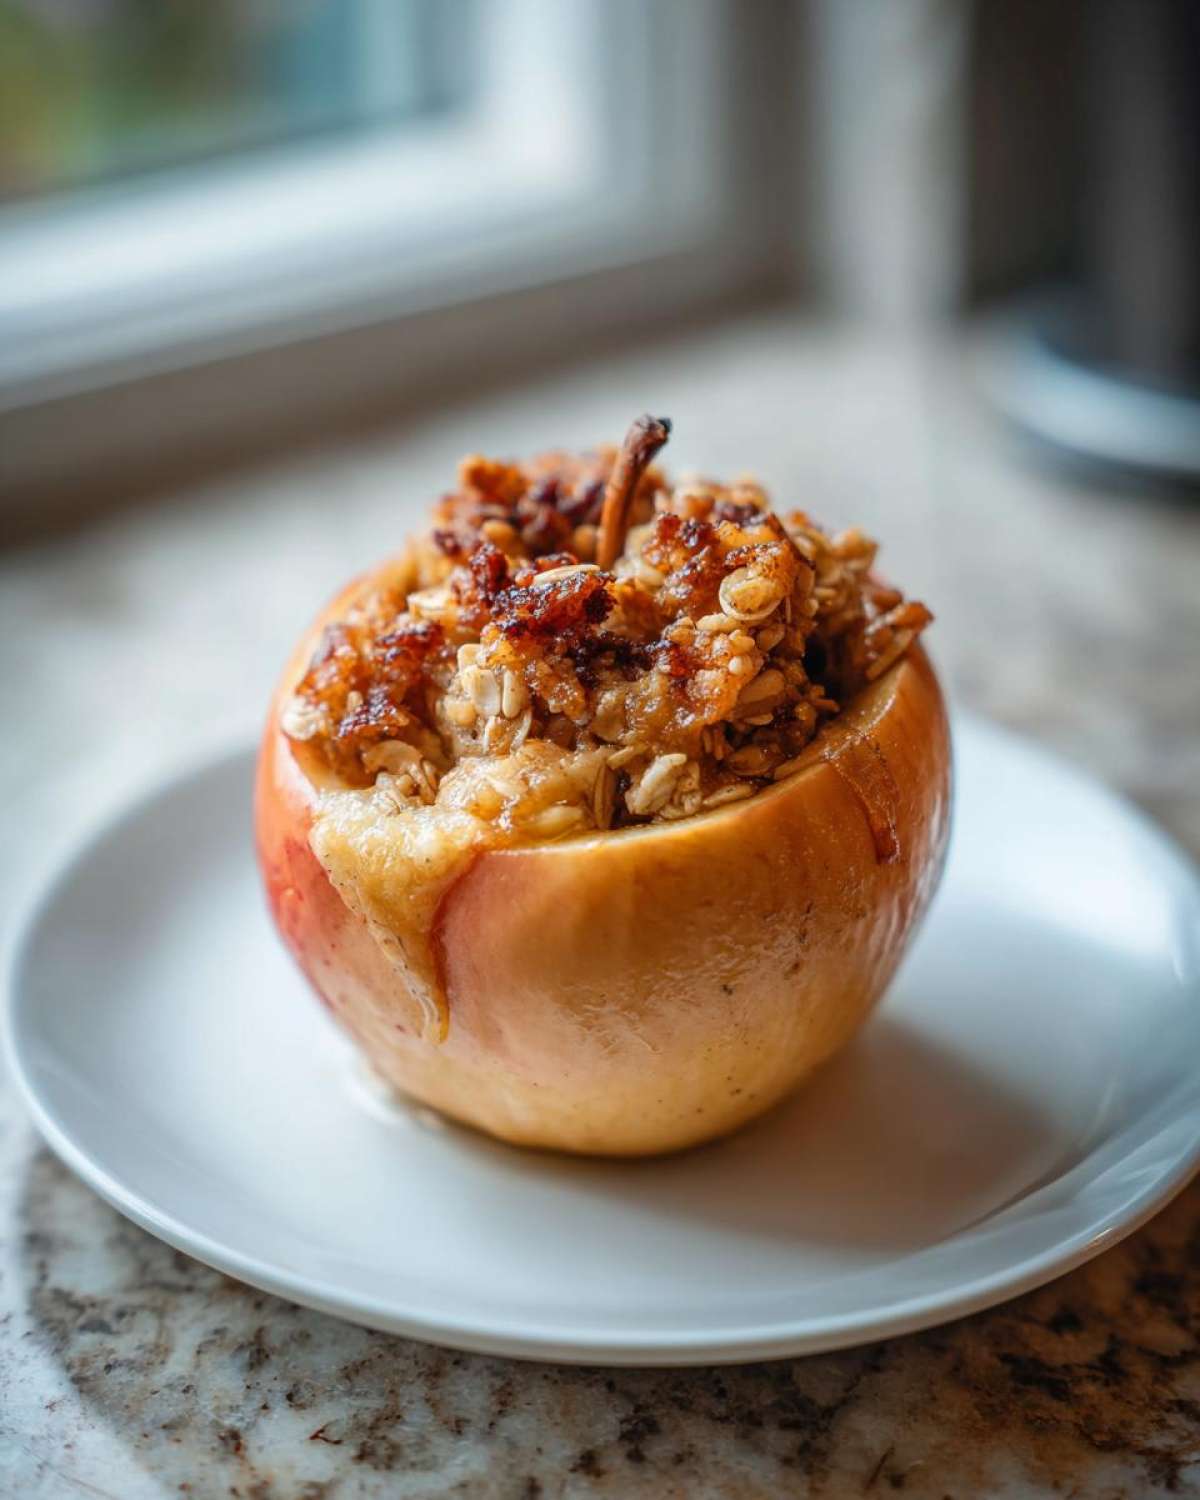
Next, we fill them up! Gently press that gorgeous, spiced oat mixture right into the cored center of each apple until it’s packed down nicely. Then, the essential step that makes these the best baked apple treats: tuck 2 or 3 tiny pats of cold butter right onto the top of the filling in each one. That butter melts down into the oats and creates the richest sauce.
Place your stuffed apples into the prepared dish and pour that 1/4 cup of water into the bottom around them. Into the oven they go for about 35 to 45 minutes. Pay attention here: halfway through the baking time, pull them out quickly, and spoon some of that warm buttery water right over the tops of the apples. This basting keeps the tops nice and soft! You’ll know the baked apple is done when you can easily poke a fork right through the flesh. Once they come out, let them rest for five minutes before serving warm. See? So simple! You can see how I incorporate similar sweet flavors in my maple brown sugar baked oatmeal, too!
Customizing Your Cinnamon Baked Apples: Variations and Swaps
While this classic brown sugar baked apples recipe is almost perfect as is, I love swapping things up depending on what I have handy. This is such a forgiving and simple apple recipe, which is why it’s one of my go-to fall apple desserts! If you’re looking to lighten things up slightly, you can swap out about half of that brown sugar for pure maple syrup. It adds such a beautiful, deep caramel note when it bakes down.
Feeling extra fancy? Toss in a quarter cup of chopped pecans or walnuts into your oat mixture before stuffing the apples. They add the best little crunch against that tender baked apple flesh. And since I know some of you are busy, remember the note on baked apple slices!
Seriously, if you don’t want to mess with coring, just thinly slice your apples, toss them with *all* the filling ingredients, and bake them in a small dish for about 20 minutes instead. It’s a totally different texture but just as delicious. If you want to use up a whole batch of apples, you should definitely try my slow cooker apple butter recipe!
Serving Suggestions for Your Warm Apple Snack
Oh my gosh, that moment right after they come out of the oven is the best! The aroma alone makes them some of my favorite cozy autumn treats. These warm apple snacks are begging for something cold and creamy on top to contrast that hot, spiced filling. I usually serve them right away in their little baking dish so everyone can enjoy them piping hot.
If you want the full indulgence—and why wouldn’t you?—a big scoop of vanilla ice cream on top is non-negotiable. The way the ice cream melts right into that cinnamon-oat mixture? Perfection! Otherwise, I love drizzling heavy cream over mine, or sometimes I break out the jar of homemade caramel sauce. You can find a winner for every sweet craving! If you love fruit desserts served warm like this, you have to try my skillet peach cobbler a la mode!
Storing and Reheating Your Homemade Baked Apples
Since these baked apples are so unbelievably tasty, you might have leftovers—though I doubt it! If you do end up with any, just let them cool completely on the counter first. Then, pop them into an airtight container and stash them in the fridge. They keep really well for about three to four days; the texture stays surprisingly good!
When you’re ready for your next warm apple snack, reheating in the oven is always my top choice for the best texture. Just pop the apple onto a small baking sheet at about 300 degrees for about 10 minutes until it’s steaming hot again. If you’re in a huge hurry, you can microwave it for about 30 seconds, but be warned—that intense heat can make the texture a little softer than baking does. Either way, they are divine!
Frequently Asked Questions About the Baked Apple
Can I use Granny Smith apples for this easy baked apples recipe?
You absolutely can! Granny Smith apples are firm, which is great because they won’t turn to mush. Now, they are much tarter than Honeycrisp, so when you use them, you might want to increase the brown sugar in the filling slightly—maybe an extra tablespoon—to make sure you get that sweet, comforting flavor we want for our apple dessert for family gatherings. They bake up beautifully!
How do I know exactly when my baked apple is done?
This is my favorite question! Don’t just rely on the time listed. The most important clue is the smell—your kitchen will smell completely incredible when they are almost ready. Visually, the skin might start to wrinkle a tiny bit. But the real test, the one I always use, is the fork test. Take a clean fork or a small, sharp knife and gently pierce the side, near the core. If the fork slides in with almost no resistance, it’s done. If you feel any hard crunch, pop them back in for another five minutes.
Can I prepare these baked apples ahead of time?
Yes, you certainly can make these ahead, which is great if you’re hosting! You can assemble the whole thing—core the apples, mix the filling, stuff them, and place them in the baking dish—cover it tightly, and keep it in the fridge for up to 24 hours. Just add that 1/4 cup of water to the bottom of the dish right before you put them in the oven, and maybe add 5 to 10 extra minutes to the baking time since they are starting cold.
Is this recipe considered one of the healthier apple dessert ideas?
It really depends on what you compare it to! Compared to a traditional apple pie with a full crust, yes, it’s much healthier because we are skipping all that processed white flour and heavy butter crust. We are using whole oats, and you control the sugar amount. If you want to make it even healthier, you can cut the brown sugar in half and add 1/4 cup of chopped pecans for healthy fats. I always have more simple apple recipes available on my main recipe page!
Estimated Nutritional Snapshot for This Baked Apple Recipe
Okay, I always like to give you an idea of what you are digging into, even though I’m more about flavor than counting every single gram! Based on how I assemble this recipe, here is a rough nutritional snapshot for one whole baked apple. Just look at those numbers—not bad for such a cozy treat!
Per serving, you’re looking at about 250 calories. We’ve got 40 grams of carbs coming mostly from the apple and brown sugar blend. The fat content sits around 10 grams, which is mostly from that lovely pat of butter we melt on top to make the filling so rich. Of course, these numbers are just estimates based on standard ingredients, so if you load yours up with extra ice cream, you know things change!
PrintClassic Whole Baked Apples

Make tender whole baked apples filled with a simple mixture of oats, brown sugar, and cinnamon in your oven.
- Prep Time: 10 min
- Cook Time: 40 min
- Total Time: 50 min
- Yield: 4 servings
- Category: Dessert
- Method: Baking
- Cuisine: American
- Diet: Vegetarian
Ingredients
- 4 medium firm apples (like Honeycrisp or Fuji)
- 1/4 cup rolled oats
- 1/4 cup packed brown sugar
- 1 teaspoon ground cinnamon
- 1/4 teaspoon ground nutmeg
- 2 tablespoons unsalted butter, cut into small pieces
- 1/4 cup water
Instructions
- Preheat your oven to 375 degrees Fahrenheit (190 degrees Celsius). Lightly grease a small baking dish.
- Wash the apples. Use a melon baller or small spoon to carefully core the center of each apple, leaving the bottom intact so the filling stays inside. Do not cut all the way through the bottom.
- In a small bowl, mix the rolled oats, brown sugar, cinnamon, and nutmeg.
- Stuff the cavity of each apple with the oat mixture. Press the filling down gently.
- Place 2 or 3 small pieces of butter on top of the filling in each apple.
- Pour the 1/4 cup of water into the bottom of the prepared baking dish.
- Place the stuffed apples into the dish.
- Bake for 35 to 45 minutes, or until the apples are tender when pierced with a fork. Basting the apples with the pan juices halfway through baking helps keep them moist.
- Remove from the oven and let cool slightly before serving.
Notes
- Serve warm with a scoop of vanilla ice cream or a drizzle of heavy cream.
- If you prefer baked apple slices instead of whole apples, slice the apples thinly and toss them with the filling ingredients, then bake in a dish for 20 minutes.
- For a richer flavor, substitute maple syrup for some of the brown sugar.
Nutrition
- Serving Size: 1 apple
- Calories: 250
- Sugar: 35
- Sodium: 5
- Fat: 10
- Saturated Fat: 6
- Unsaturated Fat: 4
- Trans Fat: 0
- Carbohydrates: 40
- Fiber: 6
- Protein: 3
- Cholesterol: 25