

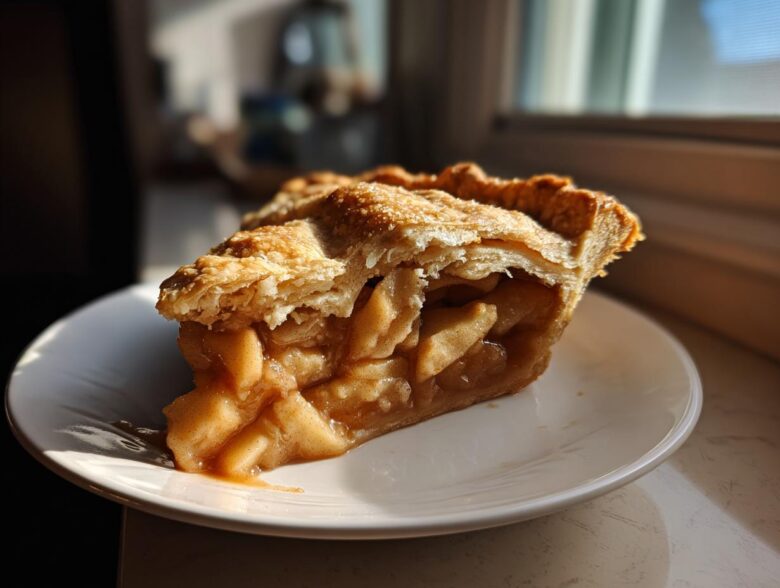
There’s nothing quite like the smell of a real, honest-to-goodness homemade apple pie baking on a cool afternoon. It just pulls everyone into the kitchen, doesn’t it? Forget those store-bought messes; when you make it from scratch, you control the magic. Trust me, after years of messing things up—soggy bottoms, cracked tops, and crusts tough enough to tile a roof—I finally landed on the absolute best homemade apple pie recipe. This one guarantees you get that perfectly flaky pie crust and an impossibly spiced filling that sets up just right. This classic apple pie is what fall memories are made of!
Why This Homemade Apple Pie Recipe Stands Out (E-E-A-T Focus)
What makes this particular apple pie leap ahead of the hundred other recipes out there? It comes down to tackling the two biggest pie pitfalls head-on: a crust that shatters delightfully, not chews sadly, and a filling that stays juicy, not soupy. Following these directions ensures you get that picture-perfect slice every single time. This isn’t just any dessert; this is the gold standard for your table. I’ve incorporated lessons learned from generations to make your homemade apple pie experience wonderful.
Here’s how we lock in that amazing texture:
Achieving the Perfect Flaky Pie Crust Tutorial
The magic here is temperature, truly! Your butter and water absolutely MUST be icy cold when mixing up the dough. We aren’t aiming for smooth; we are aiming for “coarse crumbs with some pea-sized pieces of butter.” Those butter chunks create steam pockets when they hit the hot oven, which is exactly what gives you that unbelievable lift and flakiness. Remember, handle it minimally! If the dough starts getting warm in your hands, stop immediately and pop it back in the fridge. You can check out my lattice guide if you want to get fancy with the top later!
The Secret to Best Apple Pie Filling That Holds Its Shape
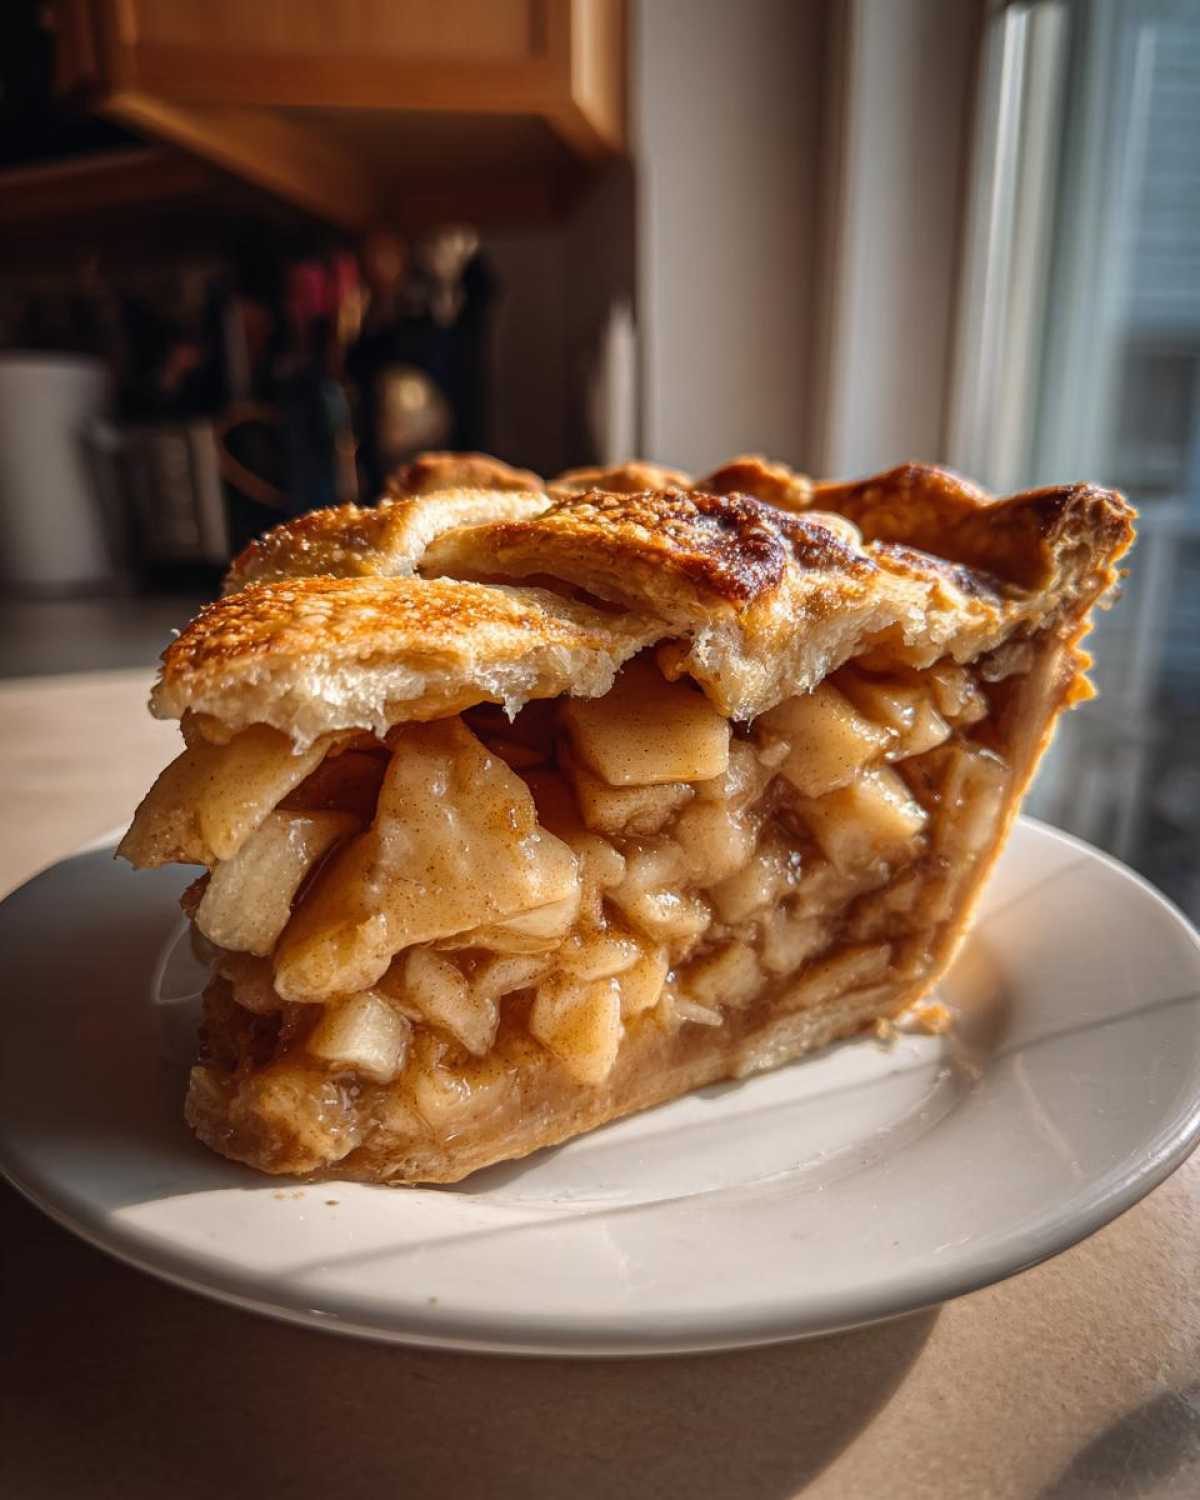
Nobody wants a watery dessert, right? The key to the best apple pie filling that holds its shape perfectly involves two little tricks. First, we use the right mix of apples—something tart and something sweet. Second, we toss the slices with a blend of sugar and flour before they ever hit the crust. That flour doesn’t just sweeten things up; it acts like a tiny sponge. When that mixture heats up, it thickens beautifully around the apples. This method guarantees you get firm, sweet slices held in a thick, luxurious sauce, never a puddle. That’s why this recipe is reliable!
Ingredients for Your classic apple pie recipe
Alright, let’s talk about what you need to gather up! I always lay everything out on the counter before I start; it keeps me calm and organized, especially when dealing with cold butter. Having your ingredients ready makes this whole process feel easy, even though we are making everything completely from scratch. Keep your butter and water chilling until the very last second, though!
Here is the full list for your double-crust beauty:
For the Flaky Pie Crust
- 2 1/2 cups all-purpose flour
- 1 teaspoon salt
- 1 cup (2 sticks) unsalted butter, very cold and cubed
- 1/2 cup ice water, plus a little extra if the dough seems dry
For the Sweet Spiced Apple Filling
- 6 medium baking apples (I swear by mixing Granny Smith and Honeycrisp!)
- 3/4 cup granulated sugar
- 1/4 cup packed light brown sugar
- 2 tablespoons all-purpose flour
- 1 teaspoon ground cinnamon
- 1/4 teaspoon ground nutmeg
- 1/8 teaspoon ground allspice
- 1 tablespoon lemon juice
- 2 tablespoons unsalted butter, cut into tiny dots for topping the apples
For the Finish
- 1 large egg, beaten thoroughly with 1 teaspoon water (that’s your egg wash!)
- 1 tablespoon coarse sugar for sprinkling on top
Step-by-Step Instructions for Homemade Apple Pie From Scratch
This is where the actual fun starts! Don’t be intimidated by making your apple pie dough from scratch; it’s actually faster than you think, provided you keep everything cold. We’re going to move quickly through the mixing here to ensure our final product is worthy of the title “best ever.”
Making the Flaky Pie Crust Dough and Chilling
First things first: the crust! Whisk your flour and salt in a big bowl. Now, toss in those cubes of ice-cold butter. You need a pastry blender or your clean, cool fingertips to work that butter in. Keep pressing and cutting until you see chunky crumbs—some should look like coarse sand, but you’ve got to have those pea-sized pieces of butter left over! That’s the secret insurance policy for flakiness. Next, drizzle in that ice water slowly until the dough just barely holds together when squeezed. If you have to work it a lot, you’ve gone too far! Divide that shaggy dough into two equal disks, wrap them tight in plastic wrap, and forget about them in the fridge for at least an hour. That chill time is non-negotiable for beginners!
Mixing the Cinnamon Spice Apple Dessert Filling
While the dough is resting, we tackle the filling. In a separate, large bowl—don’t use the crust bowl!—gently toss your sliced apples with both the granulated and brown sugar, the flour, and all those wonderful spices: cinnamon, nutmeg, and allspice. You want everything coated, but seriously, be gentle! If you smash the apples now, they turn to mush when baking. Finish with a splash of lemon juice for brightness. Once everything is lightly coated, dot the top of that glorious mixture with those tiny pieces of extra butter.
Assembling and Baking Your Double Crust Apple Pie
Now we bring it together! Preheat that oven to 425°F. Pull out one dough disk and roll it into that beautiful 12-inch circle, then carefully lay it into your 9-inch pie plate. Spoon in all those spice-coated apples. Take the second dough disk, roll it, and lay it right over the top. Trim the overhangs and crimp those edges together tight so none of the filling escapes. Cut some decorative slits in the top—this is how the steam gets out, otherwise, bye-bye bottom crust! Brush it all with your simple egg wash and toss on that coarse sugar. Here’s the critical baking part: Bake hot at 425°F for just 15 minutes. Then, without opening the oven door unless you absolutely must, knock the temp down to 375°F and bake for another 40 to 50 minutes. If you see the crust edges threatening to burn before the filling bubbles nicely, just wrap a strip of aluminum foil loosely around the rim. Patience pays off when you cool it for three hours!
Tips for the Ultimate Apple Pie Success
Even with the perfect recipe, a few little veteran baker tips can take your pie from great to legendary. Honestly though, the biggest mistake people make? Rushing the resting time! That three-hour cool-down period after baking isn’t an optional suggestion; it’s mandatory science. If you slice into it too soon, all that beautiful spiced apple filling leaks out because the starches haven’t had time to fully set up. Be strong! Also, remember keeping those crust ingredients cold isn’t just about flakiness—it’s about flavor too. A warmer crust tastes heavier; a cold crust tastes rich and buttery.
Selecting the Best Apples for Apple Pie
I always tell people you need a blend of personalities in your pie! If you just use Granny Smith, it can be a little too sharp, and if you use only something sweet like a Gala, it might turn to mush before it tastes cooked. My absolute favorite combination, the one I use every time for the classic apple pie recipe, is half tart Granny Smith for structure and half Honeycrisp or Braeburn. That combo gives you firmness, tartness, and a lovely sweetness, all coated perfectly in those spices we mixed in earlier. Seriously, don’t underestimate the power of mixing your varieties!
Variations: From Dutch Apple Pie to Easy Apple Pie Recipe
Now that you’ve mastered the absolute best double-crust apple pie, you deserve to know this base is flexible! You don’t always need two full sheets of homemade dough, even though I highly recommend it. If you’re in a rush, this recipe pivots beautifully into an easy apple pie recipe just by swapping out the top crust for pre-made, store-bought pastry. It’s my secret for those Tuesday night dessert emergencies!
If you want crunch instead of a second crust, pivot to a Dutch style. For a genuine dutch apple pie recipe, just skip rolling out that top lid. Instead, mix up a quick streusel topping—oats, flour, butter, and brown sugar—and sprinkle that generously over your filling before baking at the lower temperature. It gives you that wonderful crunchy contrast against the soft apples. Either way you go, this filling recipe holds that signature spiced flavor that defines a great, traditional apple pie.
Serving Suggestions for This Comfort Food Dessert
You did it! You baked the perfect apple pie, and now comes the best part—eating it. Honestly, even the most perfect pie benefits from a little something extra on the side. Nothing beats that classic pairing: a generous, melting scoop of high-quality vanilla bean ice cream balancing the tartness of the apples. It’s the definition of a perfect comfort food dessert, warmed just right.
If ice cream feels too heavy, grab the whipped cream! I like mine freshly whipped with just a hint of maple flavor, which pairs beautifully with the cinnamon in the spices. For a cozy drinks pairing, try enjoying a slice alongside a homemade latte. That spiced aroma mixing with the pie scent is just heavenly.
Storage & Reheating Instructions for Your Apple Pie
This old fashioned apple pie is just as good the next day, provided you store it right. Because the filling has a lot of sugar and fresh fruit, you actually don’t need to refrigerate it right away. It can sit safely on the counter, covered loosely with plastic wrap, for up to two days. Don’t seal it tight, or the bottom crust will get soggy! If you need it to last longer than that, then definitely move it to the fridge.
When you are ready for a second helping, don’t just microwave it! That ruins the crust texture we worked so hard for. Reheat individual slices in a toaster oven or a conventional oven set around 325°F until it’s warmed through. This crisps up that flaky crust again perfectly. Three hours of cooling time makes reheating simple!
Frequently Asked Questions About Making Apple Pie
I get so many questions about this recipe—which just shows how much everyone loves pie! These are the things that pop up most often when folks are tackling their first classic apple pie recipe. I’m happy to clear up any confusion so your bake day goes smoothly! If you want something apple-y for breakfast later, check out these oatmeal breakfast cookies.
Can I use store-bought crust for this apple pie recipe?
Oh, absolutely, you totally can! If you’re pressed for time, grabbing a good quality, refrigerated crust makes this an easy apple pie recipe in a flash. Just know that while it’s convenient, it won’t capture that melt-in-your-mouth, buttery perfection you get from making the dough for homemade apple pie from scratch. But for a quick fix? Go for it!
Why is my apple pie filling runny?
That is the ultimate pie tragedy! Usually, a runny filling comes down to one of three things. First, you didn’t let it cool long enough—seriously, wait the full three hours! Secondly, you might have used apples that were way too juicy without compensating with enough flour. Or, you might have skipped dotting that extra butter on top of the filling just before capping it with the top crust. That butter helps create that rich thickening sauce as it bakes.
How far in advance can I bake this Thanksgiving pie recipe?
You can go ahead and bake your pie a day before your big event, which is a lifesaver for Thanksgiving pie recipes! Bake it fully, let it cool completely, and store it under a loose dome or cake cover at cool room temperature. If you try assembling it the day before, the crust can absorb too much moisture overnight. Baking it fresh truly gives you the best flake, even if you bake it the morning of the gathering.
Estimated Nutritional Data for This Apple Pie
I’m all about making incredible desserts, but I also believe in knowing what we’re eating! Now, remember, since this is an old-fashioned recipe made with real butter and honestly delicious amounts of sugar, these numbers aren’t shocking, but they are good to know. Since every slice of pie is a little different based on how thick you cut it or exactly how much butter you dot on top of the filling, these figures are solid estimates based on the recipe amounts we used.
Before you dive into that slice—maybe with a dollop of cream or a nice scoop of vanilla ice cream—take a peek at what you’re working with:
Here is the estimated breakdown per slice:
- Serving Size: 1 slice
- Calories: 420
- Fat: 24g (Keep that butter use in mind!)
- Saturated Fat: 15g
- Carbohydrates: 55g
- Sugar: 35g (That’s the joy speaking right there!)
- Protein: 4g
- Fiber: 3g
A little disclaimer, because I’m not a nutritionist, just a very enthusiastic baker: These are estimates based on standard ingredient measurements we used here in the kitchen. The exact count can change slightly depending on the apples you pick or the brand of sugar you grab. But honestly, when the pie tastes this good, these numbers are just details, right?
Share Your Perfect Apple Pie Experience
Oh, I truly hope you loved making this pie as much as I love sharing it with you! There is nothing more satisfying than pulling a beautiful, golden-brown homemade apple pie out of your very own oven. It smells like success and pure comfort, doesn’t it?
Now that you’ve let it cool (the hardest part, I know!) and you’ve finally managed to slice into that perfect flaky crust, I desperately want to hear about it! Your feedback truly helps other bakers who are maybe a little nervous about tackling their first scratch crust.
Did you stick with my favorite Granny Smith/Honeycrisp mix, or did you try a different variety? Let me know if you found a new favorite apple for baking! Please take a quick moment right now to hit those five stars if this recipe worked for you.
Drop a comment below. I read every single one, and I love seeing pictures of your beautiful bakes! If you want to see more of my kitchen adventures and behind-the-scenes baking fails and wins, head over to my main blog page. Happy baking, friend!
PrintThe Best Homemade Apple Pie: Flaky Crust and Perfectly Spiced Filling
Make a classic double crust apple pie featuring a tender, flaky crust and a sweet, spiced apple filling that holds its shape.
- Prep Time: 45 min
- Cook Time: 65 min
- Total Time: 110 min
- Yield: 8 servings
- Category: Dessert
- Method: Baking
- Cuisine: American
- Diet: Vegetarian
Ingredients
- 2 1/2 cups all-purpose flour
- 1 teaspoon salt
- 1 cup (2 sticks) cold unsalted butter, cut into cubes
- 1/2 cup ice water, plus more if needed
- 6 medium baking apples (like Granny Smith or Honeycrisp), peeled, cored, and sliced 1/4 inch thick
- 3/4 cup granulated sugar
- 1/4 cup packed light brown sugar
- 2 tablespoons all-purpose flour
- 1 teaspoon ground cinnamon
- 1/4 teaspoon ground nutmeg
- 1/8 teaspoon ground allspice
- 1 tablespoon lemon juice
- 2 tablespoons unsalted butter, cut into small pieces
- 1 large egg, beaten with 1 teaspoon water (for egg wash)
- 1 tablespoon coarse sugar for sprinkling
Instructions
- Prepare the crust: In a large bowl, whisk together the flour and salt. Cut in the cold butter using a pastry blender or your fingers until the mixture resembles coarse crumbs with some pea-sized pieces of butter remaining.
- Gradually add the ice water, one tablespoon at a time, mixing until the dough just comes together. Do not overmix. Divide the dough in half, form each half into a disk, wrap in plastic, and chill for at least 1 hour.
- Prepare the filling: In a large bowl, combine the sliced apples, granulated sugar, brown sugar, 2 tablespoons of flour, cinnamon, nutmeg, and allspice. Toss gently to coat the apples evenly. Stir in the lemon juice.
- Preheat your oven to 425 degrees Fahrenheit (220 degrees Celsius).
- On a lightly floured surface, roll out one disk of dough into a 12-inch circle. Carefully transfer the dough to a 9-inch pie plate. Trim the edges, leaving a 1-inch overhang.
- Pour the apple filling into the crust. Dot the top of the filling with the 2 tablespoons of small butter pieces.
- Roll out the second disk of dough for the top crust. Place it over the filling. Trim the top crust, leaving a 1-inch overhang. Crimp the top and bottom edges together to seal. Cut several slits in the top crust to allow steam to escape.
- Brush the top crust lightly with the egg wash and sprinkle with coarse sugar.
- Bake for 15 minutes at 425 degrees Fahrenheit. Reduce the oven temperature to 375 degrees Fahrenheit (190 degrees Celsius) and continue baking for 40 to 50 minutes, or until the crust is golden brown and the filling is bubbling. If the edges brown too quickly, cover them loosely with foil.
- Cool the pie on a wire rack for at least 3 hours before slicing to allow the filling to set completely.
Notes
- Use a mix of tart and sweet apples for the best flavor balance.
- For an extra flaky crust, keep all ingredients very cold during preparation.
- If you prefer a Dutch Apple Pie, omit the top crust and use a streusel topping instead.
Nutrition
- Serving Size: 1 slice
- Calories: 420
- Sugar: 35g
- Sodium: 250mg
- Fat: 24g
- Saturated Fat: 15g
- Unsaturated Fat: 9g
- Trans Fat: 0g
- Carbohydrates: 55g
- Fiber: 3g
- Protein: 4g
- Cholesterol: 60mg