

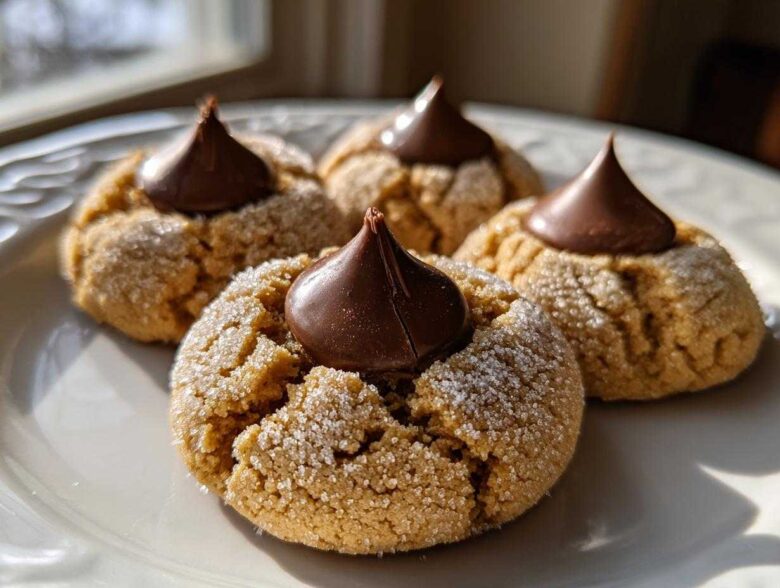
Oh my goodness, if there is one cookie that signals the holidays are officially here, it’s the classic Peanut Butter Blossoms. Seriously, the second I smell that sweet peanut butter dough mixed with vanilla, I know Christmas is right around the corner! Every year, I pull out this exact recipe because I have perfected the art of making these cookies truly soft and deliciously chewy. Forget those dry, crumbly versions you sometimes find—my goal is always that perfect melt-in-your-mouth experience, complete with the signature crackle top and that sweet Hershey Kiss nestled right in the middle.
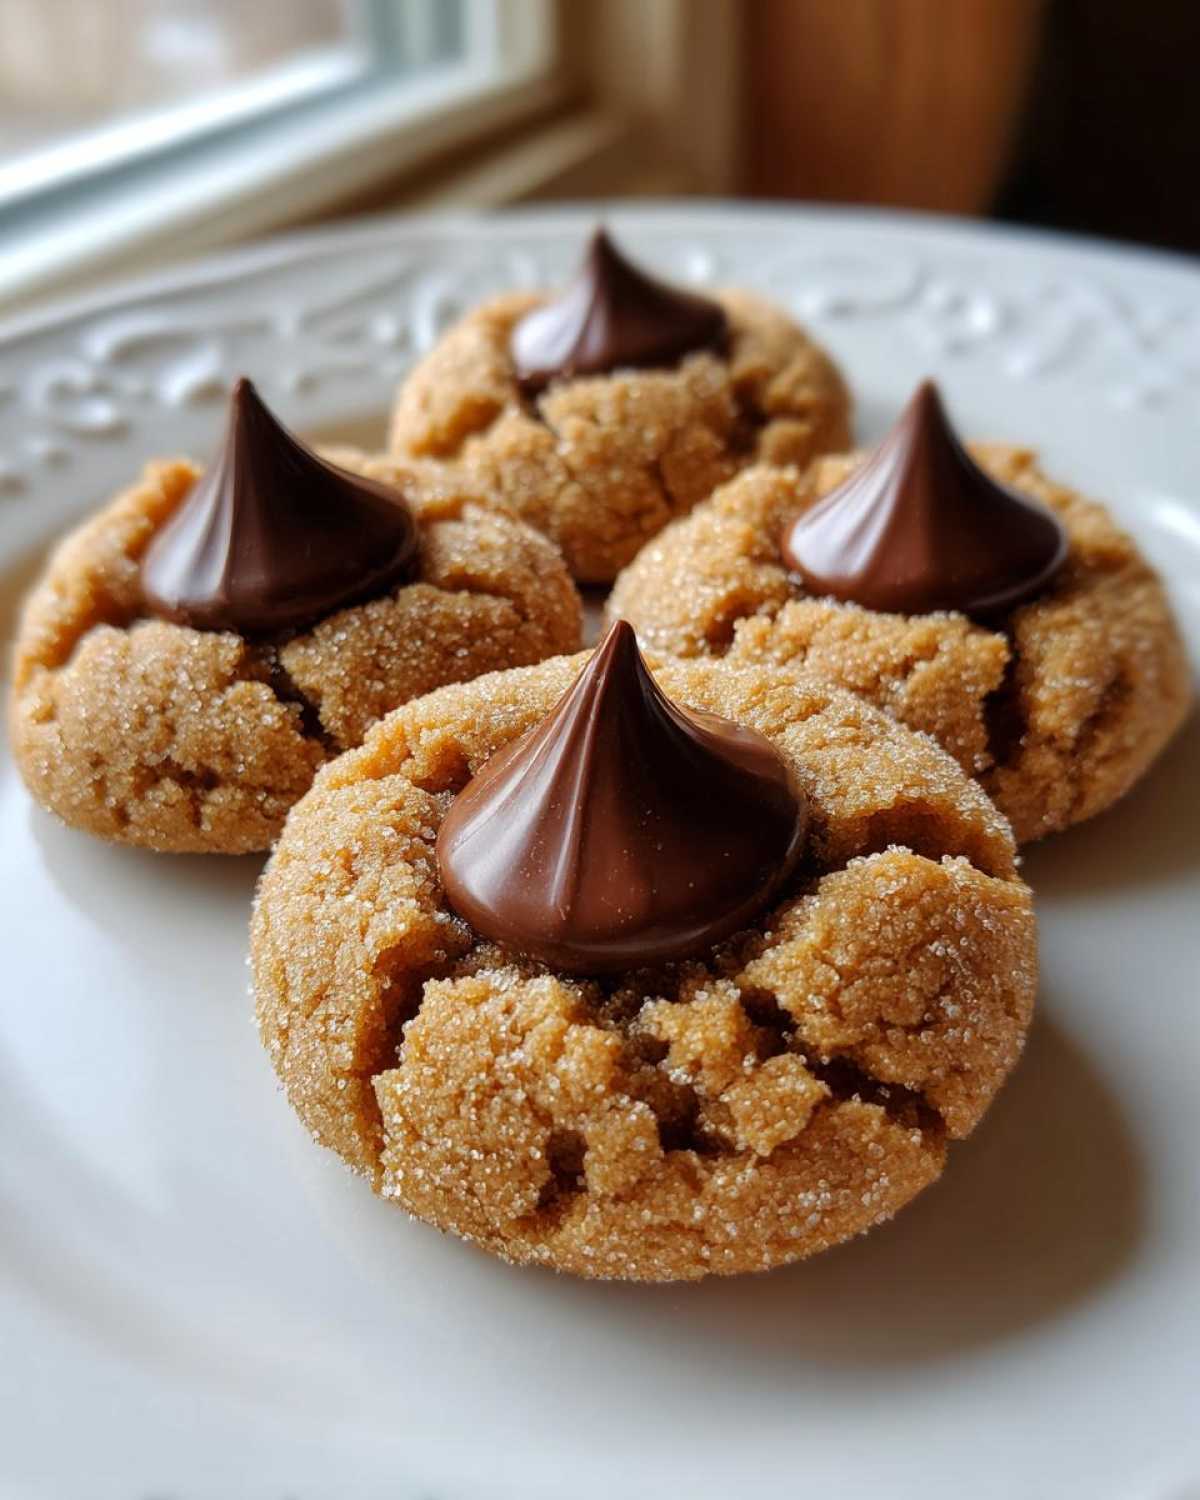
I remember hauling platters of these to every neighborhood cookie exchange my mom had me attend. People would always ask for the recipe because they looked so perfect, but the real magic is in keeping the center gooey while the outside sets up just right. Trust me, once you try this version of the traditional **peanut butter blossoms**, you won’t look back. It really is the best foundation for a family favorite cookie recipe!
Why This is the Best Recipe for Classic Peanut Butter Blossoms (Chewy Results Guaranteed)
I know everyone has *a* recipe for peanut butter blossoms, but ours is different, I promise! The biggest complaint I hear about this classic is that the cookies turn out too crunchy or they spread out into pancakes before baking. That’s usually down to sugar ratios, and that’s where my recipe wins. We use a specific blend of granulated and brown sugar that locks in moisture while still allowing that gorgeous, classic crackle to form on top.
If you’re looking for the legendary **peanut butter blossoms** that everyone fights over at holiday parties, this is it. It delivers exactly what the best Christmas cookie recipes should:
- Signature crackle top that lets you know it’s authentic.
- Soft, slightly puffy centers that practically melt in your mouth.
- Perfect structure to hold that chocolate kiss without crumbling!
Achieving the Perfect Soft Peanut Butter Cookies Recipe Texture
The secret sauce for that amazing Soft Peanut Butter Cookies Recipe feel is really in the fats and sugars. We use softened butter—not melted, *softened*—and pack in that brown sugar. Brown sugar has molasses, right? That molasses is amazing because it keeps the cookie tender long after they’ve cooled down. We don’t want crispy edges; we want a chewy hug in cookie form!
Ingredients Needed for Perfect Peanut Butter Blossoms
Okay, ingredient list time! You know, when we talk about **peanut butter blossoms**, we aren’t messing around. This recipe relies on structure, so measuring precisely is really important here. Don’t just eyeball the flour; it’s tempting, but trust me, the difference between flour measured right and flour scooped with the cup makes these cookies either perfect or a little too crumbly.
Before you even start mixing, make sure everything is ready to go, especially your chocolate kisses—they need to be unwrapped! Also, make sure that butter is truly softened to the right texture. As a quick note about that flour, you can find great info over on our disclaimer page about ingredient handling, but really, take the time to fluff it up before measuring it for the best results!
Here is what you’ll need to gather for about three dozen of these amazing cookies:
- 1 cup unsalted butter, softened (This is crucial! Soft, not melty.)
- 1 cup granulated sugar, plus an extra 1/2 cup reserved just for rolling later.
- 1 cup packed light brown sugar (Don’t pack it too tight, just golden and ready.)
- 2 large eggs (Make sure these aren’t straight from the fridge, let them warm up slightly!)
- 1 teaspoon vanilla extract (Make this good quality, it really shines through!)
- 1 cup creamy peanut butter (Smooth is the way to go for texture here.)
- 2 1/2 cups all-purpose flour (Sifted or just lightly spooned into the cup, your choice.)
- 1 teaspoon baking soda
- 1/2 teaspoon baking powder
- 1/2 teaspoon salt (Even if your peanut butter is salted, a little extra helps!)
- 1 bag (12 ounces) milk chocolate kisses, absolutely unwrapped and ready by the oven!
Step-by-Step Instructions for Chewy Peanut Butter Blossoms
Now for the fun part where we turn that beautiful ingredient list into the absolute best **peanut butter blossoms** you’ve ever made. Don’t stress about the steps; it’s really straightforward, but we have to respect the timing, especially when those chocolate kisses are involved. We’re aiming for a cookie that spreads just a tiny bit in the oven and sets up perfectly. Keep your workstation clean, and let’s get baking! Remember to preheat your oven to 375 degrees F before you start mixing, and have those baking sheets lined with parchment paper ready to go. That parchment paper is your best friend!
Mixing the Dough for Your Peanut Butter Blossoms
First thing’s first: we need to whip that butter and sugar until it’s pale and fluffy. This is where we build air into the dough, making sure they aren’t dense hockey pucks later on. Beat that softened butter, the 1 cup of granulated sugar, and all the brown sugar until it looks light. Then, dribble in the eggs one at a time—don’t rush this! Once the peanut butter and vanilla are mixed in, move to your dry components. Whisk the flour, baking soda, baking powder, and salt separately. Add the wet and dry together slowly and stop mixing the second you don’t see any more streaks of flour. Seriously, overmixing is the enemy of a soft cookie!
Baking and Pressing the Chocolate Kiss on Your Peanut Butter Blossoms
Okay, this is the moment everything hinges on! First, set up your rolling sugar in a shallow dish. Roll those 1-inch dough balls until they are completely coated in the sugar—this is what gives you that classic crackle top. Place them about two inches apart on your lined sheets and bake them for just 8 to 10 minutes. You want the edges to look set, but the middle must still look a little underdone. Immediately, and I mean *immediately*, pull them out and gently press one chocolate kiss right into the center of each one. The residual heat from the warm cookie will melt the bottom of the kiss just enough so it sinks in perfectly when it cools! This technique is why this Chocolate Kiss Cookies Recipe always turns out.
Tips for Success Making Crackly Top Peanut Butter Cookies
Even with my best instructions, sometimes weird stuff happens in the oven! Don’t panic if your first batch of **Crackly Top Peanut Butter Cookies** spreads a little more than you wanted. Usually, if the dough is too warm, they flatten out. If that happens to you, just take the tray out, pop the dough balls into the fridge for about 20 minutes before baking the next batch. Chilled dough bakes up taller, plain and simple!
Also, remember my note about taking them out early? That’s the most important part for keeping those beautiful soft centers. If you wait until they look completely done, they will be overbaked once the chocolate melts and sets.
Ingredient Notes and Substitutions for Peanut Butter Blossoms
So, can you use crunchy peanut butter? You totally can, but the texture will change quite a bit. Crunchy peanut butter adds little bits of nut throughout, so they won’t have that smooth, melt-in-your-mouth texture we are aiming for in these Peanut Butter Blossoms. Salted butter is usually fine; just skip adding that 1/2 teaspoon of extra salt if you do! I always recommend creamy for the best structural results.
Storage and Reheating Instructions for Perfect Peanut Butter Blossoms
Keeping these cookies soft is easy because they are so rich, but we have to be mindful of that chocolate Kiss center! For best immediate results, store your **peanut butter blossoms** in a cookie jar or an airtight container at room temperature. I usually layer them between sheets of parchment paper, mostly because I’m paranoid about the chocolate smudging onto the cookie above it, but they’re generally okay stacked loosely. They stay delightfully soft for about three or four days this way.
Freezing is great for making ahead, especially for your Holiday Baking Classics prep! You can freeze the baked cookies, kisses and all, without any problem at all. Just make sure they are completely cool before you stack them (otherwise, you get melted chocolate blobs). If you’re going to keep them longer than a month, wrap the stack tightly in plastic wrap and then foil. To reheat, just let them thaw on the counter for an hour—no oven needed!
Frequently Asked Questions About Peanut Butter Blossom Cookies
You guys always ask the best questions when baking up holiday treats! Seriously, I love hearing what you’re wondering about before you even start mixing. It’s all about preparation when we’re aiming for the Best Peanut Butter Blossoms. Here are a few things I get asked all the time regarding these simple and wonderful Easy Holiday Cookies.
Can I make these Peanut Butter Blossoms without chilling the dough?
Yes, you absolutely can! That’s the beauty of this recipe; it’s incredibly fast, which is why it’s great for last-minute cookie baking. However, I always mention that if you have a warm kitchen, or if your dough feels really soft when you are rolling those little balls, chill them for 20 or 30 minutes. Chilling helps them hold their shape better and prevents them from spreading too much while baking. But if you’re in a rush, go ahead and roll and bake them straight away!
What is the secret to the signature crackle on Classic Peanut Butter Kiss Cookies?
That crackly top is the hallmark of a great batch of Classic Peanut Butter Kiss Cookies! It comes from two main things working together. First, you must roll the dough ball thoroughly in plain white granulated sugar before it goes into the oven. That sugar coating bakes instantly and cracks as the cookie puffs up underneath it. Second, having the correct balance of leavening agents—that baking soda and powder we used—ensures the cookie puffs up just enough to create those beautiful fissures around the center before it sets!
Nutritional Estimates for Your Homemade Peanut Butter Blossoms
I always feel a little nervous sharing this part, but knowledge is power, right? Since these are made with classic ingredients like butter, brown sugar, and peanut butter, they are definitely a treat! These numbers are just estimates based on the recipe breakdown, so remember they can shift a bit depending on your exact measurements or which brand of peanut butter you choose. Treat these fabulous **peanut butter blossoms** like the special holiday delight they are!
For one cookie, you can expect:
- Calories: Around 180
- Fat: Roughly 10 grams
- Carbohydrates: About 22 grams
- Protein: 4 grams
I always say if you’re enjoying a cookie exchange, you’re probably going to have two or three anyway, so just enjoy every bite! These are worth every calorie!
Share Your Experience Baking These Simple Peanut Butter Treats
Whew! Now that you’ve made a batch of these incredible **peanut butter blossoms**, I’d absolutely love to hear how they turned out for you! Did you get that picture-perfect crackle top? Please leave a comment below and tell me your favorite part—was it the gooey center or the tender crumb? Don’t forget to save this recipe over on your bookmarks so you can find it again next time you’re whipping up quick and easy holiday cookies. Happy baking, friends!
PrintThe Ultimate Soft & Chewy Classic Peanut Butter Blossoms
Make soft, chewy peanut butter cookies with a signature crackle top, finished with a milk chocolate kiss.
- Prep Time: 20 min
- Cook Time: 10 min
- Total Time: 30 min
- Yield: About 3 dozen cookies
- Category: Dessert
- Method: Baking
- Cuisine: American
- Diet: Vegetarian
Ingredients
- 1 cup unsalted butter, softened
- 1 cup granulated sugar, plus 1/2 cup for rolling
- 1 cup packed light brown sugar
- 2 large eggs
- 1 teaspoon vanilla extract
- 1 cup creamy peanut butter
- 2 1/2 cups all-purpose flour
- 1 teaspoon baking soda
- 1/2 teaspoon baking powder
- 1/2 teaspoon salt
- 1 bag (12 ounces) milk chocolate kisses, unwrapped
Instructions
- Preheat your oven to 375 degrees F. Line baking sheets with parchment paper.
- In a large bowl, cream together the softened butter, 1 cup granulated sugar, and brown sugar until light and fluffy.
- Beat in the eggs one at a time, then mix in the vanilla extract and peanut butter until combined.
- In a separate medium bowl, whisk together the flour, baking soda, baking powder, and salt.
- Gradually add the dry ingredients to the wet ingredients, mixing on low speed until just combined. Do not overmix.
- Place the remaining 1/2 cup of granulated sugar in a shallow dish.
- Roll the dough into 1-inch balls. Roll each ball in the extra sugar until fully coated.
- Place the sugared balls about 2 inches apart on the prepared baking sheets.
- Bake for 8 to 10 minutes. The edges should be set, but the centers should still look slightly soft.
- Immediately upon removing the cookies from the oven, gently press one chocolate kiss into the center of each warm cookie. The residual heat will soften the chocolate.
- Let the cookies cool on the baking sheet for 5 minutes before transferring them to a wire rack to cool completely.
Notes
- For the softest cookies, do not overbake. Remove them when the edges look firm.
- If your chocolate kisses are hard to press in, wait one minute longer before adding them.
- You can chill the dough for 30 minutes before rolling if your kitchen is very warm.
Nutrition
- Serving Size: 1 cookie
- Calories: 180
- Sugar: 15
- Sodium: 85
- Fat: 10
- Saturated Fat: 4
- Unsaturated Fat: 6
- Trans Fat: 0
- Carbohydrates: 22
- Fiber: 1
- Protein: 4
- Cholesterol: 20