

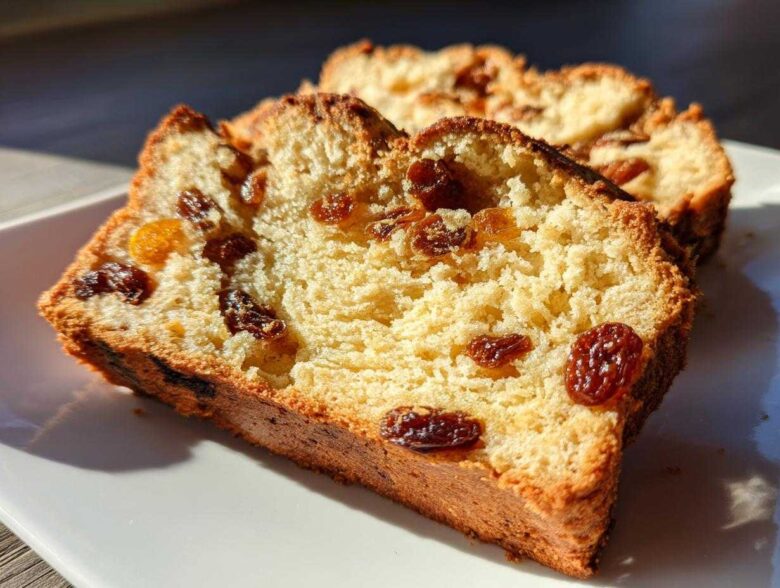
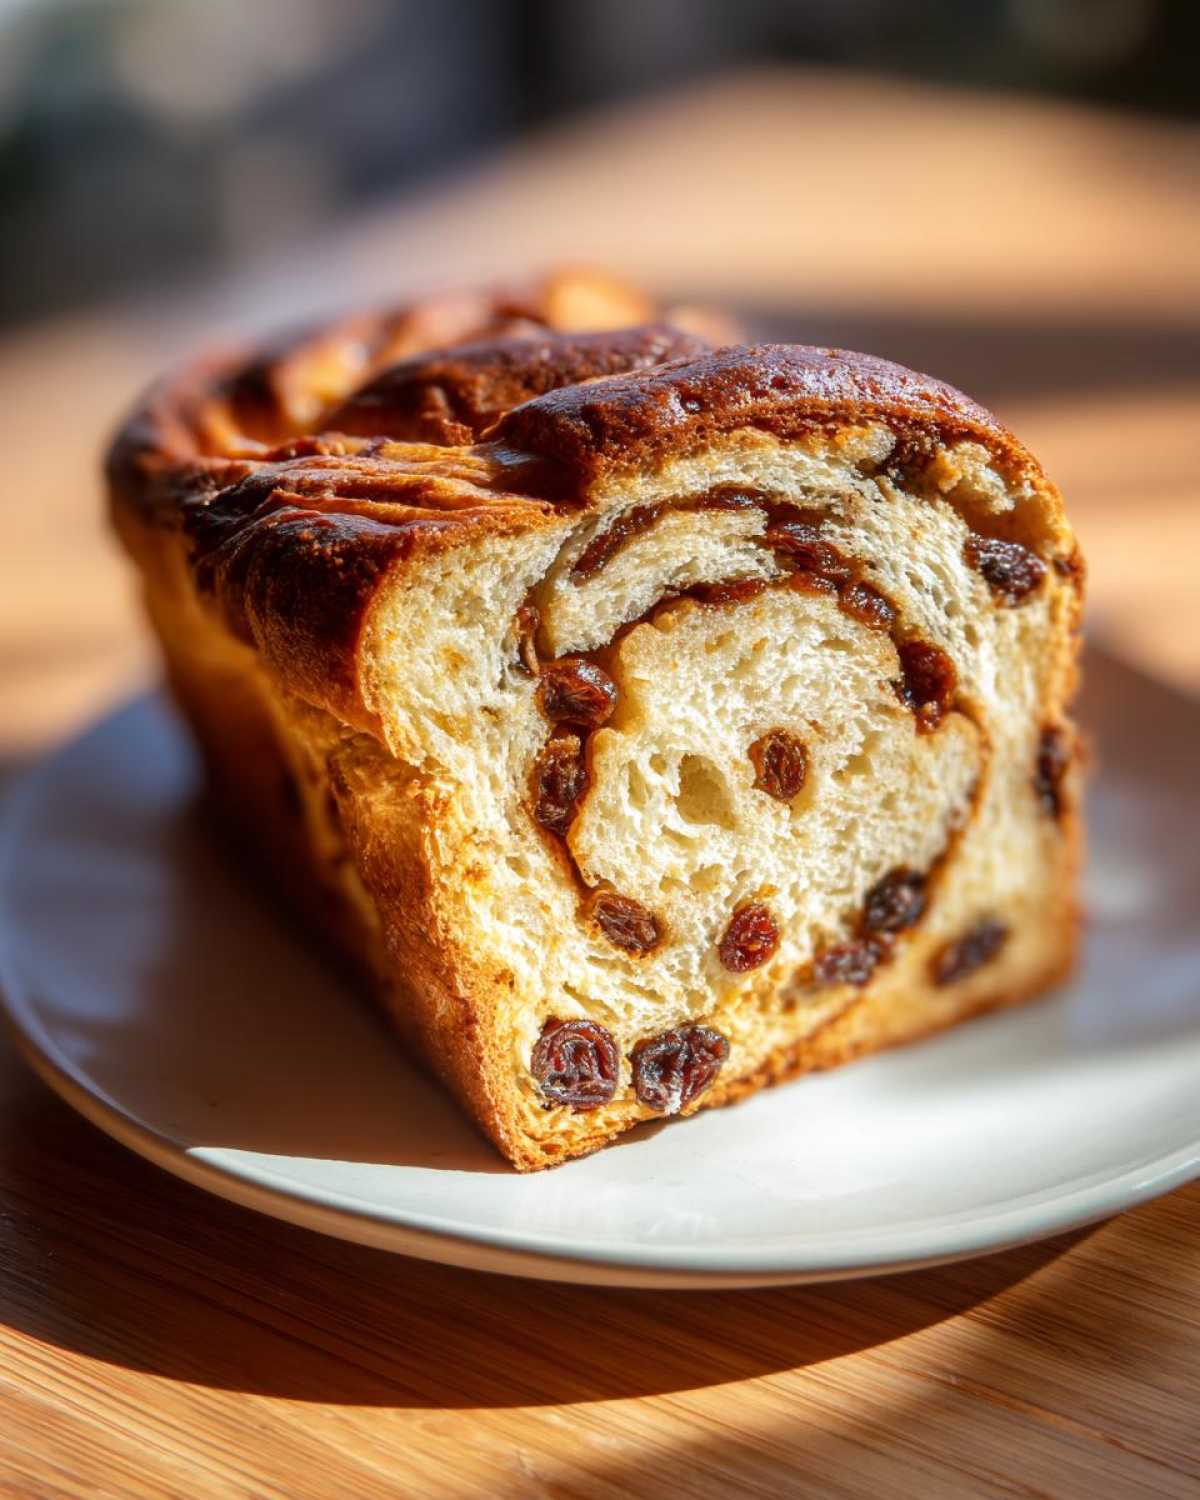
Oh my goodness, the smell of this baking in the oven is just pure comfort, isn’t it? Seriously, nothing beats walking into a kitchen filled with that warm, yeasty scent mixed with cinnamon and sweet raisins. I’ve tried a million variations over the years, but I’m telling you right now—this is *the* recipe. This is the one that delivers the softest, fluffiest homemade **raisin bread** you will ever stick a knife into. I keep it tucked away because it’s the one my family always asks for when they visit. There’s something so wonderfully grounding about making bread from scratch, and this loaf, with its signature swirl, has become my personal baking happy place. If you love a slightly sweet breakfast treat, you’ve come to the right spot!
It’s fantastic on its own, but you absolutely must check out some of my other favorite breakfast recipes when you get a minute. You can find them all right here!
Why This is the Best Raisin Bread Recipe You Will Make
Forget those dry, crumbly loaves you sometimes find—this recipe guarantees a **raisin bread** that stays perfectly soft for days. The magic really comes down to a few key details that ensure maximum fluffy texture. We use melted butter instead of solid fat, which keeps the crumb incredibly tender, and making sure your milk is the perfect temperature is non-negotiable for a speedy, beautiful rise.
If you are looking for that ultimate sweet breakfast bread, trust me, this is it. The blend of cinnamon and brown sugar creates a gorgeous, gooey swirl inside that you just can’t get from a standard recipe. It’s just heavenly!
For a great pairing, you should try whipping up my maple cinnamon latte recipe; it goes perfectly with a thick slice of this warm bread. Grab that recipe here!
Key Features of This Homemade Raisin Bread
- Exceptional softness that lasts long after cooling.
- A rich, defined cinnamon swirl in every slice.
- Unbeatable texture for a satisfying warm raisin toast.
Gathering Your Ingredients for Soft Raisin Bread
Okay, let’s talk supplies! Getting the ingredients right is half the battle when you’re aiming for truly soft **raisin bread**. Don’t just grab anything—a few small details make a huge difference in the final texture. First, that milk needs to be warm, not hot, aiming for that 105 to 115-degree sweet spot so we can wake up that yeast perfectly. Your egg absolutely needs to be at room temperature for the best incorporation!
Also, please measure your brown sugar packed down—that tells the recipe how much molasses goodness we are getting! And yes, we need 3 ½ cups of flour, but always keep a little extra dusting flour handy just in case your dough feels sticky during kneading.
Ingredient Notes and Substitutions for Your Raisin Bread
If you don’t have active dry yeast, you can usually substitute instant yeast, but you can skip that initial foaming step; just mix it right in with the dry ingredients. I love using plump golden raisins because they soak up the moisture beautifully, but standard dark raisins work just fine!
If you only have cold butter, melt it and let it cool down just slightly before adding it to the wet mixture—we don’t want to scramble that egg! For the salt, use regular table salt; kosher salt crystals are too big and can throw off the hydration ratio just a tiny bit. Quality ingredients really do make the difference when you want that incredible rise and soft inner crumb for your loaf.
Essential Equipment for Making Homemade Raisin Bread
You don’t need a fancy stand mixer or an artisan baking stone for this, thankfully! We are keeping things straightforward for this beautiful loaf of **raisin bread**. You’ll definitely want a large mixing bowl—big enough to handle all that kneading! The most important piece of hardware is your pan: a standard 9×5 inch loaf pan is absolutely required. Don’t try to use a springform or a deeper casserole dish, or your baking time will get completely thrown off.
And please, please, please, make sure you have a wire cooling rack ready to go. Slicing into this bread when it’s piping hot makes it gummy, so we need that air circulation underneath immediately after it comes out of the oven. Speaking of great things to have in your kitchen, if you’re looking for another easy breakfast bake, you might love these apple oatmeal cookies!
Step-by-Step Instructions for Perfect Raisin Bread
Now we get to the fun part—turning simple ingredients into this amazing loaf of **raisin bread**! The process is straightforward, but nailing the little details is what separates a good loaf from one you want to brag about. We need to work patiently through the activation, the kneading, and finally, that gorgeous swirl. Remember, bread loves a warm spot, so make sure your kitchen isn’t chilly!
Once you’re done baking, make sure you check out my collection of other simple bread recipes—they use a lot of the same techniques!
Activating Yeast and Mixing the Dough for Raisin Bread
First thing’s first: the yeast. Pour that warm milk into your bowl—it should feel warm like a baby’s bottle, definitely not hot enough to burn your finger. Sprinkle the yeast right on top and just leave it alone for five minutes. If you see foam forming, you’re good to go! That means the yeast is happy and ready to work its magic. Next, stir in the granulated sugar, the room-temperature egg, the melted (and slightly cooled!) butter, and salt. Now, add the flour in batches, mixing until it’s shaggy. Don’t panic if it looks messy; that’s exactly how it should look before you start kneading.
Kneading and Creating the Cinnamon Swirl in Your Raisin Bread
Time to put in a little elbow grease! Turn that shaggy dough out onto a lightly floured surface. We want to knead this **raisin bread** dough for about 5 to 7 minutes. You’ll know you’re done kneading when it feels smooth, springs back when you poke it gently, and is generally elastic. Flatten that beautiful dough into a rectangle. This is critical for the swirl! Sprinkle those raisins, the cinnamon, and the brown sugar evenly across the surface. Roll it up tightly like you’re making a jelly roll, making sure you pinch that final seam closed really well so the filling stays locked in.
Proofing and Baking This Comfort Food Bread
Place that log, seam-side down, into your greased loaf pan. Cover it loosely—I use plastic wrap, but a kitchen towel works too—and let it rise somewhere warm for about an hour to an hour and a half. You want it doubled in size; look for it reaching just over the top edge of the pan. While it’s doing that final push, set your oven to 375°F. We need that heat ready to go! Bake it for about 30 to 35 minutes. You’re looking for a lovely golden brown top, and the center should hit 200°F if you have a thermometer. Immediately transfer it to your wire rack to cool down!
Tips for the Softest Raisin Bread Every Time
Even with the perfect instructions, sometimes achieving that legendary soft **raisin bread** texture requires a few insider tricks. If you want to make this the absolute **best raisin bread recipe** you’ve ever tried, listen close! My number one tip is to never skip cooling it completely on the rack. Slicing it early traps steam, and that steam turns into moisture that turns mushy later.
Don’t overcrowd the raisins; too many spoils the dough structure. Also, remember my rule about the internal temperature—200°F is your target. If you pull it out too soon, it looks okay on top but crumbles to pieces when you slice it. For a gorgeous presentation, try brushing the top with a bit of melted butter right when it comes out of the oven for that extra rich crust sheen.
If you’ve enjoyed learning the best ways for **baking with raisins**, I have a whole category dedicated to just that kind of delicious technique! Check out all the great ways to use them here.
Storing and Reheating Your Delicious Raisin Bread
Now that you have this incredible, soft **raisin bread**, you’ll want to keep it perfect! The absolute best way to store it is tightly wrapped. Seriously, wrap that cooled loaf securely in plastic wrap first, and then stick it in an airtight container or a Ziploc bag. This stops it from drying out.
It stays wonderfully soft on the counter for about three days this way. When you’re ready for that perfect slice of **warm raisin toast** the next morning, just pop a slice in the toaster or microwave it for about ten seconds. It instantly brings back that fresh-from-the-oven experience!
Serving Suggestions for This Sweet Breakfast Bread
Honestly, this bread is a star all on its own, but a little something extra never hurt anyone! When this **sweet breakfast bread** is fresh—and I mean just barely warm—a slather of really good, salty butter is pure heaven. It just melts right into the soft crumb when you slice it thick.
If you’re serving it up for a weekend brunch, I highly recommend having a bowl of good quality cream cheese ready to go. Tangy cream cheese cuts through the sweetness of the cinnamon swirl so nicely. And of course, you can never go wrong with your favorite jam, maybe something tart like raspberry or strawberry to balance things out.
If you’re looking for a great, quick breakfast idea that uses similar warm spices, you have to try my apple cinnamon overnight oats. They are perfect for the mornings when you are rushing out the door! You can find that recipe here!
Frequently Asked Questions About Making Raisin Bread
I get so many questions about this **raisin bread**, especially from people trying to fit it into busy schedules! Here are some of the things I hear most often.
Can I make this raisin bread without kneading the dough?
That’s a great question, especially if you’re looking for a true **no knead raisin bread** experience! While I highly recommend the 5-minute knead for that soft texture, you *can* get away with a very gentle mix if you’re pressed for time. You’ll need to let the dough rest for about 20 minutes after combining the flour, giving the gluten time to relax on its own before you add the fillings. The texture won’t be quite as elastic, but it will still be tasty!
Is there a faster way to make this bread? Maybe a bread machine?
If you have a bread machine, you can absolutely use it for mixing and the first rise! You’d just use the dough cycle, which handles the kneading for you. For a full **bread machine cinnamon raisin** loaf, you’d follow your machine’s wet/dry order, add the cinnamon/sugar/raisins during the last few minutes of kneading, and then bake it in a traditional loaf pan after the machine finishes its cycle. It saves your arms, but you still need an oven for the best golden crust!
My raisins always sink to the bottom—how do I fix that?
Ah, the sinking raisin epidemic! This is almost always because the raisins weren’t tossed with a little bit of flour before adding them to the dough. I always toss mine with about a tablespoon of the flour reserved from the total amount. That light coating helps them cling to that beautiful cinnamon swirl instead of sliding straight down to the bottom during the rise and bake of your **raisin bread**.
If you’re looking for more simple loaf ideas, I’ve put together a great guide on making more easy homemade raisin bread variations!
Nutritional Estimates for Homemade Raisin Bread
I know so many of you like to keep track of what you’re eating, even when it’s delicious comfort food like this loaf! When you’re making bread from scratch, the numbers can vary a little based on the exact type of flour or butter you use, so keep that in mind.
These estimates are based on cutting the loaf into 16 even slices. It’s amazing how reasonable the calories are when you skip those super sugary store-bought versions. It really proves that homemade is always the best way to go!
- Serving Size: 1 slice
- Calories: 220
- Sugar: 11g
- Sodium: 280mg
- Fat: 5g
- Saturated Fat: 3g
- Carbohydrates: 40g
- Fiber: 2g
- Protein: 5g
Please remember these are just general estimates based on the recipe ingredients! If you use whole milk instead of low-fat milk, your fat content will obviously tick up a bit. Enjoy it guilt-free, knowing you controlled all the wonderful ingredients that went into making this loaf!
Share Your Experience Baking This Raisin Bread
I truly hope you loved making this **raisin bread** as much as I love sharing it with you! When you finish off that loaf—and trust me, you will—I really want to hear all about it. Did the swirl turn out perfectly? Did you toast it with butter?
Hop down to the comments and give the recipe a great rating! If you made any fun tweaks or adjustments, please share those so we can all learn from you. Thanks so much for baking with me today; you can learn more about our little corner of the internet right here!
PrintSoft Cinnamon Raisin Bread

A recipe for making a soft, fluffy loaf of homemade cinnamon raisin bread suitable for breakfast or toasting.
- Prep Time: 20 min
- Cook Time: 35 min
- Total Time: 1 hour 50 min
- Yield: 1 loaf
- Category: Breakfast
- Method: Baking
- Cuisine: American
- Diet: Vegetarian
Ingredients
- 1 cup warm milk (105-115°F)
- 2 1/4 teaspoons active dry yeast
- 1/4 cup granulated sugar
- 1 large egg, room temperature
- 1/4 cup unsalted butter, melted
- 1 teaspoon salt
- 3 1/2 cups all-purpose flour, plus more for dusting
- 1 cup raisins
- 2 tablespoons ground cinnamon
- 1/4 cup packed brown sugar
Instructions
- Combine the warm milk and yeast in a large bowl. Let it sit for 5 minutes until foamy.
- Stir in the granulated sugar, egg, melted butter, and salt into the yeast mixture.
- Gradually add the flour, mixing until a shaggy dough forms.
- Turn the dough out onto a lightly floured surface and knead for 5 to 7 minutes until smooth and elastic.
- Flatten the dough into a rectangle. Sprinkle the raisins, cinnamon, and brown sugar evenly over the surface. Roll the dough tightly into a log, pinching the seam closed.
- Place the dough seam-side down in a greased 9×5 inch loaf pan.
- Cover the pan loosely with plastic wrap and let it rise in a warm place for 1 to 1.5 hours, or until the dough has doubled in size.
- Preheat your oven to 375°F (190°C) during the last 20 minutes of rising.
- Bake for 30 to 35 minutes, or until the top is golden brown and the internal temperature reaches 200°F (93°C).
- Remove the bread from the pan immediately and let it cool completely on a wire rack before slicing.
Notes
- For a richer flavor, use whole milk instead of low-fat milk.
- If you prefer a sweeter crust, brush the top of the loaf with melted butter immediately after removing it from the oven.
- To keep the bread soft longer, wrap the cooled loaf tightly in plastic wrap before storing.
Nutrition
- Serving Size: 1 slice
- Calories: 220
- Sugar: 11g
- Sodium: 280mg
- Fat: 5g
- Saturated Fat: 3g
- Unsaturated Fat: 2g
- Trans Fat: 0g
- Carbohydrates: 40g
- Fiber: 2g
- Protein: 5g
- Cholesterol: 25mg