

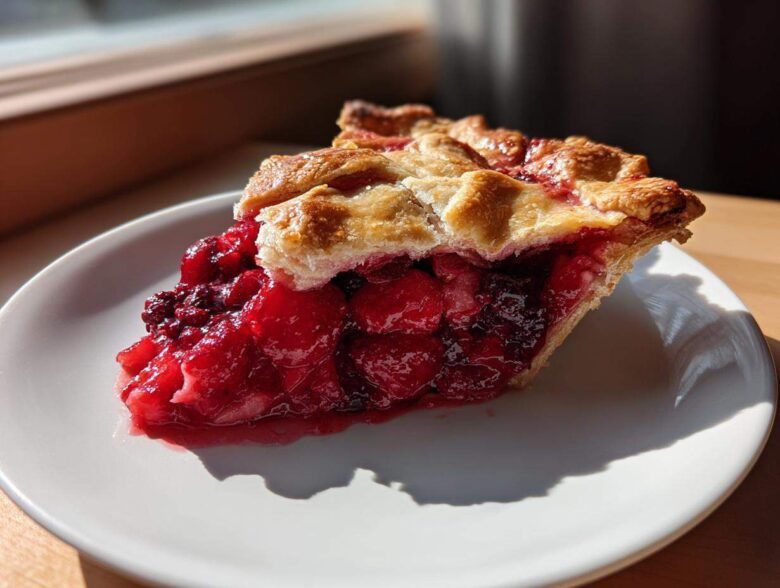
Honestly, there is nothing—and I mean nothing—that screams summer kitchen magic better than baskets overflowing with sweet, jewel-toned berries. I’ve wrestled with countless fruit pies over the years, but this triple berry pie recipe finally nailed the trifecta: unbelievably flaky crust, a filling that sets up perfectly without being gummy, and that irresistible sweet-tart flavor balance.
I still remember the first time I served this version; I used too much cornstarch out of habit, and the filling was stiff! Not this time, though. We are ditching the mediocre stuff and making the absolute ultimate homemade triple berry pie, complete with a buttery crust that shatters when you cut into it. Trust me, this is the only one you’ll ever need.
If you want to know more about what goes into making our site the best place for baking tips, check out our story here!
Why This Triple Berry Pie Recipe Stands Out (E-E-A-T Focus)
When you’re putting this much effort into a classic, you want guaranteed results, right? That’s why I spent so many baking sessions perfecting this specific triple berry pie. It’s not just pretty; it delivers on texture and taste every single time. I promise you’ll get rave reviews!
- Guaranteed flaky crust—we treat the butter like gold!
- A filling that holds its shape beautifully once cooled.
- The flavor is vibrant, hitting that perfect sweet-and-tart note across all the berries.
Achieving the Perfect Sweet and Tart Fruit Pie Balance
You know how some berry pies just taste like sugar? We absolutely avoid that sludge here! We use a vibrant mix of blueberries, raspberries, and strawberries—sometimes I sneak in a few blackberries if I find them—and then balance that natural acidity with just the right amount of sugar and a splash of fresh lemon juice. It brightens up the deeper berry flavor so you get a zing in every bite. It’s truly divine.
Tips for a Buttery Pie Dough Recipe
Forget store-bought crusts; the secret to a show-stopping pie is right here in the buttery pie dough recipe. I preach about keeping everything frigid cold for a reason. Those tiny, cold chunks of butter are what create those gorgeous, shattering layers when the pie bakes. That flaky pie crust tutorial coming up later is where we dive deep into this magic!
Gathering Ingredients for Your Triple Berry Pie
Okay, let’s get down to business! You can’t make a spectacular summer dessert without the right supplies. I’ve split this list up for you so you know exactly what goes into making this incredible homemade berry pie—the crust ingredients first, and then we move onto that juicy filling. Don’t skimp on the butter for the dough; it’s what gives us that incredible texture!
When you look at the measurements, remember these are for a standard 9-inch deep-dish pie. I grabbed a few extra ingredients for the egg wash, which is totally optional but makes the crust look professionally baked. If you need a refresher on making a bright lemonade to drink alongside this, you can check out my favorite watermelon mint lemonade here.
Ingredient Notes and Substitution Guidance
This is where we talk flexibility without sacrificing quality. If you’re leaning on frozen berries—which is totally fine, especially out of season—you have to make one critical swap! You’ll need to bump that cornstarch up to 5 tablespoons to account for the extra water they release. Please, do not thaw the frozen berries first!
As for the mix, feel free to play around: swap out raspberries for tayberries or use only blueberries and blackberries, but you are actively changing the recipe dynamics at that point. Sticking to the three classics gives us the best sweet and tart fruit pie vibe.
How to Make Berry Pie From Scratch: The Flaky Pie Crust Tutorial
Alright, let’s face the music: mastering the crust is the difference between a good pie and a legendary one. This buttery pie dough recipe is my go-to for anything I bake, and it’s the foundation for our amazing triple berry pie. You have to treat the butter like it’s made of glass—it needs to be very cold and cubed right before you start mixing.
When cutting in the butter, you’re aiming for a mix of pea-sized clumps and some flatter, lentil-sized pieces. Those flatter pieces are your secret weapon for flakiness! Add your ice water slowly, just until the dough reluctantly starts clinging together. Stop mixing the second it barely clumps up. Overworking pastry dough is the quickest way to get tough crust, and we want tender layers, not baking bricks!
If you ever want to see a masterclass on how to lay down the perfect top crust, especially if you plan on braiding a show-stopping lattice top, check out the techniques in my apple pie guide.
Chilling the Buttery Pie Dough Recipe
Once you’ve got your two disks wrapped up, they absolutely must go into the fridge for a minimum of one hour. Seriously, don’t cheat this step! Chilling allows the gluten you developed to relax, meaning your dough won’t shrink down to the size of a saucer when it hits the hot oven. It keeps that buttery pie dough delicate and ready to puff.
Assembling Your Easy Berry Pie Filling
Now that the crust is chilling (patience, my friend!), it’s time to work on the heart of this triple berry pie: that easy berry pie filling. I take all my glorious berries—fresh or frozen, remember?—and pop them into a big bowl. We need to coat them evenly with sugar, that touch of cinnamon for warmth, and the cornstarch, which is our thickening hero.
This next part is important: you have to toss this mixture gently. I use two big rubber spatulas and fold the ingredients over, trying not to disturb the structural integrity of the raspberries or squish the strawberries. If you mash them up now, you’ll end up with berry mush instead of discernible fruit chunks baking in that gorgeous, thick syrup. Just a light, loving toss until you see no white streaks of cornstarch left!
Constructing Your Triple Berry Pie with Lattice Top
Time for the fun part—putting this beautiful homemade berry pie together! Take one chilled dough disk and gently roll it out on a flour-dusted surface until you have a circle that’s about 12 inches across. You need enough overhang to crimp later. Carefully drape this large circle into your 9-inch pie plate. Trim the edges, leaving about an inch hanging over the sides.
Now for the glorious filling! Pour all those perfectly coated berries right into that dough-lined plate. If you are going for maximum visual impact, this is where you weave your lattice top. Cut your second dough disk into even strips—aim for about three-quarters of an inch wide—and get weaving! It sounds intimidating, but honestly, even a simple over-under pattern looks fantastic. If lattice feels like too much work, just roll out a second full circle, place it on top, and cut some nice, generous vents in the middle.
Remember to crimp those edges tightly to seal in all those juices. I like to use my thumb and index finger for a classic fluted edge. And this is a must-do: always place the pie onto a rimmed baking sheet before it goes into the oven! Trust me, those berry juices will bubble over, and this saves you a huge mess. For more rustic sealing ideas, check out this galette folding technique—sometimes that method leaks less!
Baking Instructions for a Deep Dish Fruit Pie
We are finally at the fire stage! You want to start this deep dish fruit pie hot to set that bottom crust quickly, so preheat your oven to a roaring 400°F. Pop that pie, sitting securely on its baking sheet, onto the lowest rack for the first 20 minutes. This blast of initial heat helps fight off any soggy bottom issues—a cardinal sin in pie baking!
After those 20 minutes, dial that heat back down to 375°F for the final stretch. Bake it for another 35 to 45 minutes. How do you know it’s actually done? You need to see those berry juices bubbling thickly right through the vents or lattice openings. If you just see slight surface bubbling, it needs more time. If the edges start looking way too dark, grab a small strip of aluminum foil and loosely drape it over the rim. That keeps the crust golden while the center finishes cooking. Almost there!
Cooling and Serving Suggestions for the Best Triple Berry Pie
Okay, you’ve pulled that masterpiece out of the oven, and it smells like heaven, but listen to Auntie—do not touch it for at least four solid hours! I know it’s torture, but that cooling time is absolutely mandatory for a perfectly set filling. If you cut it hot, you’ll get berry soup all over the plate, and we worked too hard for that!
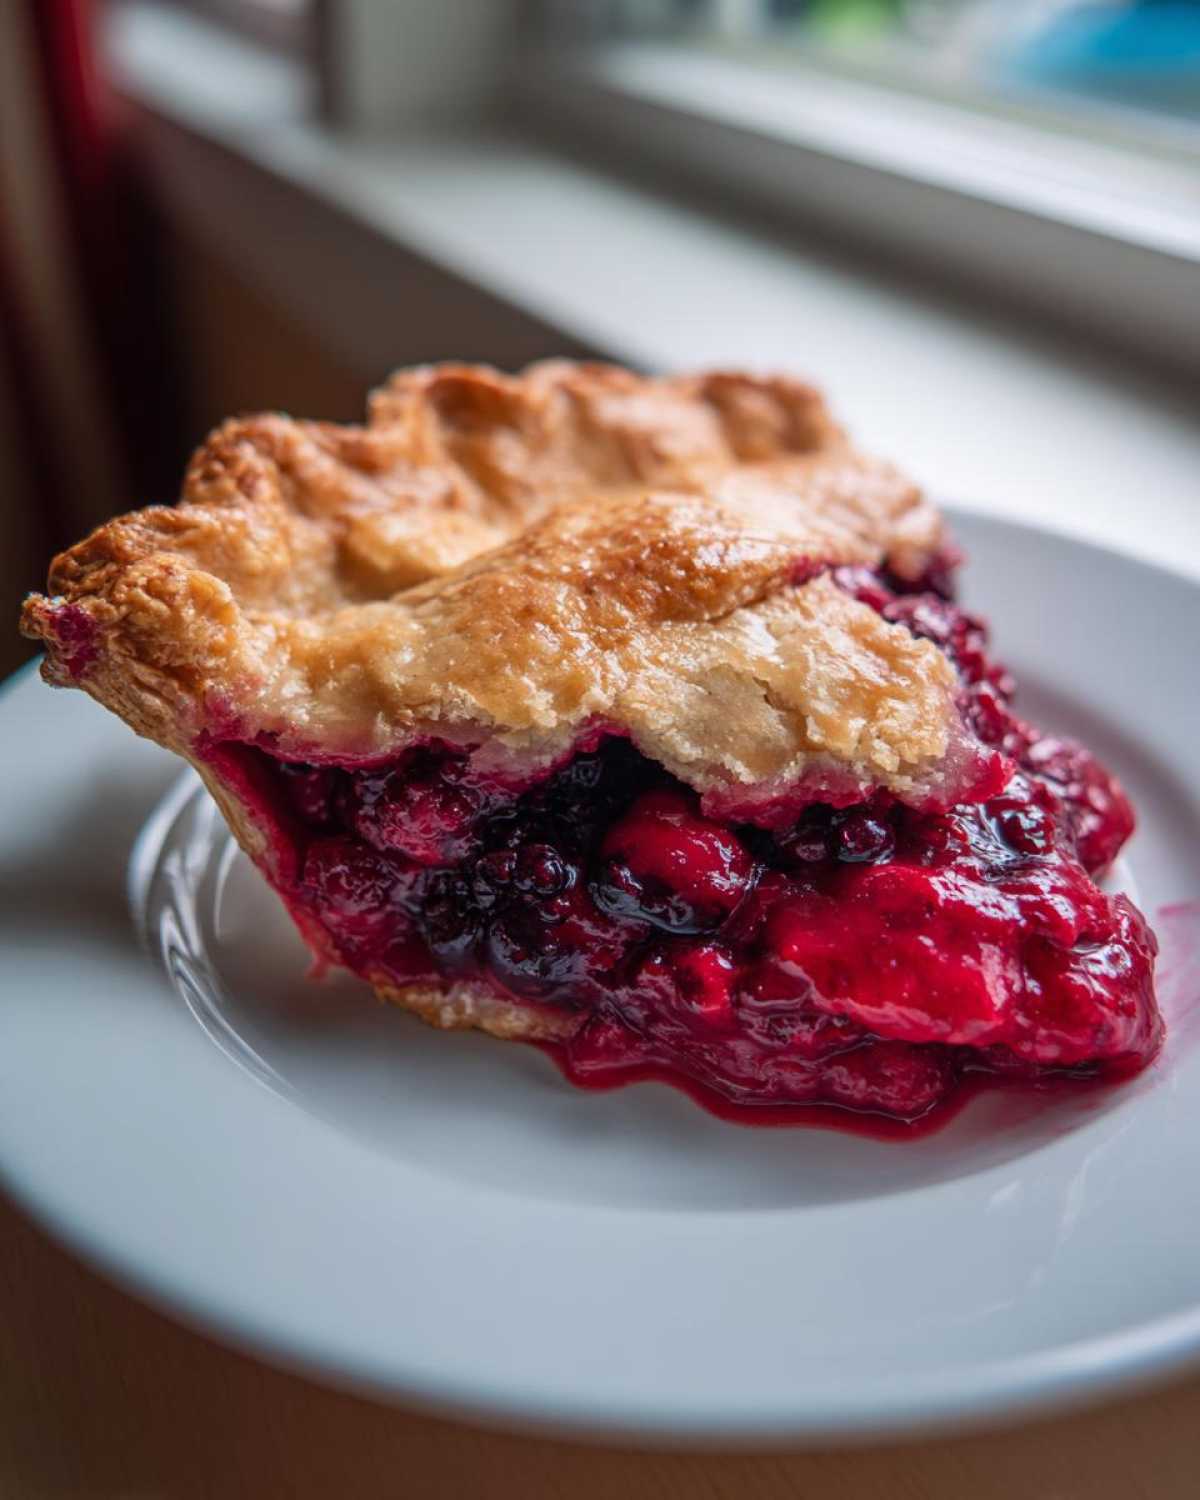
Once it’s cooled down to room temperature—or maybe just slightly warm—it is time for toppings! This gorgeous pie begs for something creamy. We usually go with a big scoop of high-quality vanilla ice cream as it melts into those warm crevices. Or, if I’m feeling fancy, I whip up a quick batch of homemade whipped cream. I even have a recipe for super easy no-bake cheesecake-inspired topping that you can dollop on instead!
Make-Ahead and Storage for Your Homemade Berry Pie
One of the best things about this classic American pie is that you can absolutely prep it ahead of time for entertaining! After it has fully cooled—remember that crucial 4-hour wait—you can wrap the whole pie tightly in plastic wrap and store it at cool room temperature for up to two days. The crust stays surprisingly flaky!
If you need longer storage, the fridge is fine, but I wouldn’t leave it there more than three days, as sometimes the bottom crust can get a little soft. Honestly, this triple berry pie is best served at room temperature, so if you refrigerate it, just take it out an hour before you plan on slicing. Skip microwaving it; a quick 10 minutes at 300°F in the oven can warm it through gently without destroying your beautiful lattice top.
Frequently Asked Questions About This Triple Berry Pie Recipe
Whenever I post this beauty online, I get tons of questions—which is great! It means you’re excited to bake this masterpiece. Here are a few things folks ask most often about getting that perfect berry pie with lattice top.
Can I use only blueberries in this recipe?
Yes, you absolutely can swap out the other fruits for just blueberries, making it a classic blueberry pie! But here’s the thing: blueberries generally weep less liquid than raspberries or strawberries do. So, if you go all blueberry, I recommend bumping that cornstarch up by just one extra tablespoon to ensure you still get that perfectly set filling we talked about. It won’t be what we call a triple berry pie anymore, but it’ll still be delicious!
How do I prevent the bottom crust from getting soggy?
Oh, the dreaded soggy bottom! That’s the absolute nightmare of any fruit pie baker. The number one trick I use, which you saw in the baking steps, is starting the bake on the lowest rack at the high temperature (400°F). That blast of direct heat helps cook the dough underneath before the berry juices soak it through. Also, make sure your pie plate isn’t too dark—dark metal pans absorb heat faster and can sometimes burn the bottom before the inside cooks. Use a light-colored glass or aluminum dish when you can!
What is the best way to slice the pie cleanly?
This goes right back to that mandatory cooling period! If you try to slice it before it’s rested for at least four hours, a messy slice is guaranteed because the filling hasn’t gelled completely. Once it’s fully set, the real trick is your knife. Don’t use a serrated bread knife; grab the sharpest, thinnest slicing knife you own. Dip the knife in hot water, wipe off the excess water, and then make your cut. Wipe and repeat for every single slice. That keeps the blade clean and the slice looking neat for serving with vanilla ice cream!
If you have any other worries or need help understanding our site policies, feel free to reach out!
PrintThe Ultimate Homemade Triple Berry Pie (Flaky Crust & Perfectly Set Filling)

A reliable recipe for a deep-dish triple berry pie featuring a sweet and tart filling encased in a buttery, flaky homemade crust, suitable for fresh or frozen berries.
- Prep Time: 45 min
- Cook Time: 60 min
- Total Time: 105 min
- Yield: 8 servings
- Category: Dessert
- Method: Baking
- Cuisine: American
- Diet: Vegetarian
Ingredients
- 2 1/2 cups all-purpose flour
- 1 teaspoon salt
- 1 cup (2 sticks) unsalted butter, very cold and cubed
- 1/2 cup ice water, plus more if needed
- 6 cups mixed berries (strawberries, blueberries, raspberries, blackberries)
- 3/4 cup granulated sugar (adjust based on berry sweetness)
- 1/4 cup cornstarch
- 1 tablespoon lemon juice
- 1/4 teaspoon ground cinnamon
- 1 large egg, beaten (for egg wash)
- 1 tablespoon coarse sugar (for sprinkling)
Instructions
- Prepare the Crust: In a large bowl, whisk together the flour and salt. Cut in the cold butter using a pastry blender or your fingers until the mixture resembles coarse crumbs with some pea-sized pieces of butter remaining. Gradually add the ice water, one tablespoon at a time, mixing until the dough just comes together. Divide the dough in half, flatten each half into a disk, wrap in plastic, and chill for at least 1 hour.
- Prepare the Filling: In a separate bowl, gently combine the mixed berries, granulated sugar, cornstarch, lemon juice, and cinnamon. Toss lightly until the berries are evenly coated. Set aside while you roll out the dough.
- Assemble the Pie: On a lightly floured surface, roll out one dough disk into a 12-inch circle. Carefully transfer it to a 9-inch pie plate. Trim the edges, leaving a 1-inch overhang. Pour the berry filling into the crust.
- Create the Top Crust: Roll out the second dough disk. You can cut strips for a lattice top or cut a full circle. If using a full circle, cut several slits in the top to allow steam to escape. Place the top crust over the filling. Crimp the edges of the top and bottom crusts together to seal.
- Bake: Brush the top crust lightly with the beaten egg wash and sprinkle with coarse sugar. Place the pie on a baking sheet to catch drips. Bake at 400°F (200°C) for 20 minutes. Reduce the oven temperature to 375°F (190°C) and bake for another 35 to 45 minutes, or until the crust is golden brown and the filling is bubbling thickly. If the edges brown too quickly, cover them loosely with foil.
- Cool: Cool the pie completely on a wire rack for at least 4 hours before slicing. This allows the filling to set properly.
Notes
- If you use frozen berries, do not thaw them first. Increase the cornstarch to 5 tablespoons and add 10 minutes to the total bake time.
- For an extra flaky crust, always keep your butter and water as cold as possible during mixing.
- Serve slices warm or at room temperature with vanilla ice cream or fresh whipped cream.
- You can prepare the dough up to two days ahead and keep it refrigerated.
Nutrition
- Serving Size: 1 slice
- Calories: 450
- Sugar: 35g
- Sodium: 250mg
- Fat: 25g
- Saturated Fat: 15g
- Unsaturated Fat: 10g
- Trans Fat: 0g
- Carbohydrates: 58g
- Fiber: 4g
- Protein: 5g
- Cholesterol: 60mg