

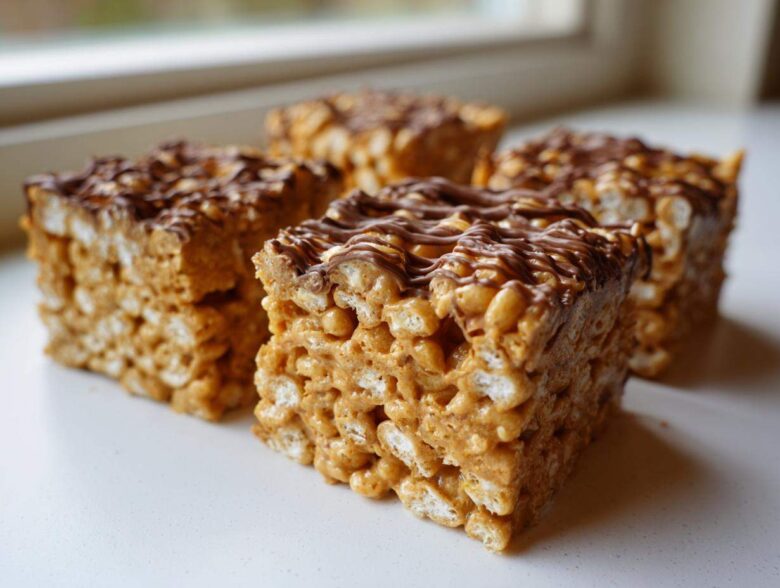
Oh my gosh, you know those times when you just need something quick, sweet, and totally nostalgic? Forget elaborate baking; we are diving headfirst into the world of **peanut butter rice krispie treats**, but trust me, these are not your average crumbling squares!
I have spent way too much time trying to figure out the perfect ratio of gooey marshmallow to creamy peanut butter so these bars don’t fall apart the second you pick them up. We are aiming for ultimate chewiness here—soft, satisfying, and totally stable. After what feels like a thousand test batches (and happily eating all the failures!), I finally cracked the code for the best peanut butter rice krispie treats you’ll ever make. Grab your big pot, because this quick dessert is about to become your new favorite way to satisfy that sweet tooth!
If you want to see how much real effort goes into perfecting these simple snacks, you can check out a little bit about our baking philosophy here.
Why You Will Make The Best peanut butter rice krispie treats
Seriously, once you try this method, you won’t go back to those dry, hard cereal bars that fall apart when you look at them funny. These are designed for maximum nostalgia and minimal afternoon fuss!
- They Are Incredibly Chewy: This is the BIG one! We nailed the low-and-slow melting process and skipped the aggressive pressing. That means you get that perfect, satisfying pull in every bite of these **peanut butter rice krispie treats**, not a brick.
- The Ultimate No Bake Dessert: Is there anything better than a dessert that avoids turning on the oven, especially when it’s warm outside? These come together faster than delivery food and require zero skill. They’re perfect for last-minute needs.
- Perfectly Balanced Flavor: That creamy peanut butter flavor plays so beautifully against the sweet marshmallow, and it’s just rich enough without being overwhelming. It’s a satisfying sweet snack recipe with peanut butter that hits all the right notes.
- Family-Friendly Activity: These are so quick and easy, every kid—from toddlers to teens—can help stir and spread them around. They are truly a wonderful kid friendly dessert recipe for getting the whole family involved.
- Sturdy Enough for Any Occasion: Unlike lighter cereal bars, these hold their shape beautifully. They travel well for picnics, potlucks, or holiday no bake desserts because they’re dense enough to stack without squishing or crumbling everywhere.
Ingredients Needed for Chewy peanut butter rice krispie treats
When we talk about making the best cereal bars, we are not messing around with cheap substitutes here. The quality of your ingredients really does make a difference in how gooey and perfect these turn out. Keep reading to see exactly what you need for these amazing **peanut butter rice krispie treats**!
For the peanut butter rice krispie treats Base
This is the core of what makes them so good—the simple combination that yields creamy, chewy results. Make sure your peanut butter is smooth and creamy for the best mix!
- 4 tablespoons unsalted butter (Don’t skimp on the real stuff; it matters!)
- 1 (10 ounce) package marshmallows (See my notes later—fresh ones make a difference!)
- 1 cup creamy peanut butter
- 6 cups crispy rice cereal
For the Optional Chocolate Peanut Butter Krispies Drizzle
Honestly, adding the chocolate drizzle takes these from a great snack to an absolute showstopper. But hey, if you’re keeping it super simple, you can totally skip this part and still have fantastic results.
- 1 cup semi-sweet chocolate chips
- 1 teaspoon coconut oil (This helps it drizzle beautifully and stay soft!)
Step-by-Step Guide to Perfect peanut butter rice krispie treats
Okay, here is where the magic happens! Follow these simple steps, and I promise you’re going to end up with the chewiest, most fantastic **peanut butter rice krispie treats** imaginable. It’s quick, I swear; the whole cooking part is done before your coffee even cools down. We just need to be a little gentle.
Preparing the Pan and Melting the Base for peanut butter rice krispie treats
First thing: get your 9×13 inch pan ready. I usually just spray it really well with my non-stick spray, but using parchment paper that hangs over the sides is even better for easy lifting later. Pop your butter into a big saucepan over medium-low heat. We need that heat low! You don’t want to brown the butter, just gently melt it. Once it’s liquid, dump in those marshmallows. Now stir constantly until they are completely dissolved and smooth—no lumps allowed. Take the whole pot off the burner right when it’s smooth; that residual heat is enough!
Mixing the Cereal and Pressing the Gooey peanut butter squares
With the heat off, stir in your cup of peanut butter until it melts right into that gooey marshmallow swirl. It should look glossy and gorgeous. Now, add the 6 cups of cereal. Fold everything together gently—we’re coating the cereal, not smashing it. This is the most important expert tip for achieving those famous **gooey peanut butter squares**: Do NOT press the mixture firmly into the pan! If you pack it down hard, it turns crunchy. Just gently smooth it out with a wax paper layer or greased hands. A light press is all you need for the best texture.
Adding the Chocolate Drizzle and Setting the Final peanut butter rice krispie treats
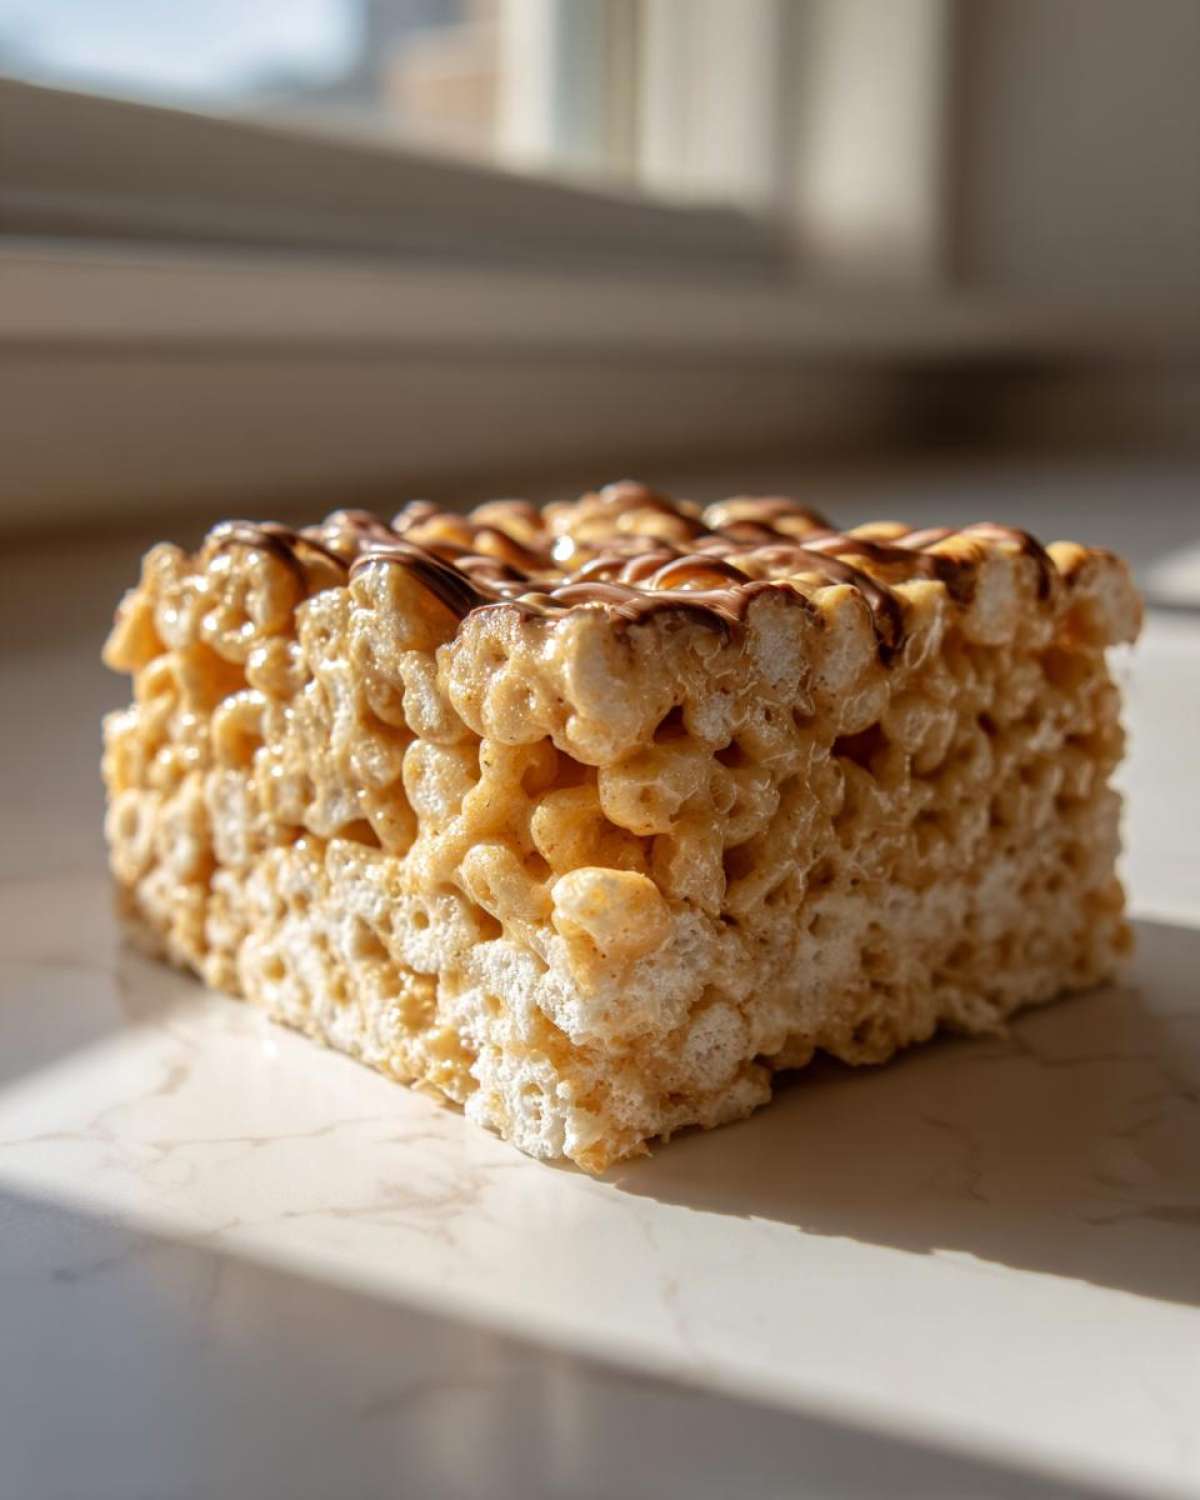
If you’re feeling fancy, this is when we add the chocolate layer. Toss your chocolate chips and coconut oil into a microwave-safe bowl. Heat it for 30 seconds, stir, another 30 seconds, stir again, until it’s silky smooth. Then, just drizzle that goodness all over the top of your bars. You can even swirl it a little if you’re feeling artistic! Now, stand back and let these glorious **peanut butter rice krispie treats** set up completely at room temperature for about an hour. That time is crucial for them to firm up just enough to cut without losing their glorious chewiness. And remember, if you skip the chocolate, you still have an amazing no bake peanut butter bar ready to go!
If you want to see a fantastic alternative, check out my recipe for No Bake Pumpkin Pie Cheesecake—just as easy and equally delicious!
Tips for Making the Best Chewy peanut butter rice krispie treats
Making something this simple shouldn’t be stressful, but I’ve learned a couple of little secrets over the years that really separate the rock-hard squares from the perfectly gooey ones. If you follow these tips, you’re going to achieve peak chewiness every single time you make these **peanut butter rice krispie treats**. Trust me, I’ve tried them all!
My number one rule, which I hinted at earlier, involves the marshmallows. Do not, under any circumstances, use those marshmallows that have been sitting in your pantry since last Halloween. They dry out!
- Fresh is Best for Chewy Texture: For the absolute chewiest results, always use the freshest marshmallows you can find. Older marshmallows lose moisture, and that moisture is exactly what keeps your **peanut butter rice krispie treats** soft and pliable after they cool down. If yours feel kind of stale, they will bake up firm.
- Pan Size Dictates Thickness (and Chewy Factor!): I wrote the recipe for a 9×13 inch pan because that gives you a nice, standard-thickness bar that sets up perfectly. If you want a seriously thick, almost dessert-like square—like a rich, dense brownie—then definitely use a 9×9 inch pan instead. Just remember that using the smaller pan means you need to bump up the setting time by about 15 or 20 minutes because the heat has to travel farther into the center.
- Don’t Introduce Heat to the Cereal: Once the cereal is mixed in with the marshmallow and peanut butter, you are done with the stove! Any extra heating or pressing just melts the starches in the cereal too hard, leading to those sturdy, brittle bars nobody wants to eat. We want warm, sticky goodness that cools to soft, not stiff.
- Greasing Your Hands is a Game-Changer: When it’s time to gently spread the mixture into the pan, don’t try to use a spatula right away, or it will pull the whole mixture out of the pan! Lightly grease your hands with a swipe of butter or cooking spray, or even press down with a sheet of wax paper. This keeps the sticky mixture from clinging to you so you can manage smoothing it out evenly.
I wish you the best success with your batch! If you want to read some of my general baking philosophies on ingredient choice and technique, feel free to check out my latest thoughts on the blog.
Variations on peanut butter rice krispie treats: Beyond the Classic
Okay, so you’ve mastered the basic, perfectly chewy bar—that’s fantastic! But who doesn’t love a little fun twist? While we’re keeping these no-bake and super easy, there are a few little tweaks you can make that totally change the game without taking up any extra cooking time. This is how we take a fantastic recipe and make it *our* own.
My kitchen is all about low effort, high reward, so these swaps are simple additions you can make while you’re melting the marshmallows. You don’t need a complicated recipe to feel like a baking genius!
Turning It Into A Scotcharoo Style Treat
If you’ve ever had a classic Scotcharoo, you know what I’m talking about—that perfect layer of crackly, sweet chocolate and butterscotch topping. It’s super easy to turn these into that nostalgic treat! After you gently press your cereal mixture into the pan and let it sit for about 15 minutes (so it’s not piping hot), you can whip up a topping in a separate bowl using melted butterscotch chips mixed with some extra chocolate chips. Pour that right over the top for that classic look!
Trying Different Peanut Butter Types
I usually stick to creamy Jif or Skippy because I know their texture blends perfectly, but feel free to experiment! If you use a natural peanut butter that has separated oil, just make sure you stir that oil back in really well before measuring it out. You might find that natural peanut butter makes the bars slightly softer, so be extra careful not to over-press them into the pan!
Adding Fun Mix-Ins for Texture
Because we add the cereal last, we can sneak in other things! If you love a little crunch, try mixing in half a cup of chopped peanuts when you add the cereal. They blend right in and add a fantastic bump of nutty flavor.
Another favorite I sometimes use, especially when I’m feeling decadent, is stirring in peanut butter balls cereal treat mix-ins, or even some chopped pretzels for a salty kick! It’s such a great way to make a simple sweet snack feel totally customized for whoever you are making them for. If you love that sweet and salty combo, you really should check out my S’mores Skillet Dip—it nails that vibe perfectly!
Storage and Reheating peanut butter rice krispie treats
The best part about these chewy squares is that you don’t really *need* to reheat them since they are no bake bars! But if you do make a huge batch—and trust me, you might—you’ll want to know how to keep them perfectly soft for those busy weeks ahead. Nobody wants a stale, hard cereal treat!
Because we avoided packing them down too hard, these stay reasonably soft for much longer than the store-bought versions. The key is keeping the air out and avoiding temperature extremes. Don’t try to freeze these; they just don’t do well coming back from the deep freeze, and they often get crumbly.
For keeping them fresh, you’ll want an airtight container lined with parchment paper. You can stack them, but put a sheet of wax paper or parchment between each layer. This stops the chocolate drizzle (if you used it!) from getting messy or sticking together.
- Room Temperature is Best: Store your sealed container on the counter—not in the fridge! Cold temperatures are the enemy of gooey texture. They will firm up nicely on the counter, but they stay softer than if they were chilled.
- How Long Do They Last? Honestly, if you handle them right, these treats are at peak deliciousness for 3 to 4 days. After day five, you might notice they start to get a little chewier than ideal, but they are still perfectly edible!
- Reviving a Stale Bar (If You Must!): If you find one that’s gotten a touch stiff after a few days, don’t throw it out! Pop it in the microwave for just 5 to 8 seconds. That little blast of heat melts the internal marshmallow just enough to bring back that glorious, fresh-out-of-the-pan softness. Watch it carefully; you only want it warm, not lava-hot!
Frequently Asked Questions about peanut butter rice krispie treats
I get so many questions about these easy peanut butter rice krispie treats! They seem simple, but getting that perfect, soft texture can trip people up. Here are the answers to the most common ones I hear when people try to make these **nostalgic snack ideas**.
How do I make sure my peanut butter rice krispie treats are gooey and not hard?
This is definitely everyone’s biggest worry! The trick to achieving those soft, **gooey peanut butter squares** is twofold: first, use fresh marshmallows—old ones won’t melt right. Second, and this is vital, do not press the mixture firmly into the pan! Just use your waxed paper or greased hands to gently even out the cereal layer. Over-packing squeezes out all the marshmallow ‘glue’ that keeps them soft!
Can I use natural peanut butter instead of creamy in this recipe?
You absolutely can! If you use natural peanut butter, though, just make sure you stir that separated oil back in really well before measuring it out. Natural peanut butter sometimes results in slightly looser **sweet snack recipes with peanut butter**, so you might need to let the mixture cool just a *tiny* bit longer before pressing it into the pan. They still come out great, though!
Can these no bake peanut butter bars be made ahead of time?
Yes, they are one of the best **quick rice krispie desserts** because they are meant to be made ahead! They need that full hour to set up at room temperature anyway. They stay perfectly fresh at room temperature, stored airtight, for about four days. They don’t need the fridge at all, which actually helps keep them from hardening up too much!
What if I want to try a peanut butter scotcheroos recipe instead?
If you want that iconic peanut butter scotcheroos recipe flavor, it’s super simple! Just substitute half of your creamy peanut butter for creamy butterscotch chips when you melt your marshmallow mixture. Then, use the chocolate chips for the top drizzle, and you’ve got a whole new experience! It’s still a fantastic **nostalgic snack idea** but with an extra layer of rich flavor.
If you have any more specific questions about melting or ingredient substitution, you can always review our privacy policies or just pop over to the contact page and ask!
Nutritional Estimates for Your peanut butter rice krispie treats
Okay, real talk time—these **peanut butter rice krispie treats** are definitely a treat, not a daily health food! But, since you asked, I pulled the numbers just to give you a general idea of what goes into one of these wonderfully chewy squares. I always say knowing what’s in your food is helpful, even if it’s pure joy in dessert form!
Please remember, these are just estimations based on the standard brand ingredients I use and yield calculated for 18 servings. If you use a different type of peanut butter or a bigger pan, these numbers will shift around a bit. I’m certainly no nutritionist, just a baker who loves her spreadsheets sometimes!
This information is based on the recipe making 18 servings, including the chocolate drizzle incorporation. If you skip the topping, the sugar and fat content will obviously drop down a bit. Here is the basic breakdown:
- Serving Size: 1 square
- Calories: About 220
- Fat: Around 11g
- Saturated Fat: Roughly 4g
- Carbohydrates: 28g (Mostly from the cereal and sugar, naturally!)
- Protein: About 5g (Thank you, peanut butter!)
- Sugar: 15g
So, while they are high in carbs from the cereal and sugar from the marshmallow, you are also getting a decent little protein punch from the peanut butter, which makes them feel more satisfying than plain cereal bars. Enjoy them guilt-free—they are worth every single, satisfying, chewy bite!
Share Your Simple 4 Ingredient peanut butter treats Experience
Alright, now it’s your turn! I am so excited to hear how these **easy peanut butter rice krispie treats** turned out for you. Did you manage to keep them perfectly chewy? Did the optional chocolate drizzle cause chaos or was it completely worth the extra two minutes?
I absolutely love seeing everyone’s creations! Please don’t be shy. Leave a rating below—even if you think they are only “pretty good” instead of “the best,” your feedback helps other bakers know what to expect. I monitor the comments like a hawk, especially if you ran into any trouble. Did you try one of those crazy variations like adding pretzels? Tell me!
The best compliment is knowing you made a batch of these **simple 4 ingredient peanut butter treats** and they brought back some happy memories. And if you snapped a picture of your perfectly neat, non-crumbling squares—I would love to see it! You can tag me or send your photos over by reaching out through our contact page. Happy treating!
PrintThe Ultimate Chewy Peanut Butter Rice Krispie Treats
Make these simple, no-bake peanut butter cereal bars for a chewy and satisfying nostalgic snack. This recipe includes an optional chocolate drizzle.
- Prep Time: 10 min
- Cook Time: 5 min
- Total Time: 75 min
- Yield: 18 servings
- Category: Dessert
- Method: No Bake
- Cuisine: American
- Diet: Vegetarian
Ingredients
- 4 tablespoons unsalted butter
- 1 (10 ounce) package marshmallows
- 1 cup creamy peanut butter
- 6 cups crispy rice cereal
- 1 cup semi-sweet chocolate chips (for optional topping)
- 1 teaspoon coconut oil (for optional topping)
Instructions
- Lightly grease a 9×13 inch baking pan or line it with parchment paper, allowing some overhang for easy removal.
- In a large saucepan over medium-low heat, melt the butter.
- Add the marshmallows to the melted butter. Stir constantly until the marshmallows are completely melted and smooth. Remove the pan from the heat.
- Stir in the peanut butter until it is fully incorporated into the marshmallow mixture.
- Add the crispy rice cereal to the mixture. Fold gently until the cereal is evenly coated.
- Press the mixture evenly into the prepared baking pan. Do not pack it down too firmly, as this can make the treats hard instead of chewy.
- If using the chocolate topping, combine the chocolate chips and coconut oil in a microwave-safe bowl. Microwave in 30-second intervals, stirring between each, until smooth.
- Drizzle the melted chocolate over the top of the cereal mixture.
- Allow the treats to set completely at room temperature for about 1 hour before cutting into squares.
Notes
- For extra chewy treats, use fresh marshmallows. Older marshmallows tend to result in a firmer bar.
- If you prefer a thicker bar, use a 9×9 inch pan instead of a 9×13 inch pan. Adjust the setting time accordingly.
- To prevent sticking while pressing the mixture into the pan, lightly grease your hands or use a piece of wax paper.
Nutrition
- Serving Size: 1 square
- Calories: 220
- Sugar: 15g
- Sodium: 150mg
- Fat: 11g
- Saturated Fat: 4g
- Unsaturated Fat: 7g
- Trans Fat: 0g
- Carbohydrates: 28g
- Fiber: 1g
- Protein: 5g
- Cholesterol: 5mg