

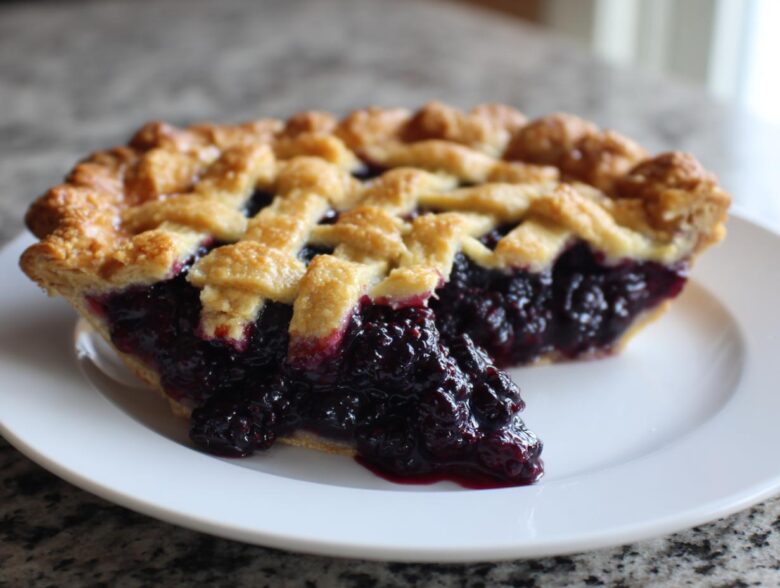
Oh, when those summer berries start hitting their peak, my kitchen just begs for a huge, gorgeous pie! Honestly, there’s nothing that beats the smell of a truly amazing classic blackberry pie recipe baking away. I spent years messing around with fillings that either ran everywhere or tasted like straight sugar, until I finally nailed this one. Trust me, this is the absolute best blackberry pie because it balances that perfect sweet-tart flavor with a crust that shatters beautifully when you cut into it. We’re talking flaky, buttery perfection wrapped around a ridiculously juicy berry mix. I still remember the first perfect lattice top I managed—it felt like winning a blue ribbon! We’re using time-tested techniques here to make sure yours is perfect too.
Why This Classic Blackberry Pie Recipe Works So Well
This recipe isn’t just another dessert; it’s a guarantee. Everything we do here is focused on giving you a stunning result every time you pull it out of the oven. You will not end up with a soggy mess!
- The filling sets up perfectly solid, so slicing is clean and easy.
- The dough handles like a dream—seriously, even if you’re new to pie making!
- That lattice top makes it look like it came straight from a bakery window.
It’s the ultimate sweet and tart fruit pie experience.
Achieving the Perfect Juicy Blackberry Filling
Okay, the filling is crucial. If you want that homemade juicy berry pie that holds its shape, you need a secret weapon: cornstarch. It thickens everything up beautifully without giving you that weirdly gummy texture some thickened pies have. Now, here’s a little expert confidence booster: whether you use gorgeous fresh blackberries or pull a bag out of the freezer, the filling works exactly the same way. Seriously, don’t even bother thawing them!
Ingredients for Your Flaky Blackberry Pie
When we talk about ingredients, we’re showing you exactly what goes into making this special treat. I listed everything you need down below. See how straightforward it is? It’s all about quality and temperature here. Keep track of these amounts, and you’re halfway to amazing.
- 2 1/2 cups all-purpose flour
- 1 teaspoon salt
- 1 cup (2 sticks) cold unsalted butter, cut into cubes
- 1/2 cup ice water, plus more if needed
- 6 cups fresh or frozen blackberries
- 1 1/2 cups granulated sugar
- 1/4 cup cornstarch
- 1 tablespoon lemon juice
- 1/4 teaspoon ground cinnamon
- 1 large egg, beaten (for egg wash)
- 1 tablespoon coarse sugar (for sprinkling)
Tips for an Easy Blackberry Pie Crust
Listen, the secret to that shatteringly crisp, easy blackberry pie crust is twofold: keep everything cold and don’t overwork it! That butter absolutely must be ice cold when you cut it into your flour. If it melts even a little bit before it hits the oven, you lose those pockets of steam that create flakiness. Seriously, if your kitchen is hot, put your cubed butter back in the freezer for ten minutes before you start. And don’t skip the chilling time—I force myself to wait at least an hour before rolling because those discs need time to relax. If you rush the chill, the dough fights back!
Step-by-Step Instructions for Homemade Blackberry Pie
Alright, let’s get down to business! This is where we take those gorgeous ingredients and turn them into that amazing old fashioned berry pie we’ve been dreaming about. Timing is everything here, so make sure those dough discs are nice and cold before you start rolling. First things first: get your oven preheated to 425 degrees F (220 degrees C). We start hot to lock in that flakiness!
Here’s the process:
- First, we deal with that crust dough. Take one disc and roll it out on a lightly floured surface until it’s about 12 inches wide—that gives us plenty of overhang for a 9-inch plate. Gently ease it into your pie dish and leave about an inch hanging over the edge.
- Now for the filling! Gently stir together your 6 cups of blackberries, sugar, cornstarch, lemon juice, and cinnamon in a separate bowl. Don’t mash those berries; we want them whole! Pour this beautiful mixture right into your dough-lined plate.
Next up is where we make it look professional!
Mastering the Flaky Lattice Pie Tutorial
If you want that classic farmhouse look, you have to tackle the lattice. Roll out your second dough disc. I like to use a pizza cutter along a ruler to get nice, even strips—aim for about 1 inch wide. Lay half your strips straight across the pie, spaced out nicely. Then, you fold back every other strip halfway, lay a new strip down perpendicular, and unfold the first set back over it. Keep alternating! It sounds tricky, but once you do it two or three times, you’ll fly through it. Don’t worry if the dough stretches; just pinch it back together. If you’re feeling lazy, just throw a round solid top on and cut a few vents so the steam can escape—but the lattice just screams best blackberry dessert ideas!
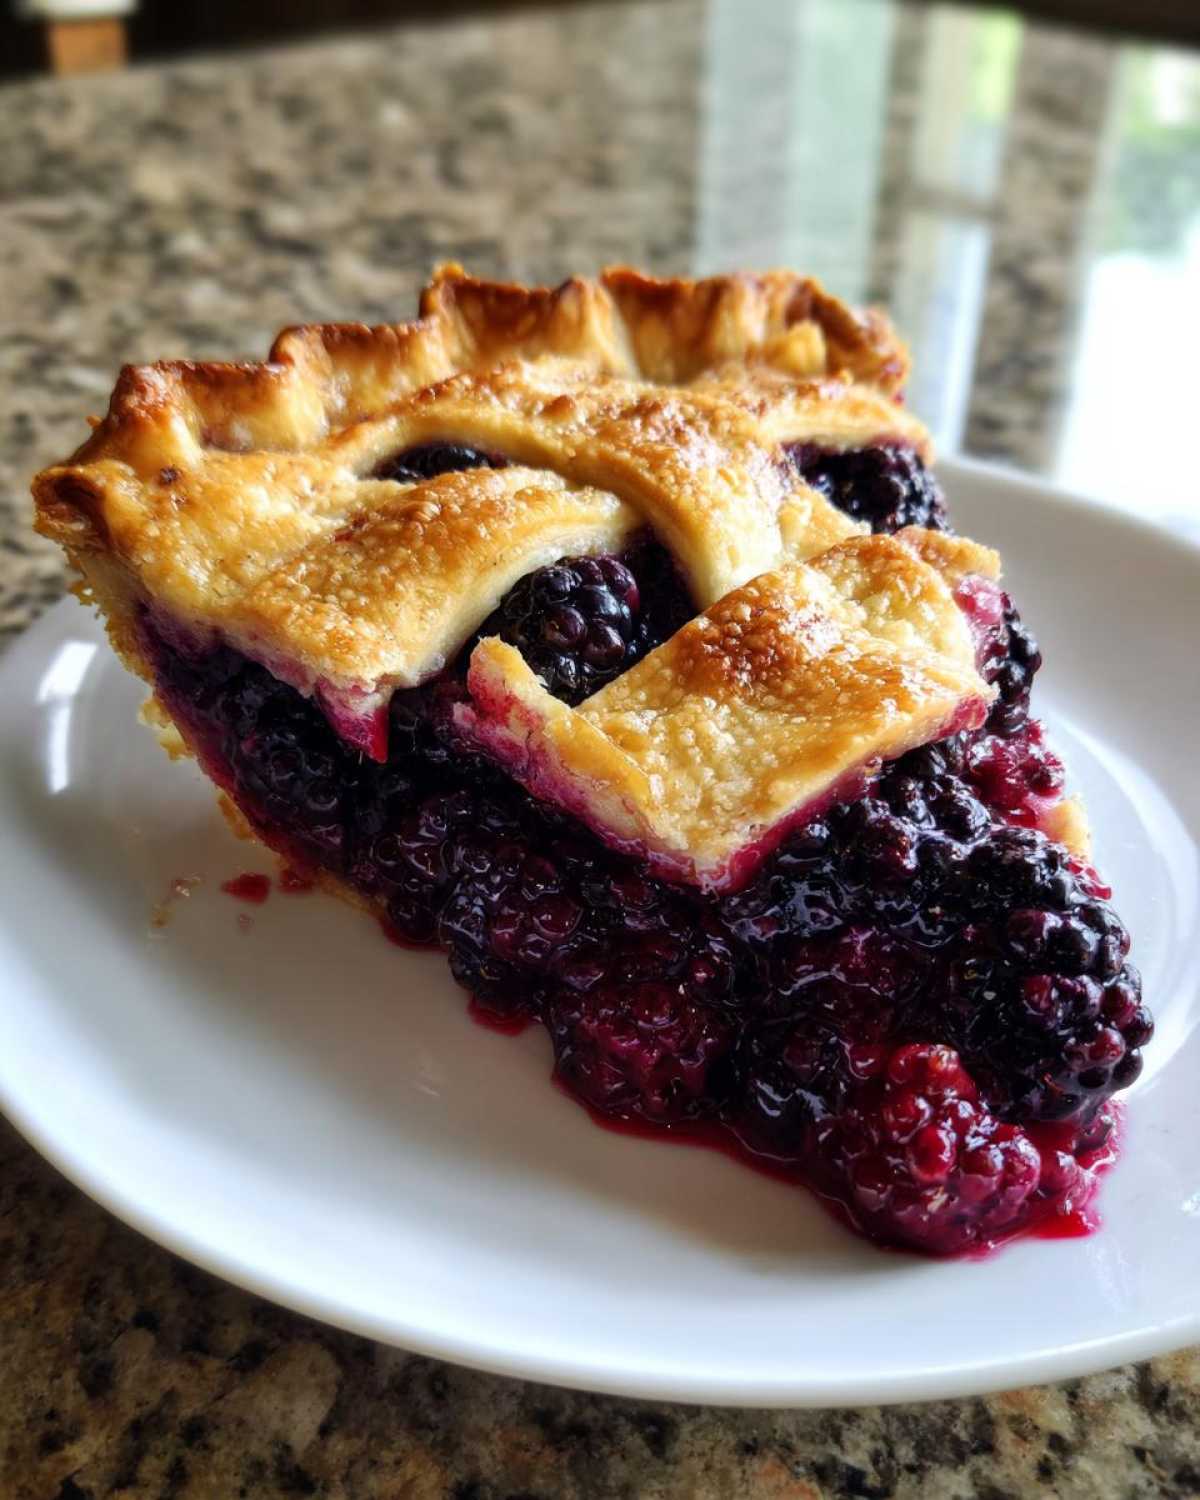
Once your top is on (lattice or solid), brush the whole thing with that beaten egg wash and sprinkle that coarse sugar on top—that’s your sparkle!
Baking the Blackberry Pie to Perfection
This is where we use the two-temperature trick. Bake it hot first, at 425 degrees F, for exactly 15 minutes. This sets the bottom crust super fast so it won’t get soggy. After those initial 15 minutes, drop the heat down to 375 degrees F (190 degrees C) and keep baking for another 40 to 50 minutes. You know it’s done when the crust is deeply golden brown *and* you can see the filling bubbling thickly in the center. If the edges start looking too dark before the center is cooked, just loosely tent them with foil! Now, here’s the hardest part: you must let this pie cool completely—I mean 3 to 4 hours on a wire rack. If you cut it early, all that lovely thickened juice from our sweet and tart fruit pie will just run right out. Patience is key!
Tips for Success with Your Blackberry Pie
If you follow the steps, you’ll be golden, but I want to give you a few extra cheat codes so you can feel super confident making this classic blackberry pie recipe. The biggest fear people have is a soggy bottom, right? You absolutely must put that pie on the lowest rack possible for the first 15 minutes it bakes at 425 degrees. That direct blast of heat cooks the bottom crust nicely before we lower the temperature.
If you are using frozen berries, remember what I said—don’t thaw them! Just toss them in frozen with the sugar and cornstarch. They release a little extra liquid, but the cornstarch handles it like a champion. If you happen to have a super juicy batch from the garden, you might want to bump that cornstarch up to 5 tablespoons just to be extra safe against runny filling.
And honestly, don’t skimp on brushing on that egg wash for the glaze! That’s what gives you that beautiful, deep golden color and seals in moisture. If you need a quick break before starting the lattice, go check out my post on making fresh peach syrup—it’s a great summer refresher while you wait for your dough to chill!
Making This Blackberry Pie a Summer Fruit Desserts Staple
Now that you have this perfect pie cooling on the rack, let’s talk about serving it! This really is my go-to for any summer fruit desserts party or simple backyard barbecue. Why bother with fussy cakes when you can have this gorgeous, juicy berry masterpiece?
I think the best treat you can add is a huge scoop of high-quality vanilla ice cream that melts slowly down the warm slices. Or, if I’m feeling fancy, I whip up some homemade whipped cream—maybe even trying out my recipe for three-ingredient watermelon sorbet if it’s scorchingly hot out, just for contrast!
Seriously, this pie easily rises to the top of my list for the best blackberry dessert ideas because it travels well and everyone loves that homey feel. Just make sure you slice it after it’s completely set, or the presentation might be a little messy!
Storing and Reheating Your Homemade Blackberry Pie
Phew! You managed the bake, and now you have this beautiful, aromatic thing sitting there. The hardest part is waiting for it to cool, but once it’s set, you need to know how to store your classic blackberry pie recipe so it stays just as good the next day. If you have leftovers—which is a big *if* in my house—you have a couple of options.
For the first day or two, leaving the pie on the counter underneath a loose dome or cake carrier is totally fine. Since the filling is so jammy now, it doesn’t technically *need* refrigeration like a custard pie does. Just keep it out of direct sunlight or any really warm spots. If you somehow manage to keep some slices past day two, I would wrap those pieces tightly in plastic wrap and pop them in the fridge to keep those berries fresh.
Now for the best part: reheating! I never reheat a whole pie; who needs that much warm pie at once? You just want a glorious slice. Do NOT microwave a slice—it turns the crust instantly soggy. Instead, pop your slice right onto a baking sheet and warm it up in a 350°F oven for about 8 to 10 minutes. That little blast of dry heat crisps the crust right back up and warms the filling through without making it runny again. That’s the trick to enjoying leftover homemade juicy berry pie perfectly!
Frequently Asked Questions About Blackberry Pie
I get so many messages asking about the little details, and that’s fantastic! It means you really care about making the best blackberry pie possible. Here are the top questions I always get asked when people try this classic blackberry pie recipe for the first time.
Can I use frozen blackberries for this blackberry pie recipe?
Absolutely, yes! That’s one of the best parts about this recipe; it works brilliantly whether you’re picking berries straight from the bramble or grabbing a bag from the freezer aisle. The key thing is that you do not thaw them before mixing them with the sugar and cornstarch. Tossing them in frozen helps keep the whole filling mixture colder, which is a huge bonus for keeping the crust nice and flaky while you assemble everything!
How do I make the crust extra flaky?
Oh, this is all about temperature and touch. To nail that super easy blackberry pie crust, you need two things: fat that is rock hard cold, and hands that are gentle. If you see pea-sized chunks of butter left after cutting it in, you’re doing it perfectly! Those chunks steam in the oven and create those beautiful layers. Remember, treat the dough gently—if you knead it too much, you activate the gluten, and that’s how you end up with tough instead of flaky!
What makes this filling ‘sweet and tart’?
That balance is everything for a great summer dessert! We hit the sweetness with sugar, of course, but the magic for that perfect tang comes from the lemon juice. Just that tablespoon cuts through the deep sweetness of the sugar and the natural flavor of the berries. It lifts the entire flavor profile so it’s vibrant and bright, which is exactly what you want in a sweet and tart fruit pie—not heavy, but refreshing. It’s the reason people keep asking for seconds!
Estimated Nutritional Details for a Slice of Blackberry Pie
Okay, I know some of you are tracking things, even when you’re enjoying the best part of summer baking! Here is a little snapshot of what you can generally expect from one slice of this fantastic classic blackberry pie recipe. I pulled these numbers using standard measurements, but remember, baking is kind of an art, not an exact science!
- Serving Size: 1 slice
- Calories: 410
- Sugar: 35g
- Sodium: 180mg
- Fat: 22g
- Protein: 4g
I always like to point out that the sugar content is because we are using a full amount of fruit and butter—it’s what makes the filling set up perfectly and the crust so tender! If you use less sugar in the filling, you might find the final texture isn’t quite right, so I always stick to the recipe for structure.
As for how reliable these numbers are? Well, since we are using real, honest-to-goodness ingredients (cold cubes of butter and fresh berries!), the exact count will shift slightly based on the brand of flour or how much butter soaks into your pan. For the full breakdown and more information on how these estimates are calculated, you can always check out my general disclaimer page here! Enjoy responsibly—though honestly, that flaky crust makes it hard to stop at just one slice!
Share Your Perfect Blackberry Pie Creation
I truly, truly hope you loved making this classic blackberry pie recipe! When you pull that gorgeous masterpiece out of the oven, please snap a photo and tag me! I live for seeing your flaky crusts and perfectly set fillings.
Let me know in the comments below: did the two-temperature bake work magic? If you have any questions before you start, toss them my way over on the contact page—I’m always here to help you bake!
PrintClassic Homemade Blackberry Pie with Flaky Crust
A recipe for a traditional blackberry pie featuring a sweet and tart juicy filling encased in a flaky, homemade crust, finished with a lattice top.
- Prep Time: 45 min
- Cook Time: 65 min
- Total Time: 110 min
- Yield: 8 servings
- Category: Dessert
- Method: Baking
- Cuisine: American
- Diet: Vegetarian
Ingredients
- 2 1/2 cups all-purpose flour
- 1 teaspoon salt
- 1 cup (2 sticks) cold unsalted butter, cut into cubes
- 1/2 cup ice water, plus more if needed
- 6 cups fresh or frozen blackberries
- 1 1/2 cups granulated sugar
- 1/4 cup cornstarch
- 1 tablespoon lemon juice
- 1/4 teaspoon ground cinnamon
- 1 large egg, beaten (for egg wash)
- 1 tablespoon coarse sugar (for sprinkling)
Instructions
- Prepare the crust: In a large bowl, whisk together the flour and salt. Cut in the cold butter using a pastry blender or your fingers until the mixture resembles coarse crumbs with some pea-sized pieces of butter remaining. Gradually add the ice water, one tablespoon at a time, mixing until the dough just comes together. Divide the dough in half, form into two discs, wrap in plastic, and chill for at least 1 hour.
- Prepare the filling: In a separate bowl, gently combine the blackberries, granulated sugar, cornstarch, lemon juice, and cinnamon. Set aside while you roll out the dough.
- Preheat your oven to 425 degrees F (220 degrees C).
- Roll out one dough disc on a lightly floured surface to a 12-inch circle. Carefully transfer it to a 9-inch pie plate. Trim the edges, leaving a 1-inch overhang.
- Pour the blackberry filling into the crust.
- Roll out the second dough disc. Cut into strips to create a lattice top, or cut a full top crust and cut vents. Place the lattice or top crust over the filling. Trim the overhang and crimp the edges to seal.
- Brush the top crust with the beaten egg wash and sprinkle evenly with coarse sugar.
- Bake for 15 minutes at 425 degrees F. Then, reduce the oven temperature to 375 degrees F (190 degrees C) and continue baking for 40 to 50 minutes, or until the crust is golden brown and the filling is bubbling thickly. If the edges brown too quickly, cover them loosely with foil.
- Cool the pie completely on a wire rack for at least 3 to 4 hours before slicing to allow the filling to set.
Notes
- If you use frozen blackberries, do not thaw them before mixing with the sugar and cornstarch.
- For an extra flaky crust, keep all ingredients, especially the butter and water, very cold.
- If you prefer a sweeter pie, increase the sugar to 1 3/4 cups.
Nutrition
- Serving Size: 1 slice
- Calories: 410
- Sugar: 35g
- Sodium: 180mg
- Fat: 22g
- Saturated Fat: 14g
- Unsaturated Fat: 8g
- Trans Fat: 0g
- Carbohydrates: 54g
- Fiber: 4g
- Protein: 4g
- Cholesterol: 55mg