

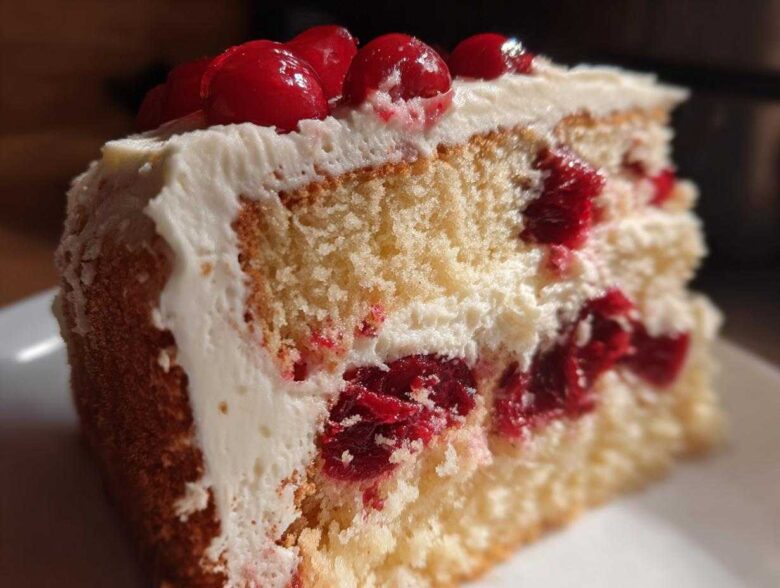
Oh boy, there is just nothing in the world that beats the smell of a real homemade cake filling up your kitchen! Forget that box mix stuff, trust me on this one. When I’m baking for a party or just because it’s Tuesday—which happens more often than I care to admit—I go straight to this recipe. This Classic Layered Cherry Cake is my absolute go-to for a reason. It’s unbelievably moist, bright with cherry flavor, and the vanilla buttercream? Forget about it! This cherry cake is the one my family fights over, especially around Christmas time. After years of tweaking, I finally have the perfect technique down for amazing results every time you bake, and I can’t wait to share it with you!
If you are new to baking layers, don’t sweat it! We’re going to walk through every single step together. You can check out a little more about my baking journey over on the About Us page if you’re curious, but right now, let’s get you that perfectly tender, fruity slice!
Why This Classic Layered Cherry Cake Recipe Works (Best Cherry Cake Recipe)
So, you’re wondering why THIS recipe beats all the others out there, right? I get it! There are a million cherry cake recipes floating around, but ours is special because it hits that sweet spot between rich and light. I’ve tried so many styles, from quick dump versions to fancy almond pairings, but this specific one is the winner.
- Incredible Texture: It bakes up perfectly tender every time. No dry edges here, I promise!
- Perfect Balance: The bright tartness of the cherries plays off the creamy vanilla buttercream so beautifully. You just can’t beat that classic combo.
- Versatility: Whether you need a stunning centerpiece for a holiday table or just a simple afternoon treat, this cake delivers.
Achieving a Truly Moist Cherry Cake
The secret to avoiding that crumbly texture that plagues so many layer cakes comes down to two things: the butter and the buttermilk. We use a good amount of softened butter, which gives the cake structure, but using buttermilk instead of regular milk adds just the right amount of necessary liquid and a little acidity. That acid reacts gently with the baking soda, giving you a subtle rise without developing tough gluten strands.
Pro tip: If you don’t keep buttermilk in the house (I usually don’t!), it’s so easy to make your own! Just take a cup of regular milk and stir in one tablespoon of white vinegar or lemon juice. Let it sit on the counter for about five minutes until it looks slightly curdled. Voila! Instant moistness booster!
Essential Ingredients for Your Homemade Cherry Cake
You absolutely cannot cut corners when it comes to making a superb homemade cherry cake. The quality of what goes in really shines through, especially since this cake doesn’t rely on overwhelming spice mixes to hide anything. We want that pure, bright cherry flavor popping through! I’ve broken the list down so you can easily grab what you need for the actual cake and then the luscious frosting we’ll whip up later.
When you shop, pay special attention to the cherries. Whether you go fresh or canned, you’ve got to drain those canned ones really, really well unless you want a soup instead of a batter. These measurements are what my decades of baking have proven to be the winning combination for that perfect texture!
Ingredients for the Moist Cherry Cake Batter
- 1 3/4 cups all-purpose flour
- 1 1/2 cups granulated sugar
- 1 teaspoon baking soda
- 1/2 teaspoon salt
- 1 cup unsalted butter, softened
- 3 large eggs
- 1 teaspoon vanilla extract
- 1 cup buttermilk
- 1 cup pitted fresh or canned cherries, drained and chopped
Ingredients for the Vanilla Buttercream Frosting
We need to make sure this frosting is fluffy but sturdy enough to hold up those beautiful layers. Don’t skimp on the softened butter here; it’s the base!
- 1/2 cup powdered sugar (yes, start with this amount, we’ll adjust!)
- 1/2 cup unsalted butter, softened
- 2 teaspoons vanilla extract
- 2-3 tablespoons milk (for frosting)
Step-by-Step Guide to Making the Perfect Cherry Cake
Alright, let’s get down to business! This is where the magic happens, but remember, baking is a bit like following a treasure map—you have to hit every landmark in order. Trust me, the timing here leads directly to that glorious, moist crumb we’re aiming for. Once you master the technique for this layer cake, you’ll feel like you can tackle anything, even something as tricky as a lattice crust, which you can check out some tips for right here if you ever get ambitious!
Preparing the Cherry Cake Layers
First things first: get that oven fired up to 350 degrees F (175 degrees C). And please, don’t just eyeball the pans! Grease and flour two 8-inch round cake pans properly. I usually grab my nonstick spray, dust it with flour, shake out the excess, and give those sides a good, even coating—it saves so much heartache later!
In your big bowl, whisk the dry stuff together: the flour, sugar, baking soda, and salt. Now, add the softened butter and the eggs right in there. You’ll beat it with your electric mixer until things look just combined. Next, stir in the vanilla and the buttermilk until it’s smooth, but here is the biggest note: Do not overmix! Seriously, just until it barely comes together. Finally, gently fold in those chopped cherries by hand. We keep mixing to a minimum to keep those air pockets nice and light.
Baking and Cooling Your Cherry Cake
Divide that lovely batter evenly between your two prepared pans. You want them as level as possible for even baking. Pop them in the oven for about 30 to 35 minutes. You’ll know they are done when a toothpick stuck right in the middle comes out clean—not wet, just clean!
This next part is crucial for a non-ruined cake: Let them chill out in the pans for 10 minutes. If you try to flip them out straight away, they might tumble! After those 10 minutes, carefully turn them out onto a wire rack. They must cool completely—I mean rock solid cool—before we even *think* about frosting them, or you’ll just have sweet cherry soup.
Assembling and Frosting the Layered Cherry Cake
While those layers are cooling off, make your frosting. Beat the powdered sugar and softened butter together until it’s looking creamy. This is where you can adjust the consistency. Add the vanilla, then slowly drizzle in the milk, a tablespoon at a time. Keep beating until it’s fluffy, creamy, and perfectly spreadable. If it’s too stiff, add a tiny splash more milk. If it starts getting loose, mix in a tablespoon of powdered sugar.
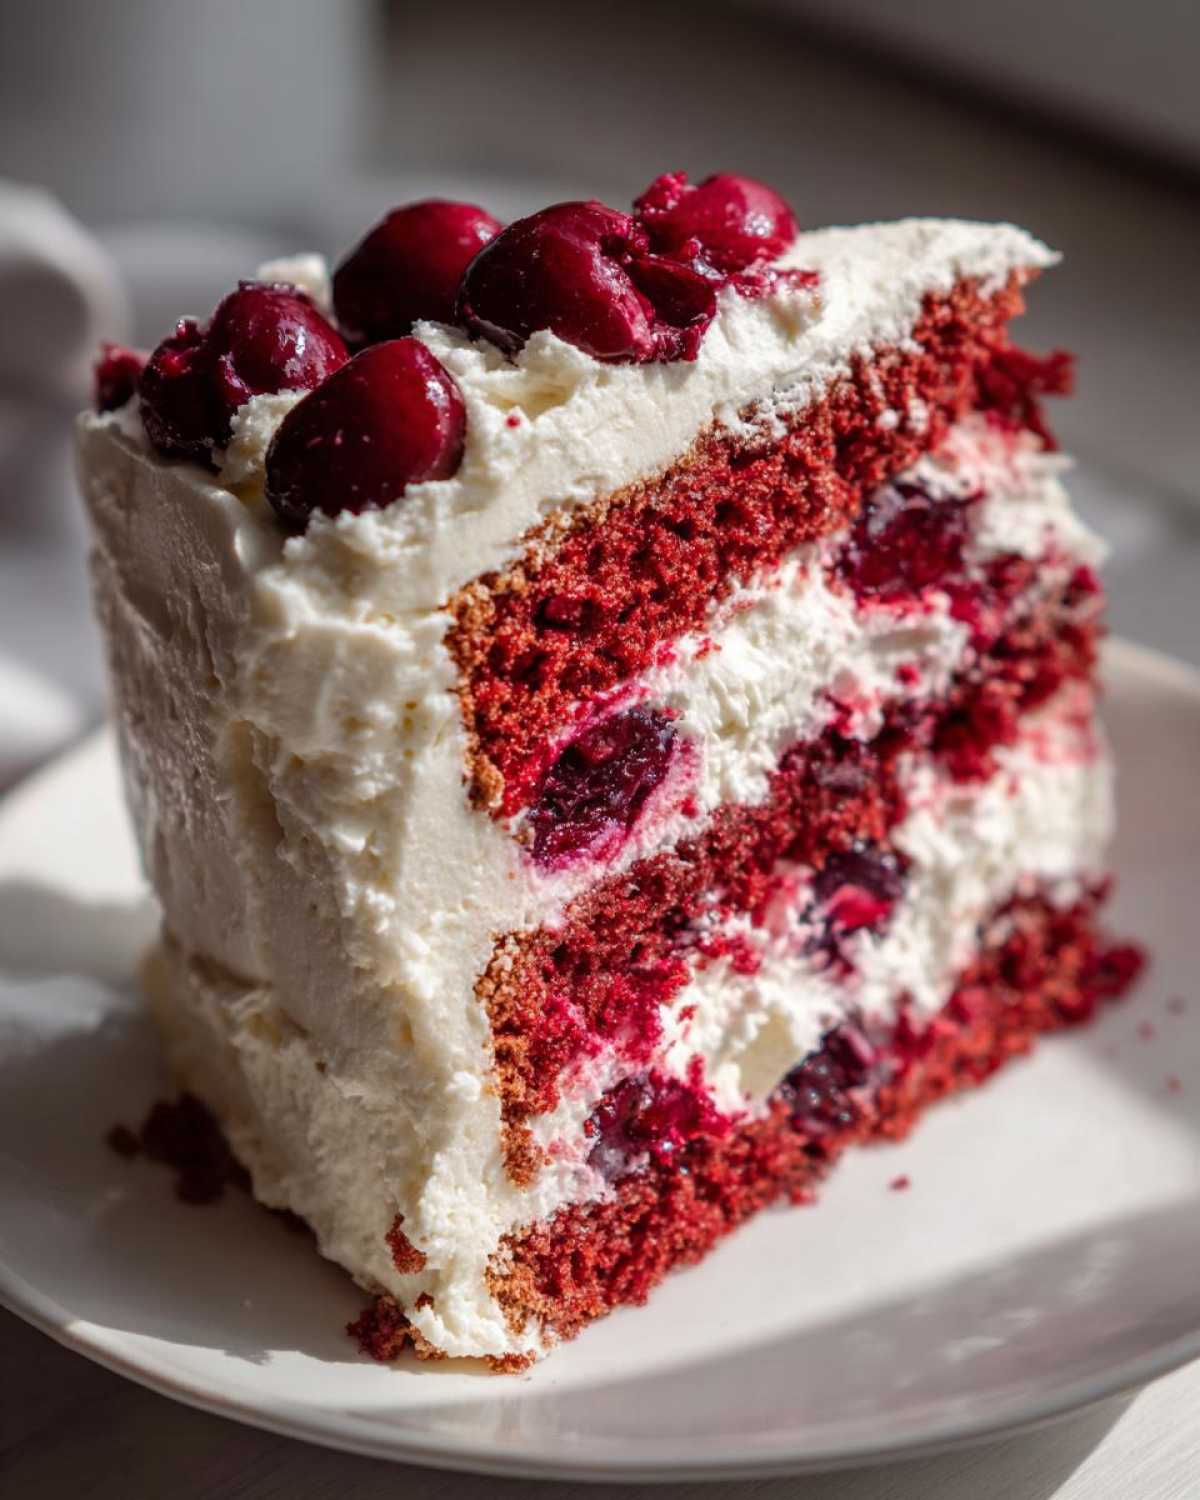
Once they’re completely cool, place the first layer on your serving plate. Spread a generous, even layer of frosting across the top. Set the second layer right on top, and then, take a big breath. Frost the top and then tackle the sides. Don’t worry if it’s not magazine perfect; a slightly rustic look is part of the charm with homemade goodies!
Expert Tips for Next-Level Cherry Cake Baking
Okay, now that you’ve mastered the basic steps for this stellar cherry cake, I want to share a few little secrets I’ve picked up over the years. These aren’t in the main instructions, but they are the real game-changers that take your cake from just “good” to the absolute best cherry cake recipe anyone has ever tasted. We’re talking slight tweaks that make a huge difference in the final flavor and texture!
I love experimenting with flavors, and sometimes a simple swap is all it takes to create something new, like turning this into a wonderful Cherry Almond Cake. If you’ve ever found yourself wishing you had a whole library of baking ideas in one spot, you should definitely take a look at some other fun recipes over on the blog!
Ingredient Substitutions for Your Cherry Cake
One thing people always ask me about is how to handle canned cherries versus fresh ones. If you’re using canned cherries because that’s what you have on hand—totally fine, we’ve all been there! The biggest thing you must do is press out that extra liquid before you chop and fold them into the batter. If you skip pressing them, you risk making the batter too wet, and nobody wants a sunken cake, right?
For a little depth, try swapping out half of the vanilla extract in the cake batter for almond extract. It’s amazing! Almond and cherry are best friends, and that hint of nuttiness really makes people say, “Wow, what is that secret ingredient?”
Variations on the Classic Cherry Cake Flavor
If you are looking to push this flavor even further, here are some easy ways to change things up. You can easily turn this into a Cherry Almond Cake just by using that almond extract trick I mentioned above. It’s subtle but delicious.
Another idea is to add a hint of warmth. If you’re baking this during cooler weather, try tossing in about half a teaspoon of ground cinnamon along with your dry ingredients. Suddenly, your cake has this cozy, familiar feel, making it a perfect holiday cherry cake! It’s funny how just a pinch of spice can transform a recipe you thought was already perfect.
Storage and Reheating Instructions for Your Cherry Cake
The hardest part about this cherry cake is probably waiting long enough to eat it all! But if you manage to have leftovers—which is rare around my house—you’ll want to store it correctly so that buttery frosting doesn’t go south.
If the entire cake is frosted, it needs to be covered tightly. I usually use a cake dome, but plastic wrap works fine as long as you don’t press it right onto the buttercream, or it will smudge everything. Keep it covered at cool room temperature for about two days. Honestly, this vanilla buttercream is so sturdy, you don’t usually need to refrigerate it unless your kitchen is super hot.
If you happen to have leftover unfrosted layers? Wrap those tightly in plastic wrap, maybe even foil over the plastic, and they are good sitting on the counter for maybe three days. When you’re ready to eat them, just let them come up to room temperature for about an hour before you frost and serve. Room temperature cake always tastes better than cold cake, doesn’t it?
Frequently Asked Questions About This Cherry Cake Recipe
I know you might have lingering questions, especially if this is your first time baking a truly from-scratch cherry cake! It’s totally normal. We want to make sure your experience making this moist cherry cake is absolutely foolproof, whether you’re looking for an easy cherry cake shortcut or need to know about specific cherry types.
I’ve gathered the questions I get most often in my inbox. If you want to see more baking advice or maybe dive into some other delicious dessert recipes, check out my general baking ideas page!
Can I make this a Quick Cherry Dessert instead of a Layered Cherry Cake?
Oh yes, absolutely! If you’re short on time and need a quick cherry dessert, this batter works beautifully in other formats. You can pour the whole batch into a greased 9×13 inch baking pan. It might need an extra 5 to 10 minutes in the oven, but it’s fantastic served right out of the pan like a snacking cake. You can even frost it right in the pan! Another quick option is dividing the batter between two loaf pans for delightful mini cakes.
What is the best way to use Maraschino Cherries in this Cherry Cake?
If you’re aiming for that nostalgic, vintage cherry cake look, maraschino cherries are your friend! However, they are super sweet and packed in syrup. The most important thing is draining them until they are practically dry. I actually pat them down on a paper towel after draining just to make sure they don’t introduce extra liquid into the batter.
Because they are so sweet, you might want to cut back on the granulated sugar in the main batter by about two tablespoons. That keeps the overall cake from tasting overly sugary when you combine that bright cherry with the vanilla buttercream.
Estimated Nutritional Information for This Cherry Cake
Now, I have to give you the standard disclaimer here, because I’m a home baker, not a registered dietitian! I ran the numbers just so you have a ballpark idea of what you’re looking at when you grab a slice of this rich, delicious cake. So, keep in mind these are just estimates based on the ingredients list, and they are calculated for one generous slice of the finished product.
For folks watching their intake, this is helpful context, but remember that the way we bake and substitute can shift these numbers slightly. I always say, if you’re enjoying a homemade treat, it’s worth every single calorie!
Here’s what the numbers generally look like based on the recipe:
- Serving Size: 1 slice
- Calories: 380
- Sugar: 45g
- Sodium: 250mg
- Fat: 19g
- Saturated Fat: 11g
- Unsaturated Fat: 8g
- Trans Fat: 0.5g
- Carbohydrates: 50g
- Fiber: 1g
- Protein: 4g
- Cholesterol: 85mg
Honestly, for a full, rich layer cake with buttercream, that looks pretty respectable to me! It proves you don’t have to sacrifice flavor for enjoyment.
Share Your Homemade Cherry Cake Creations
Now that you’ve got the recipe, I am just dying to see what you come up with! Seriously, sharing what you create in your own kitchen is the best part of me putting these recipes out there. When you finish wrapping those beautiful layers in that fluffy vanilla buttercream, snap a picture for me, won’t you?
If you post it on social media, please tag me! I love seeing your decorating styles. And if you have a minute, hop back over here and leave a star rating on the recipe card. Knowing how your bake turned out helps other folks decide to try it, and I read every single comment!
I’m already thinking about what to bake next—maybe a dark chocolate pairing? Tell me, what fruit variation are you already planning to try next time you whip up this lovely dessert? Let me know in the comments below, and if you have any specific troubleshooting questions, you can always reach out via the contact page!
PrintClassic Layered Cherry Cake with Vanilla Buttercream
A recipe for a moist, layered cake featuring fresh or canned cherries, topped with a simple vanilla buttercream frosting.
- Prep Time: 25 min
- Cook Time: 35 min
- Total Time: 60 min
- Yield: 10 servings
- Category: Dessert
- Method: Baking
- Cuisine: American
- Diet: Vegetarian
Ingredients
- 1 3/4 cups all-purpose flour
- 1 1/2 cups granulated sugar
- 1 teaspoon baking soda
- 1/2 teaspoon salt
- 1 cup unsalted butter, softened
- 3 large eggs
- 1 teaspoon vanilla extract
- 1 cup buttermilk
- 1 cup pitted fresh or canned cherries, drained and chopped
- 1/2 cup powdered sugar (for frosting)
- 1/2 cup unsalted butter, softened (for frosting)
- 2 teaspoons vanilla extract (for frosting)
- 2-3 tablespoons milk (for frosting)
Instructions
- Preheat your oven to 350 degrees F (175 degrees C). Grease and flour two 8-inch round cake pans.
- In a large bowl, whisk together the flour, sugar, baking soda, and salt.
- Add the softened butter and eggs to the dry ingredients. Beat with an electric mixer until just combined.
- Stir in the vanilla extract and buttermilk until the batter is smooth. Do not overmix.
- Gently fold in the chopped cherries.
- Divide the batter evenly between the prepared cake pans.
- Bake for 30 to 35 minutes, or until a toothpick inserted into the center comes out clean.
- Let the cakes cool in the pans for 10 minutes before inverting them onto a wire rack to cool completely.
- To make the frosting, beat the powdered sugar and softened butter together until creamy. Add the vanilla extract and milk, one tablespoon at a time, until the frosting reaches a spreadable consistency.
- Once the cakes are completely cool, place one layer on a serving plate. Spread a layer of frosting on top. Place the second layer on top and frost the top and sides of the entire cake.
Notes
- If you use canned cherries, press out excess liquid before chopping and adding them to the batter.
- For a richer flavor, substitute almond extract for half of the vanilla extract in the cake batter.
- You can use fresh or frozen cherries; if using frozen, do not thaw them completely before adding.
Nutrition
- Serving Size: 1 slice
- Calories: 380
- Sugar: 45g
- Sodium: 250mg
- Fat: 19g
- Saturated Fat: 11g
- Unsaturated Fat: 8g
- Trans Fat: 0.5g
- Carbohydrates: 50g
- Fiber: 1g
- Protein: 4g
- Cholesterol: 85mg