

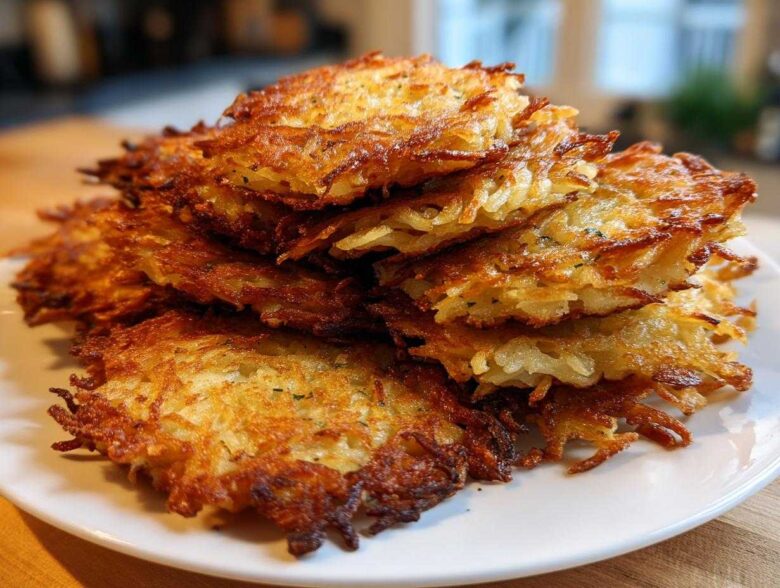
Listen, I have been there. I have made sad, soggy, oily excuses for potato pancakes that looked more like grayish puddles than the glorious, golden brown wonders they are supposed to be. But friends, all that changes today! I finally cracked the code to making potato latkes that actually shatter when you bite into them. Forget everything you think you know about frying these savory little cakes; the real magic isn’t in the oil temperature—though that helps—it’s about getting almost every drop of water out of those grated spuds first. Seriously, this recipe locks in that light and crispy exterior every single time, and trust me, developing this technique took me years of frustrated scrubbing!
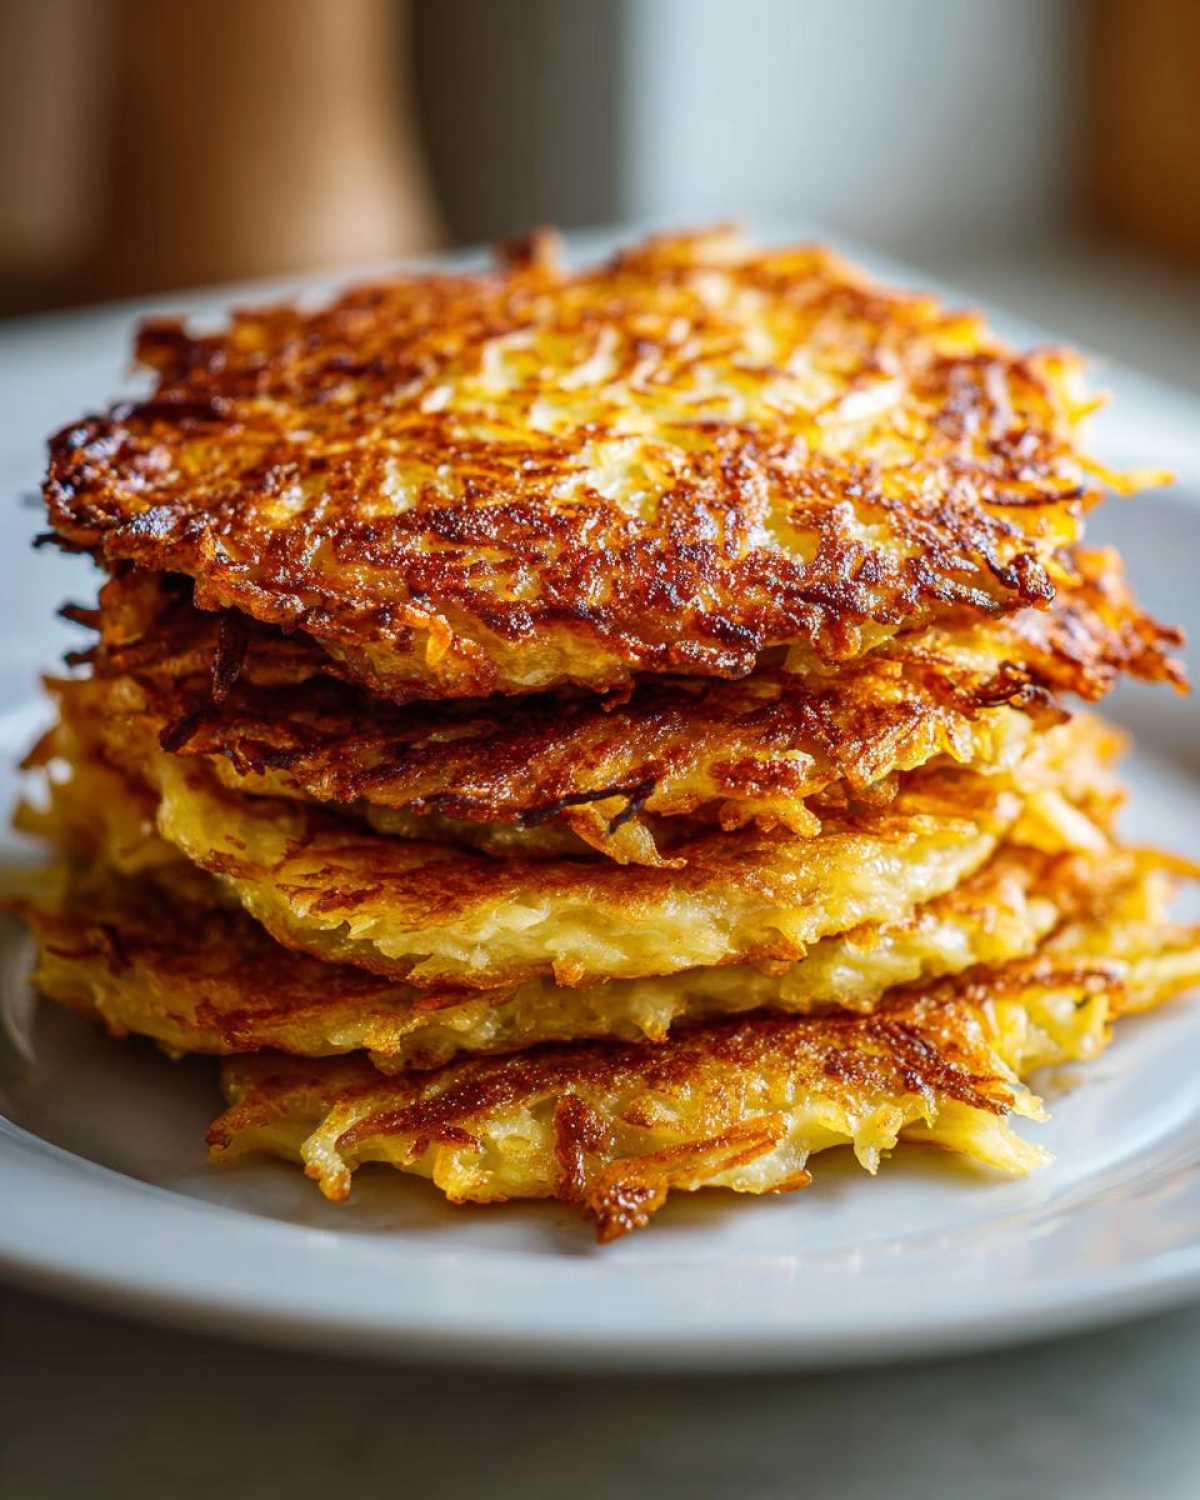
If you’re looking for that unmistakable crunch that makes these a must-have holiday side dish or just an amazing snack, you need to follow my moisture control rules exactly. I promise you won’t believe how simple it is once you know the secret. It’s all about the squeeze, and I’m going to show you exactly how I do it. You can check out more about our passion for great cooking over at our story.
Why You Will Make The Best Crispy Potato Latkes Every Time
I want you to ditch the fear of soggy bases right now! When you use this method, you are guaranteed success, even if you’ve had trouble mastering how to make latkes without getting soggy in the past. It’s all about getting that perfect contrast we all dream about.
- You will achieve a truly shatteringly crisp exterior that browns beautifully—no limp edges here!
- The interior remains tender and perfectly cooked, never gummy.
- We focus only on the necessities to keep these light and crispy latkes tasting true to the traditional recipes.
- Your batch will stay crisper longer on that wire rack, ready for serving with your favorite toppings.
Essential Ingredients for Traditional Potato Latkes
Okay, let’s talk about what goes into these glorious savory potato patties. The list is short, which is exactly how a traditional latkes recipe should be! Keeping the ingredient list simple means we focus all our energy on technique, which is where the flavor is really locked in. Remember, we aren’t looking for fancy additions here; we want those classic, comforting flavors that remind you of the best Jewish traditional food.
You’ll need about three big russet potatoes—please use russets, they have the starch we need! We pair those with one average-sized yellow onion. Then we bind it all together with two large eggs that have been lightly beaten beforehand. For our minimal binders, grab a quarter cup of all-purpose flour. I always put in a full teaspoon of salt and about half a teaspoon of fresh black pepper. Don’t forget the oil! You need enough vegetable or canola oil to cover about an inch deep in your skillet for proper frying. If you need to review any disclaimers about substitutions, you can check out our disclaimer page.
Mastering the Technique: How to Prepare Crispy Potato Latkes
Now we get down to the brass tacks of creating the best potato pancakes—the technique! If you skip this part, you won’t get those beautiful, golden brown potato cakes you deserve. Everything we do here is aimed at creating the crackle, starting with the prep. You can see how we incorporate our savory homemade Chex mix inspiration into some of our more adventurous recipes over here (savory homemade Chex mix), but for these traditional potato latkes, precision is key.
Grating and Squeezing: The Secret to Non-Soggy Potato Latkes
First things first: peel those potatoes and that onion. You want to use the coarse side of the grater, not the fine side, for the best texture. Grate them right into a clean kitchen towel or a really sturdy piece of cheesecloth. Now, take a deep breath and squeeze. I mean squeeze with all your might!
You should see a shocking amount of liquid draining out. This is the enemy of crispiness, right? That starchy water is what causes soggy results. Keep squeezing until almost nothing comes out. Seriously, you need to get rid of every last drop if you want an answer to how to make latkes without getting soggy.
Here’s my extra little secret for next-level crispiness: After the first squeeze, toss that potato pile into the fridge for about 15 minutes. Then, squeeze it again! You’d be surprised how much more liquid you pull out that first squeeze missed.
Mixing the Batter for Perfect Potato Latkes
Once you have your super-dry shreds, put them in a clean bowl. Now, we add the eggs, flour, salt, and pepper. Mix this gently! You want everything coated, just barely combined. The second you start overmixing potato batter, you activate too much starch, and guess what happens? They get gummy!
Keep your movements light and quick. We only mix until we see no more dry flour streaks left. That’s it. Don’t stand there stirring for five minutes staring lovingly at the bowl; get it mixed and straight into the hot oil!
The Ultimate Latke Frying Technique for Golden Brown Potato Latkes
Okay, we have the driest potato mixture possible, now it’s time for the main event: the frying! This is where we turn our prepared mixture into those perfect potato latkes we’ve been dreaming about. You need a heavy-bottomed skillet—don’t skimp here—with about an inch of oil poured in. We want to get this hot, but not smoking hot.
Heat your oil up until it hits about 350 degrees Fahrenheit. If you don’t have a thermometer, toss a tiny bit of batter in; it should immediately sizzle vigorously without immediately turning dark brown. We work in batches because overcrowding the pan instantly drops the oil temperature, and that leads right back to greasy, sad latkes. Drop heaping tablespoons of your potato mixture into the hot fat, and flatten them slightly with the back of your metal spoon—this helps them cook evenly and get those lacy, crisp edges.
Let them cook for about three to five minutes per side until they achieve that amazing deep, golden brown potato cake color. As soon as they come out, place them immediately on a wire rack that you’ve set over some paper towels. Skipping the rack and placing them directly on paper towels is a common mistake; the rack lets air circulate underneath so the bottoms don’t steam and lose their crispness. If you want to see another great sizzling recipe, check out my garlic butter steak bites!
Oil Temperature Management for Crispy Potato Fritters
This is non-negotiable territory! Temperature control is the difference between truly crispy potato fritters and oil sponges. You absolutely have to keep that oil steady, hovering right between 325 degrees Fahrenheit and 350 degrees Fahrenheit while you fry each batch. If the heat is too low, the shredded potato pancakes soak up oil like crazy and get floppy. If it’s too high, they burn on the outside long before the inside is cooked through.
Watch closely while they fry. If the sizzling calms down, crank the heat up slightly before the next batch goes in. If they are browning too fast, turn the burner down right away. Keeping that temperature locked in ensures you get those beautiful, uniform, golden brown potato cakes every single time.
Serving Suggestions for Classic Potato Latkes
Here’s the thing about these homemade latkes: they cool down fast! You really want to serve these savory potato patties right away while they are at their peak crunch factor. If you’re going traditional—and honestly, why mess with perfection?—you absolutely must have two things on hand: good sour cream and high-quality applesauce!
The mix of the tangy, cool sour cream and the sweet, sometimes chunky applesauce is just mandatory when eating latkes with applesauce and sour cream. It’s the classic pairing for a reason, my friends! If you are feeling a little adventurous, maybe try making a brighter, fruitier salsa to go alongside; I love a fresh topping, check out my fresh mango salsa recipe for inspiration, but keep the classics nearby!
Storage and Reheating Instructions for Homemade Latkes
So, you made too many—which is the only way to make potato latkes, if you ask me! That’s the beauty of these classic potato fritters; they reheat surprisingly well, provided you follow my storage rules. Never, ever store them in an airtight container once they’ve cooled down. Trust me on this; that trapped moisture will turn your crispy dream into a steamy nightmare.
The absolute best way to store leftovers is to let them cool completely on the wire rack first. Then, layer them in a clean container using paper towels between each layer. This absorbs any residual moisture and keeps them separate. They’ll keep nicely in the fridge for about three days.
Now for the critical part: reheating! If you even think about putting these in the microwave, you are wasting your hard work. Microwaving steams them instantly, and poof—no more crispness. You need dry heat to bring that lovely crunch back. The oven or an air fryer works wonders.
For the oven, spread them in a single layer on a baking sheet, maybe tossing them back onto that wire rack if you have room, and bake at 375 degrees Fahrenheit for about 8 to 10 minutes. If you are using an air fryer, just toss them in for 4 or 5 minutes at that temperature. Either way, they come out tasting almost freshly fried! If you’re looking for a quick side to go with them, I’ve got a fantastic recipe for quick refrigerator dill pickles that cuts right through the richness of the fried potatoes.
Common Questions About Making Potato Latkes
I know you’ve put in the work to get those potatoes shredded and squeezed dry, but you probably have a few lingering worries bouncing around in your head. That’s totally normal! Mastering potato latkes means understanding the nuance. Here are the top things people ask me when they’re trying to make the best potato pancakes and nailing that holiday spread.
Can I bake these potato latkes instead of frying?
Oh, I wish I could say yes, but I can’t lie to you! If you want that shatteringly crisp crust and that decadent, rich flavor that defines traditional potato latkes, you have to fry them. Baking them just doesn’t give you the same texture. When you bake them, they end up much softer, often more like a baked hash brown patty than a crispy fritter. If you absolutely must bake them—maybe you’re making a huge batch for a gathering and can’t manage the stovetop—you should lightly brush them with oil on both sides and bake them at 400 degrees Fahrenheit on parchment paper until they’re deeply golden. But honestly, for the best potato pancakes experience, stick to the oil!
What is the best potato to use for traditional latkes recipe?
This is a fantastic question, and it’s one of the biggest secrets to success! For a traditional latkes recipe, you absolutely want high-starch potatoes. My go-to, and what I used in the recipe above, is the Russet potato. Russets seem to release the right kind of starchy water when you squeeze them, and that starch acts like nature’s glue, helping your shredded potato pancakes bind together perfectly. Plus, that extra starch helps them crisp up beautifully in the oil. Waxy potatoes, like red potatoes, tend to fall apart easily, so stick with Russets for that perfect crunch!
If you have any other burning questions about this recipe or just want to drop a note, please feel free to get in touch using the contact form. I love hearing how your homemade latkes turned out!
Nutritional Estimate for Potato Latkes
The numbers below are a very loose estimate for one potato latke based on the ingredients listed, but please remember values can swing wildly depending on how much oil they absorb during frying—our goal is minimal absorption, but it happens!
For full details on what we collect, you can check out our privacy policy.
- Serving Size: 1 latke
- Calories: 110
- Fat: 6g
- Carbohydrates: 11g
- Protein: 2g
- Sugar: 0.5g
- Sodium: 250mg
Share Your Crispy Potato Latkes Success
Now comes the best part—seeing your amazing creations! I genuinely hope this recipe has changed the way you view frying potato latkes forever. Getting that perfect, light and crispy texture is something to brag about, so show off!
When you make a batch, please come back here and leave a rating. Five stars if they shattered wonderfully when you cut into them! I’m dying to know how they turned out. Did you stick to the traditional serving of sour cream and that lovely applesauce, or did you try something totally different?
I’d love to hear if this became your new go-to for Hanukkah recipes or if you found yourself enjoying these golden brown potato cakes as a fun, savory side dish year-round. Don’t forget to share your pictures with the community!
Head over to our main blog page and let your culinary success stories inspire the next person who’s worried about watery potatoes. Happy frying!
PrintUltimate Crispy Potato Latkes: Traditional Recipe

Make traditional potato latkes that achieve a shatteringly crisp exterior and tender interior using proper moisture removal techniques.
- Prep Time: 20 min
- Cook Time: 20 min
- Total Time: 40 min
- Yield: About 12 latkes
- Category: Side Dish
- Method: Frying
- Cuisine: Jewish
- Diet: Vegetarian
Ingredients
- 3 large russet potatoes (about 1.5 lbs)
- 1 medium yellow onion
- 2 large eggs, lightly beaten
- 1/4 cup all-purpose flour
- 1 teaspoon salt
- 1/2 teaspoon black pepper
- Vegetable oil or canola oil, for frying (about 1 inch deep)
Instructions
- Peel the potatoes and the onion. Grate them using the coarse side of a box grater or a food processor attachment.
- Place the grated potatoes and onion in a clean kitchen towel or several layers of cheesecloth. Gather the edges and squeeze out as much liquid as possible. This step is crucial for crispiness. Discard the liquid.
- Transfer the dried potato and onion mixture to a medium bowl.
- Add the beaten eggs, flour, salt, and pepper to the bowl. Mix gently until just combined. Do not overmix.
- Pour about 1 inch of oil into a large, heavy-bottomed skillet and heat over medium-high heat until the oil reaches 350 degrees Fahrenheit (175 degrees Celsius).
- Carefully drop heaping tablespoons of the potato mixture into the hot oil, flattening them slightly with the back of the spoon to form thin pancakes. Work in batches to avoid overcrowding the pan.
- Fry for 3 to 5 minutes per side, until deeply golden brown and crisp. Adjust heat as needed to prevent burning.
- Remove the latkes from the oil and place them on a wire rack set over a baking sheet lined with paper towels to drain excess oil.
- Serve immediately with applesauce and sour cream.
Notes
- For extra crispiness, you can chill the grated potato mixture for 15 minutes after squeezing out the water, then squeeze again before mixing with other ingredients.
- Maintain the oil temperature between 325F and 350F during frying for the best texture.
- If you prefer a smoother texture, use the fine side of the grater for half of the potatoes.
Nutrition
- Serving Size: 1 latke
- Calories: 110
- Sugar: 0.5
- Sodium: 250
- Fat: 6
- Saturated Fat: 1
- Unsaturated Fat: 5
- Trans Fat: 0
- Carbohydrates: 11
- Fiber: 1
- Protein: 2
- Cholesterol: 35