

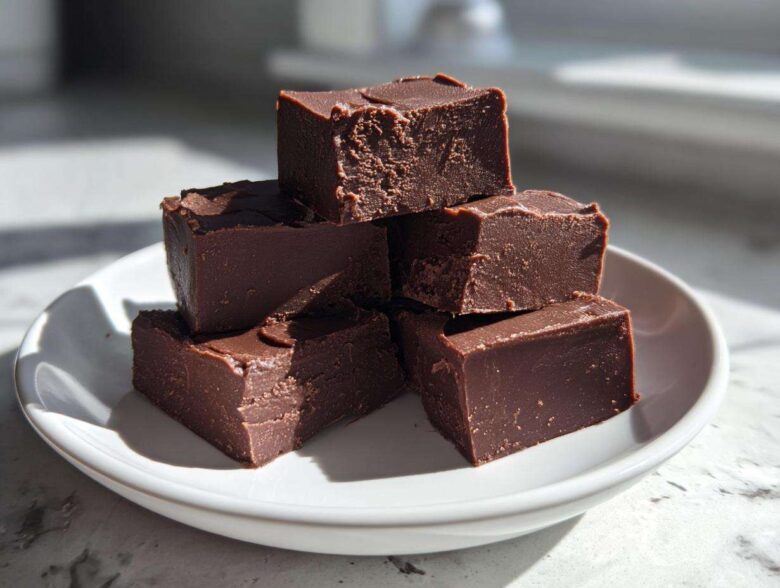
Okay, listen up! I know you’ve seen those gorgeous holiday candy platters overflowing with the richest, most decadent treats imaginable, and you instantly think, “I wish I had time for that.” Well, stop wishing! Because I have cracked the code on truly irresistible, melt-in-your-mouth chocolate fudge that takes about five minutes of actual work. Seriously, five minutes! I used to be terrified of making homemade fudge; it always ended up grainy or too soft. But this specific three-ingredient version changed everything. I taught this recipe to my neighbor last Christmas, and she said it was the easiest, most foolproof candy she had ever made. If you are looking for a quick dessert that tastes like you slaved over it all day, you’ve come to the right place!
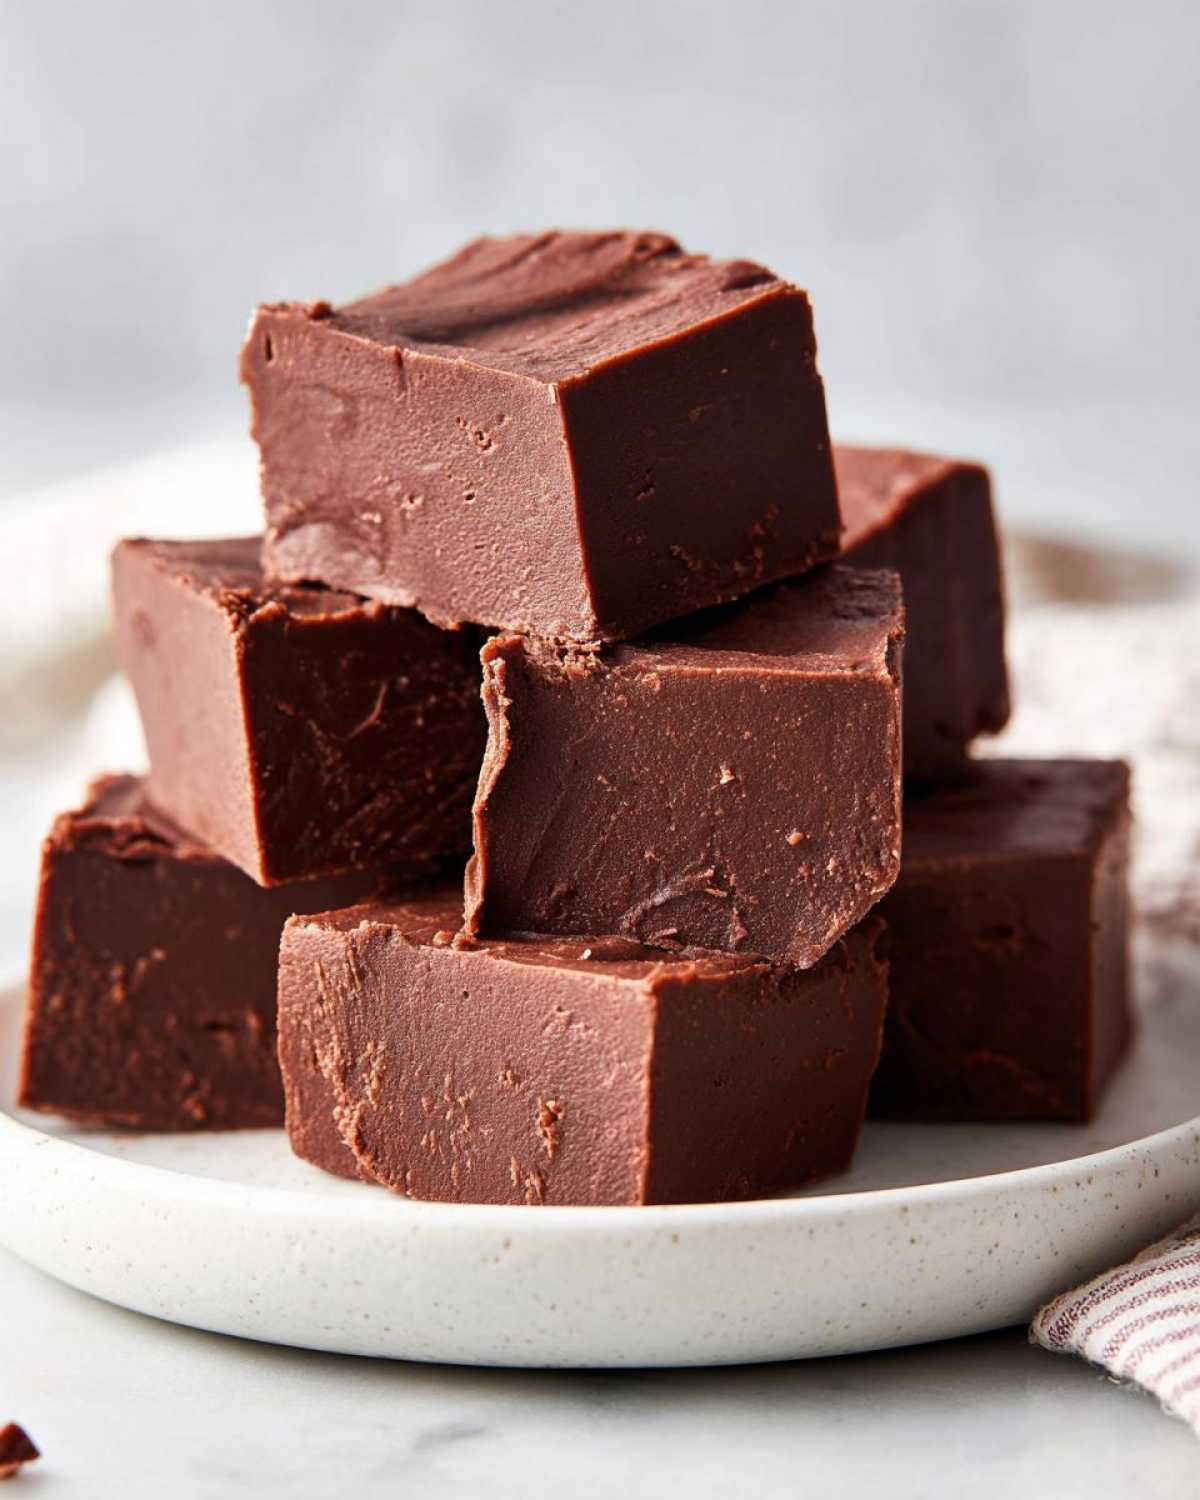
It even looks impressive sitting on my cooling rack, which is half the battle, right? If you want creamy, dreamy chocolate goodness without all the fuss of tempering or tricky sugar cooking, stick with me. We are making magic happen! You can check out my other quick baking fixes, like this amazing no-bake holiday delight while this sets up later.
Why This Easy Fudge Recipe is Foolproof
I know what you’re thinking: Fudge is hard. It requires candy thermometers and prayers. Not this version! I promise you, this simple recipe removes all the guesswork. It’s designed for people like me who want decadence without the drama.
The Magic of 3 Ingredient Fudge
It truly hinges on the sweetened condensed milk. That stuff does all the heavy lifting! Because we use that as our base, we skip all the stages of heating sugar to the soft-ball stage. It’s almost impossible to mess up, which makes it truly no-fail. You get that traditional creamy fudge texture without any of the effort.
Quick Dessert Ready in Minutes
This is my go-to when guests suddenly show up or I need to round out a holiday basket fast. The active time is genuinely under five minutes. You melt it, stir it, and chill it. That’s it! You get a fantastic, rich treat that qualifies as a top-tier Quick Dessert, but it takes zero actual baking skill.
Gathering Ingredients for Your Simple Fudge Recipe
The beauty of this simple fudge recipe is right there in the name: we only need three things. I keep these ingredients stocked in my pantry at all times because you never know when a fudge craving will strike! You don’t need any fancy equipment—just a microwave-safe bowl and a spatula. Don’t bother pulling out that heavy saucepan unless you really want to, which I’ll explain below.
Here is exactly what you need for this foolproof candy:
- 1 (14 ounce) can sweetened condensed milk
- 2 cups semi-sweet chocolate chips
- 1 teaspoon vanilla extract
Ingredient Notes and Substitutions for Perfect Fudge
Listen carefully here about the ingredients—this is where you guarantee that creamy fudge texture. Always use the full-fat sweetened condensed milk. The low-fat stuff just doesn’t have the right amount of sugar and fat needed to bind properly, and that’s how we end up with sad, grainy fudge! For the chocolate chips, semi-sweet is awesome, but if you want something a little more grown-up and less sweet, go for dark chocolate chips. Trust me, it deepens the flavor beautifully!
Now, if your microwave is being tricky or you just prefer the stovetop method, you absolutely can. Just use low heat and stir constantly until it’s melted and glossy. But honestly, microwaving is so much faster, and I rarely bother with the stovetop for this recipe anymore.
Step-by-Step Instructions for Microwave Fudge
Getting this beautiful, decadent microwave fudge done is so straightforward it feels like cheating. We are relying on short bursts of heat, which is the secret to keeping our chocolate smooth and preventing that dreaded scorched taste. Since we are using the microwave, you want to make sure you have everything ready to go before you even turn the machine on, because once it starts melting, you need to work fast!
This method is really what makes this such a quick dessert. I always grab my notes from my little baking blog area—you can find all my quick tips over at my baking space—to make sure I don’t forget any crucial steps. Now let’s get this chocolate mixed!
Preparing the Pan and Melting the Chocolate Fudge Base
First things first, grab that 8×8 inch pan. You absolutely must line it with parchment paper, and this is a non-negotiable step! Just make sure you leave a little overhang on two opposite sides. These little parchment flaps are your handles later on—they let you lift the entire slab of fudge out without messing up the sides or having to scrape the bottom.
Next, toss the condensed milk and the chips into a microwave-safe bowl. Microwave it for a full 60 seconds. When that timer dings, pull it out—careful, it’s hot! Stir it like you mean it. If it still looks lumpy, pop it back in for 30-second intervals, stirring well after every single time. If you try to zap it for a full minute again, you risk burning the chocolate, and nobody wants that bitter taste in their fudge!
Setting and Cutting Your Creamy Fudge
Once it is totally smooth and glossy—that means you’ve got that perfect, uniform color—stir in that little splash of vanilla extract. Pour it immediately into your prepared pan and use a spatula to gently coax it into the corners. Don’t press too hard; we want to keep the top surface as nice as possible!
Now comes the hardest part: waiting! Pop the pan into the fridge for a minimum of two hours. If you rush this step, you’ll end up with sticky fingers and a gooey mess instead of nice squares of Creamy Fudge. Once it’s firm, use those parchment overhangs to lift the whole block out onto a cutting board. A sharp, quick knife will slice it into lovely squares. They are perfect for immediate snacking or for packing up as homemade candy gifts!
Variations on Classic Chocolate Fudge
Now that you’ve mastered the absolutely easiest chocolate fudge in existence, you can’t stop there, right? Why keep life simple when you can add more deliciousness? This base recipe is so flexible; it begs for creative additions. We can take this basic chocolate fudge and turn it into something totally new with just one extra ingredient.
I love making batches just before the holidays because it’s such a fantastic base for all the festive flavors floating around. It’s sturdy enough to handle mix-ins, and since it’s so quick, I can whip up three different kinds in the time it used to take me to bake one tricky batch of old-fashioned fudge.
Making Peanut Butter Fudge
If you are a peanut butter fanatic like my husband, you need to try this modification. To create amazing peanut butter fudge, you have two options, depending on how strong you want that PB flavor. My absolute favorite way is to actually replace half of the semi-sweet chocolate chips with creamy peanut butter chips. If you don’t have those, just stir in about 1/2 cup of creamy peanut butter right after you take the mixture out of the microwave, along with the vanilla. Be warned: Because peanut butter is oilier, you might need to stir it for an extra minute to get it perfectly smooth. You can find some of my other favorite peanut butter-based sweets over at the protein muffin recipe section if you ever need a less sweet fix!
Holiday Candy Fudge Add-ins
This is where we seriously level up our Christmas Treats game! Once the fudge is smooth and you’ve stirred in the vanilla (before pouring it into the pan), throw in whatever delights you have on hand. For winter, I usually fold in about 1/2 cup of finely crushed candy canes—it gives the fudge a beautiful pink swirl. Or, if you like that salty-sweet combination, sprinkle flakey sea salt over the top right before it goes into the fridge to chill.
You can also always swirl in some caramel or melted white chocolate if you want a marbled effect. Just be gentle when swirling so you don’t mix it *too* much—we still want distinct layers in our holiday candy!
Tips for Achieving Perfect Homemade Fudge Texture
Even though this is the easiest fudge recipe ever, we still have to respect the chocolate! My biggest fear when making any simple fudge recipe is ending up with that grainy, crumbly texture that screams “I was rushed!” That happens when the chocolate gets too hot or you stir it after it has already started to set up.
The key here is temperature control, even in the microwave. If you keep microwaving the mixture until every single chip is melted, you’ve gone too far. Once you see just a few lumps left, that’s your signal to pull it out and just stir! Residual heat does the rest of the work, and that gentle melt is what keeps your final product looking glossy and feeling wonderfully creamy. Remember, we are aiming for smooth, not scorched!
Another thing folks struggle with is getting it soft enough to cut. If you find your fudge is setting up too firm, it usually means you cooked it slightly too long, or perhaps your ratio of chips to condensed milk was slightly off. Don’t fret! I found this out the hard way. If it sets hard one time, let it sit on the counter for about 30 minutes before cutting, or microwave the whole pan for just 5 or 10 seconds to soften the edges slightly. It works wonders! For more in-depth general baking reliability tips, you should review my site’s terms of use, just so you know what to look for in all my recipes.
Storing Your Homemade Fudge for Maximum Freshness
Honestly, the biggest challenge with this amazing, no-bake candy isn’t making it—it’s keeping it around long enough to enjoy! Because this recipe is so rich and dense, it holds up beautifully at room temperature, which is a huge perk when you’re trying to save fridge space during the holidays.
The good news is, you don’t actually have to refrigerate this fudge if you plan on eating it fairly soon. Store your cut squares in an airtight container right on your counter. It stays perfectly fresh and soft for up to a full week this way. Room temperature is actually where the texture really shines because it keeps that velvety, melt-in-your-mouth feeling. You don’t want it rock hard, right?
If, by some miracle, you have leftovers past a week, or if your kitchen is super warm and humid, then pop that airtight container into the fridge. It will last a bit longer in the cold! Just remember to let it sit out on the counter for about 20 minutes before serving if you pull it from the fridge. That little bit of warming time brings back the perfect texture. This stability really makes it one of the best options for gifting!
Frequently Asked Questions About This Fudge Recipe
I get so many messages about this super easy fudge recipe, and most people are just asking how it keeps up its magic tricks! It’s natural to have questions when a recipe seems almost too simple, especially when you are comparing it to the long, involved process of making traditional old fashioned fudge. Trust me, answering these helps everyone get that perfect, creamy result! I always share my site policy disclaimers, like those found in my site terms, whenever I give detailed advice like this.
Can I use regular milk instead of condensed milk in this fudge?
Oh, I wish you could, but no, you really can’t for this particular style of microwave fudge. That sweetened condensed milk is doing heavy lifting! It’s already cooked down significantly and has a ton of sugar. If you swap it out for regular milk, you won’t have enough sugar or thickness to set up correctly. You’d end up with warm chocolate soup, not fudge. The condensed milk is the backbone of this foolproof recipe!
How do I make this fudge creamy if it sets too hard?
This usually happens if you overheat the chocolate mixture just a tiny bit, which causes some of the sugar crystals to bind up too tightly. If you cut into it and it’s harder than you like, don’t panic! You can often rescue it. Place the uncut block back in the warm microwave for just 5 to 10 seconds, really low power. Then, stir gently, almost folding it. If it’s still too firm after that little heat kiss, take a spoon and stir in about half a teaspoon of extra melted butter—that fat helps soften the structure right up. It should return to a much nicer creamy texture instantly.
Is this recipe suitable for making Christmas Treats?
Absolutely! This is my number one choice for Christmas Treats because I can whip up a batch while the oven is busy with cookies. It’s the perfect candidate for Homemade Candy Gifts. Once it’s set and you lift it out of the pan, just slice it into skinny little rectangles instead of squares. Tie a ribbon around a stack of them, maybe place them in a sheer bag, and add a little sprinkle of edible gold dust on top. They look totally professional, and nobody will ever guess it only took you ten minutes to make!
Estimated Nutritional Information for This Fudge
Look, I’m not a nutritionist, and I’m certainly not trying to turn our favorite decadent treat into a salad, but I do like to know what I’m looking at when I hand these out! Remember, since this is a super easy recipe with just three core ingredients, this information is a solid estimate based on using standard semi-sweet chips and full-fat condensed milk. It’s Option A as listed on all my recipe cards!
This is based on yielding about 36 small squares from the whole batch:
- Serving Size: 1 square
- Calories: 120
- Sugar: 15g
- Sodium: 25mg
- Fat: 6g
It’s a small, concentrated bit of sweetness, which is perfect when you only need one little piece to satisfy that craving!
Share Your Homemade Candy Gifts
Well, that’s it! You’ve made the easiest, creamiest fudge in the entire world. Wasn’t that less stressful than boiling water? Now that your house smells amazing and you have a whole pan of homemade candy waiting to be devoured, I really, really want to hear about it!
This is the part where I hope you’ll stick around a bit longer. Did this simple fudge recipe actually save your holiday dessert plans? I need to know if my favorite trick works for you too! Please take a second, scroll down past those FAQs, and leave me a rating. A star rating tells me instantly if this recipe is top-tier, but a comment telling me how you adapted it—maybe you used espresso powder or added nuts—is even better!
If you snapped a picture of your finished, perfectly cut squares, please tag me on social media! I’d love to see how you packaged up your homemade candy gifts. Seriously, sharing what we bake together is the best part of my day. Happy snacking, and I’ll see you in the comments section of my contact page soon!
PrintEasy 3-Ingredient Chocolate Fudge
Make rich, creamy chocolate fudge quickly using only three simple ingredients. This recipe is foolproof and perfect for a fast dessert or holiday treat.
- Prep Time: 5 min
- Cook Time: 5 min
- Total Time: 10 min
- Yield: About 36 small squares
- Category: Dessert
- Method: Microwave
- Cuisine: American
- Diet: Vegetarian
Ingredients
- 1 (14 ounce) can sweetened condensed milk
- 2 cups semi-sweet chocolate chips
- 1 teaspoon vanilla extract
Instructions
- Line an 8×8 inch pan with parchment paper, leaving an overhang on the sides for easy removal.
- In a medium, microwave-safe bowl, combine the sweetened condensed milk and chocolate chips.
- Microwave on high for 60 seconds. Stir well.
- Continue microwaving in 30-second intervals, stirring after each interval, until the mixture is smooth and fully melted. This usually takes 1 to 2 minutes total.
- Stir in the vanilla extract until combined.
- Pour the fudge mixture into the prepared pan and spread evenly.
- Refrigerate for at least 2 hours, or until firm.
- Use the parchment overhang to lift the fudge out of the pan. Cut into small squares before serving.
Notes
- For a richer flavor, use dark chocolate chips instead of semi-sweet.
- If you prefer a stovetop method, heat the condensed milk and chocolate chips gently in a saucepan over low heat, stirring constantly until smooth.
- Store leftover fudge in an airtight container at room temperature for up to one week.
Nutrition
- Serving Size: 1 square
- Calories: 120
- Sugar: 15
- Sodium: 25
- Fat: 6
- Saturated Fat: 4
- Unsaturated Fat: 2
- Trans Fat: 0
- Carbohydrates: 16
- Fiber: 0.5
- Protein: 2
- Cholesterol: 5