

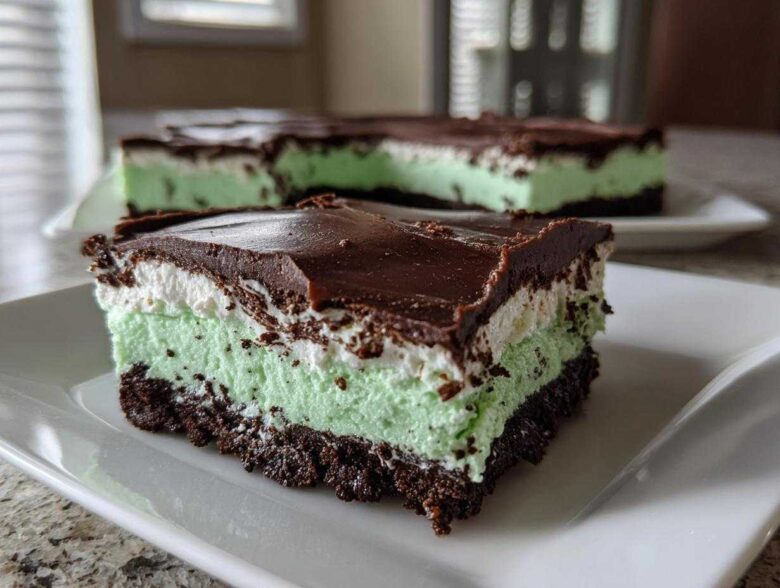
Okay, confession time: my favorite desserts are the ones that look like I spent hours sweating over a hot stove, but honestly, I didn’t touch the oven once. If you’re like me—a chocolate lover who craves that refreshing mint bite—then you’re going to obsess over these No-Bake Chocolate Mint Icebox Bars. Seriously, these are famous in my house. I first whipped these up for a last-minute summer potluck when my AC died, and I’ve been making them ever since, usually in the dead of winter because that cool mint flavor just hits different! Check out my guide for easy no-bake Oreo balls for another simple win!
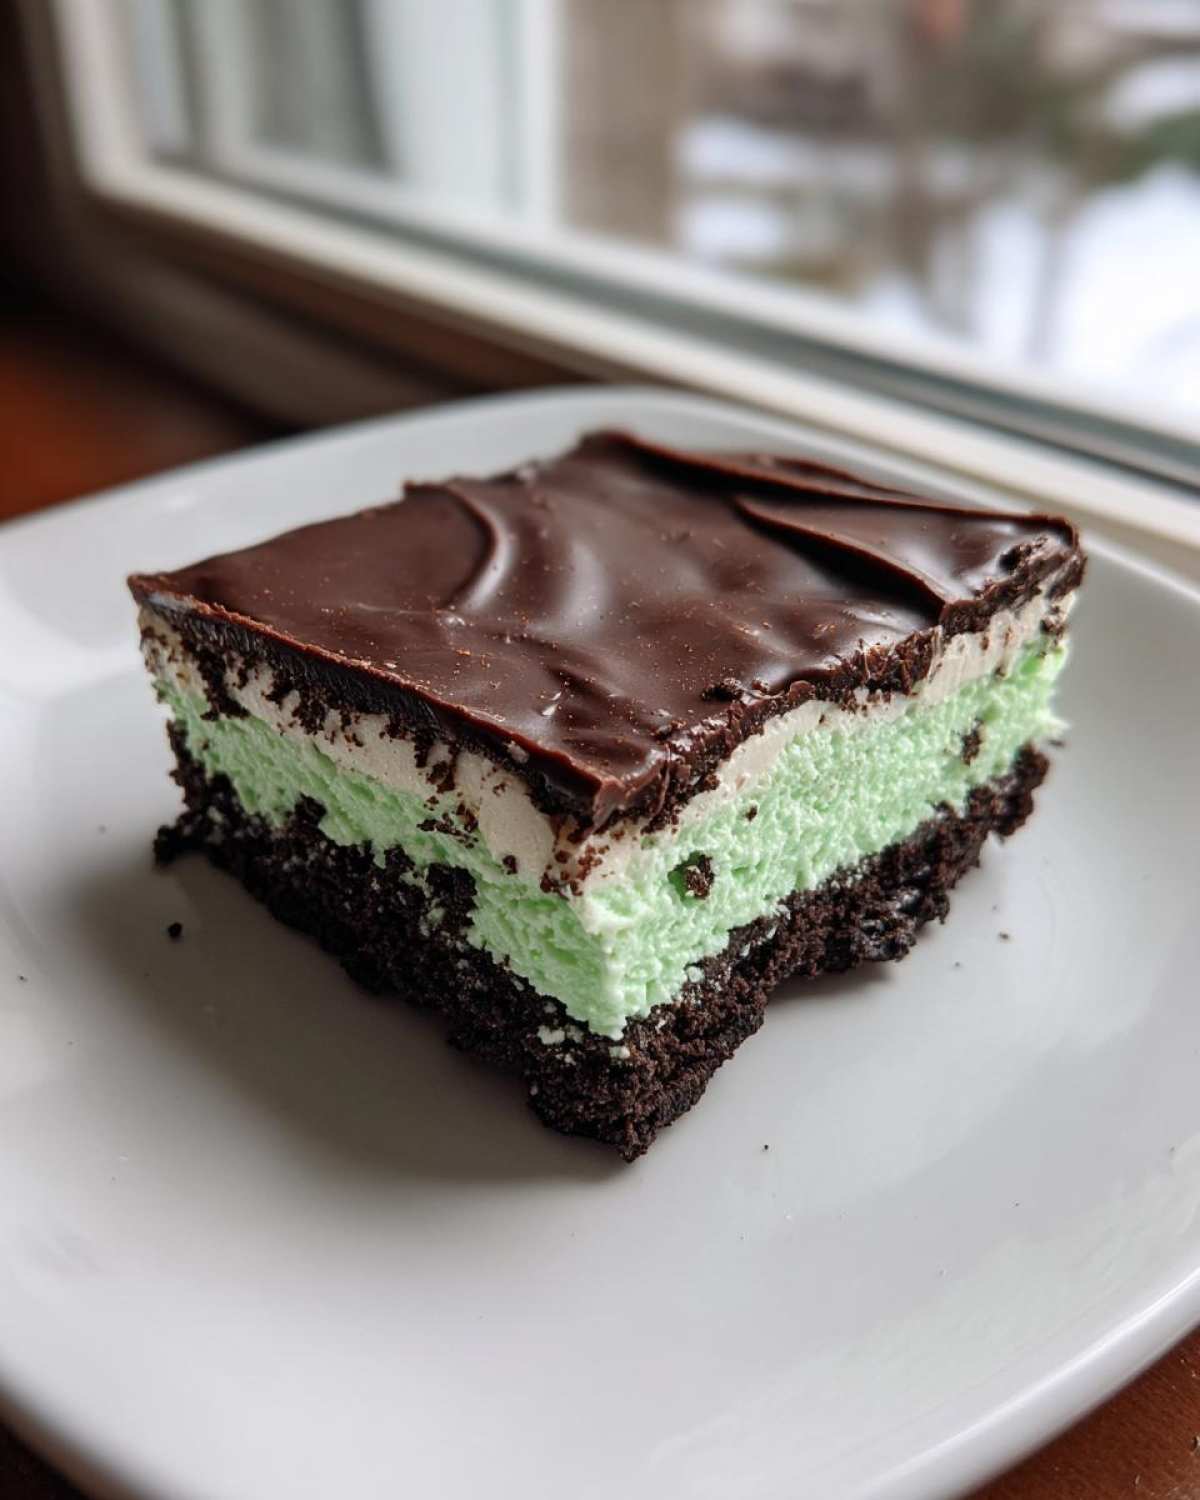
These bars are the ultimate trifecta: a crisp, chocolatey Oreo crust, a cloud-like creamy mint filling, and a smooth, shiny chocolate top layer. They are the *definition* of a layered icebox cake that sets up perfectly in the fridge. Forget complicated baking steps; this recipe is pure, simple magic that always impresses everyone who tries them. It’s truly the best simple chocolate freezer dessert you’ll ever make.
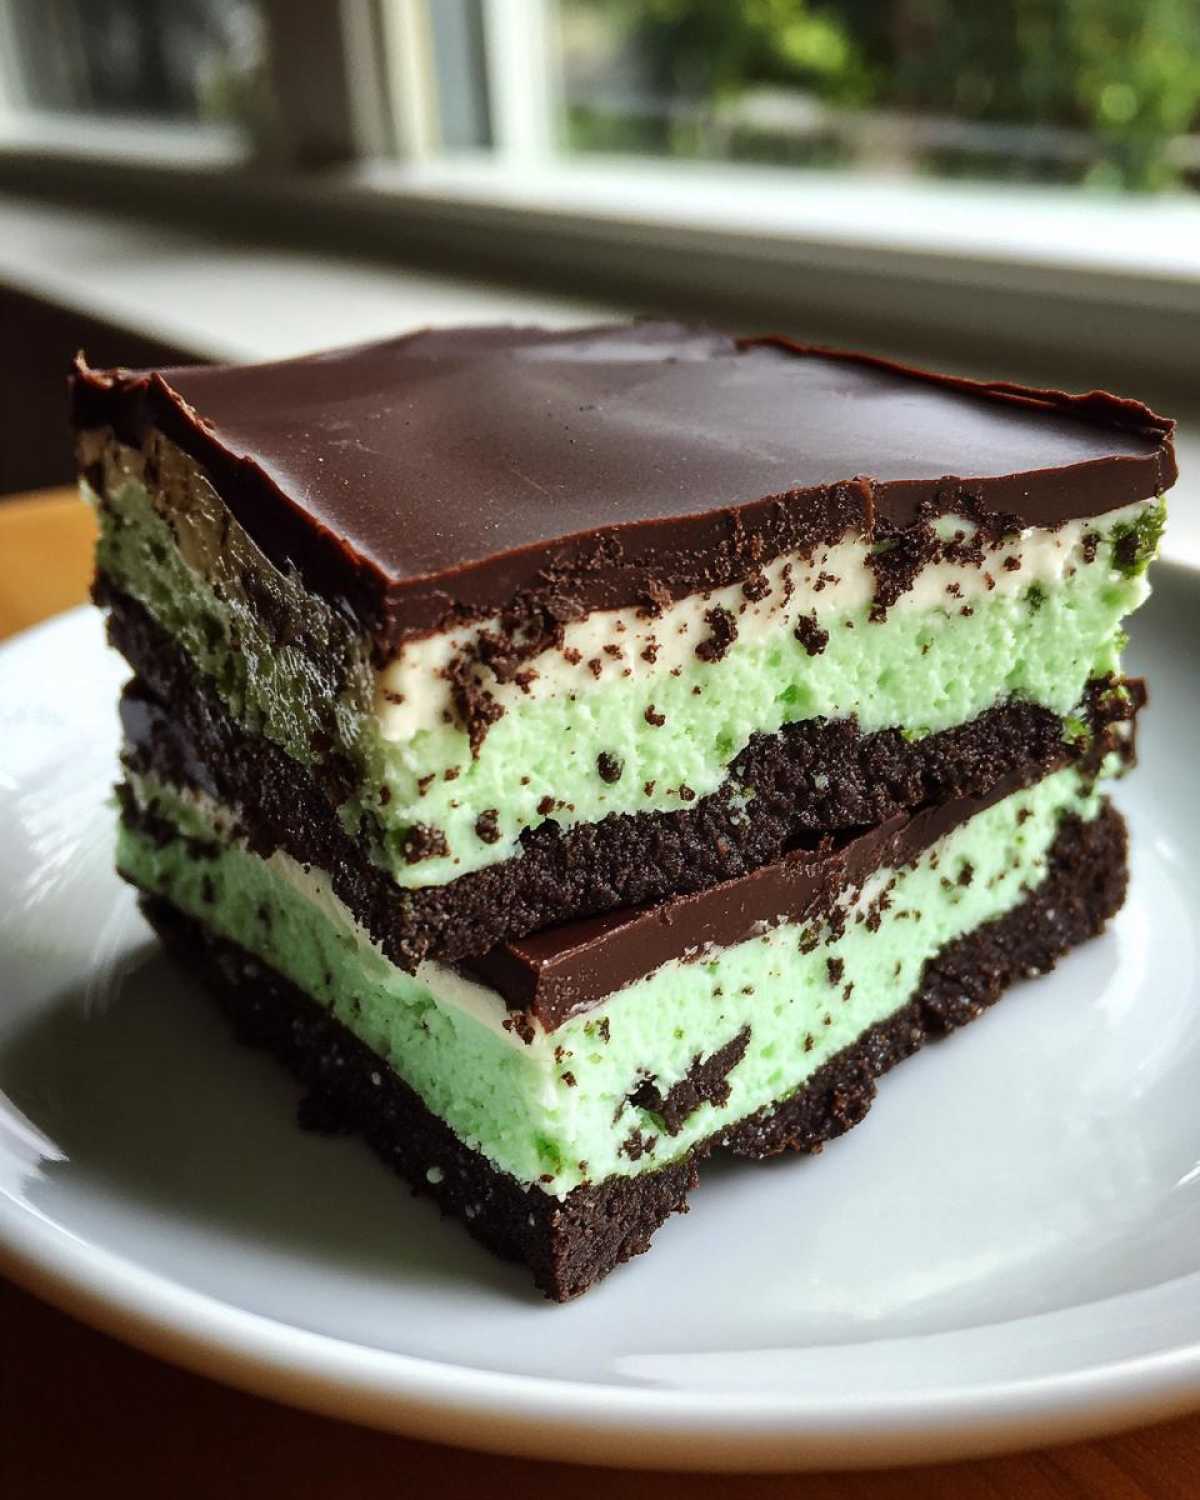
Why You Will Love These No-Bake Chocolate Mint Icebox Bars
Honestly, what’s not to love? These bars tick every single box for a winner dessert. They never fail me, and I think they’ll become your go-to recipe too.
- Zero oven time! Perfect for those scorching summer days when you need quick summer sweets.
- The texture is unmatched—super creamy mint filling over a crisp chocolate base.
- That perfect blend of rich dark chocolate and cool peppermint flavor in every bite.
- They are fantastic make ahead desserts; just pull them out when you need them.
If you need another easy, no-fuss idea, check out these double chocolate peppermint cookies, but for pure, rich decadence, these No-Bake Chocolate Mint Icebox Bars take the crown!
Gathering Ingredients for Your No-Bake Chocolate Mint Icebox Bars
Because this is a no-bake recipe, the quality of what you put in really matters, even if it’s just sitting in the fridge! We need three main components for these layered dessert ideas: a strong base, that light-as-air creamy filling, and of course, the chocolate blanket on top. I always check my pantry twice before I start mixing. If you want to see another recipe that uses chocolate and mint, you should check out these double chocolate peppermint cookies!
Make sure your cream cheese is truly softened—that’s key for avoiding lumps in the mint layer. Trust me on that one!
For the Crushed Oreo Crust
This crust is always a crowd-pleaser. It’s sturdy enough to hold up the layers but melts perfectly in your mouth.
- 1 1/2 cups crushed Oreo cookies (I usually grind about 30 cookies in the food processor until they look like coarse sand).
- 6 tablespoons unsalted butter, melted.
For the Creamy Mint Filling
See how we use two different amounts of heavy whipping cream? The larger amount gets whipped into stiff peaks to keep the filling light and fluffy, so make sure it is nice and cold before you start beating it!
- 8 ounces cream cheese, softened to room temperature so it mixes smoothly.
- 1 cup powdered sugar, sifted if it looks lumpy.
- 1 teaspoon vanilla extract.
- 1/2 teaspoon peppermint extract. It’s potent, so start here!
- 1/4 teaspoon green food coloring (optional, but it gives you that classic mint chip look!).
- 1 cup heavy whipping cream, kept cold.
For the Chocolate Ganache Topping
This topping sets up beautifully, giving you that clean, square cut we are looking for in these chocolate mint squares.
- 4 ounces semi-sweet chocolate, finely chopped (chopping it helps it melt faster!).
- 1/2 cup heavy whipping cream (this is separate from the cream we used for the filling).
Step-by-Step Guide to Making No-Bake Chocolate Mint Icebox Bars
Honestly, once you gather all your ingredients, putting these No-Bake Chocolate Mint Icebox Bars together flies by! It’s all about layers waiting patiently for the next one. Following these steps ensures you get that perfect, distinct cool mint layer sitting right on top of that rich crust.
Preparing the Oreo Crust Base
First things first, you need a base that won’t crumble when you try to cut it. Grab your 8×8 inch pan and line it completely with parchment paper. Make sure you leave a big overhang on two opposite sides—that parchment sling is your best friend later when you need to lift the whole thing out in one piece! Mix those crushed Oreos and the melted butter until everything is damp and crumbly, then pack it down hard into the bottom. I mean *really* pack it. Put that pan straight into the freezer while we work on the magic middle layer.
Creating the Creamy Mint Layer
We have to beat that softened cream cheese until it looks like silk. No lumps allowed! Once it’s smooth, slowly mix in all your dry stuff—the powdered sugar, vanilla, peppermint, and that drop of green coloring if you want the full effect. Now, this is crucial: Whip that cup of heavy cream separately until you get stiff peaks. You want those peaks to stand up tall! Gently fold the whipped cream into the cream cheese mixture. If you stir too hard, you lose all that air we just whipped in, and the whole filling gets dense. Be gentle!
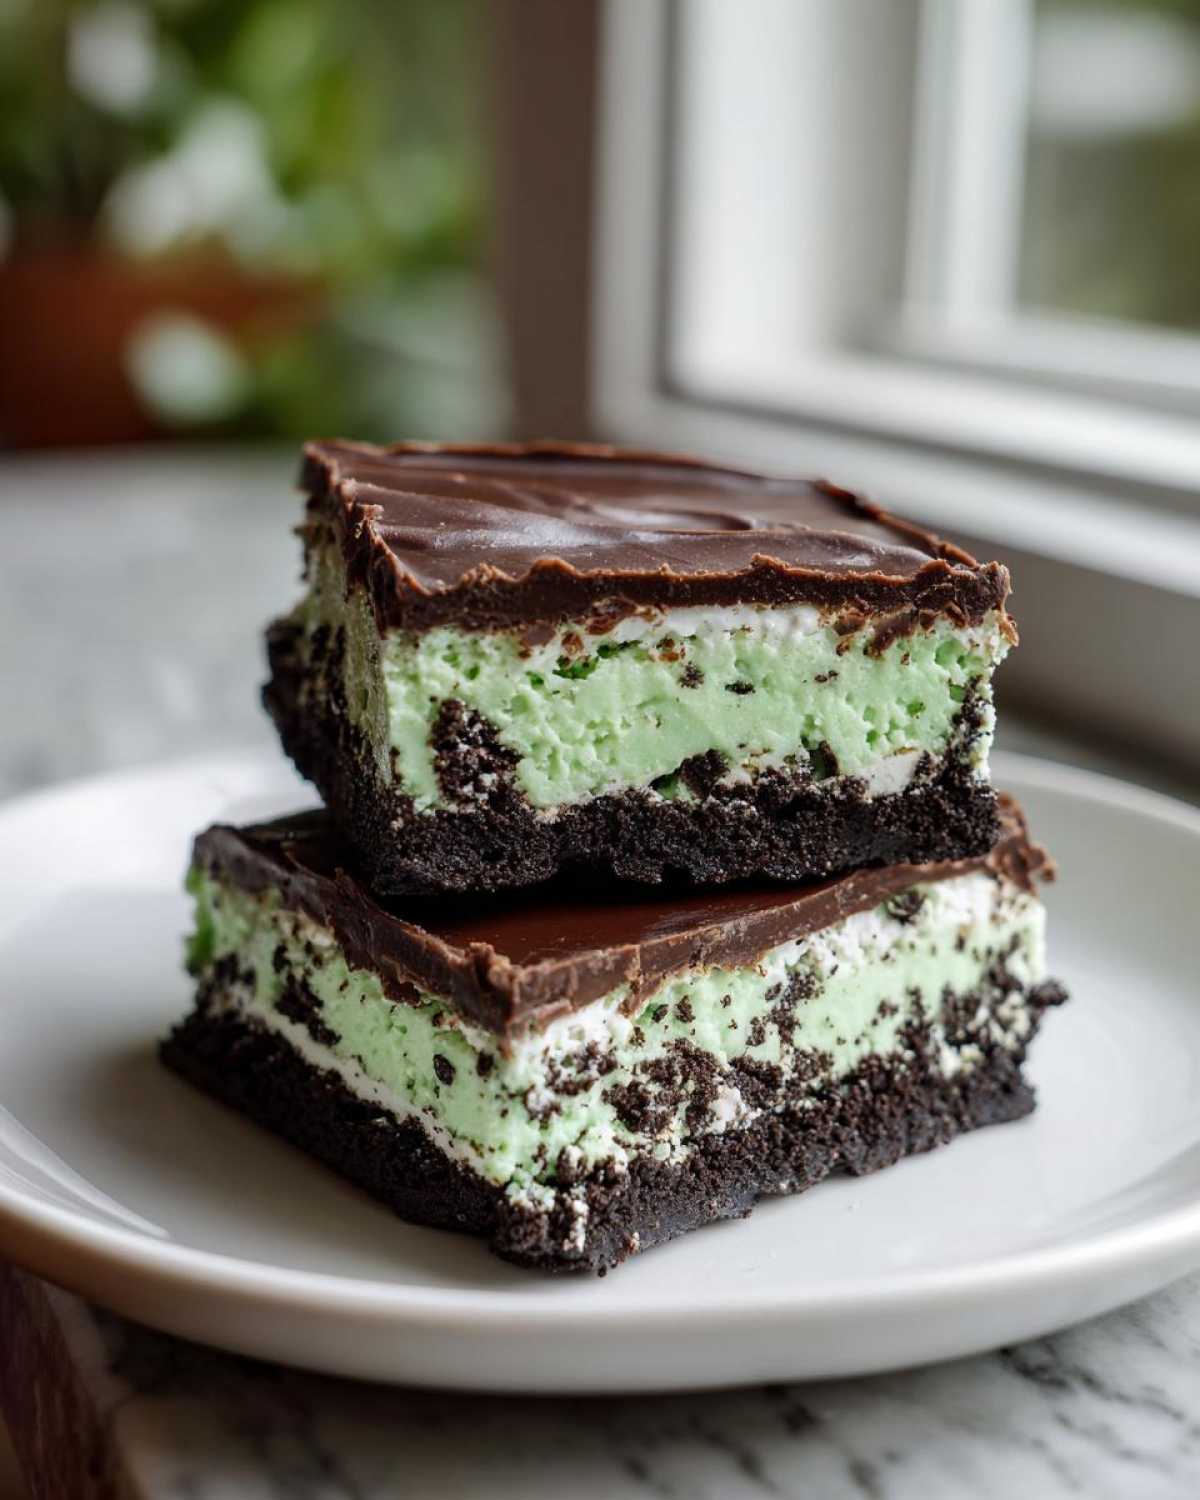
Assembling and Setting the Layered Icebox Cake
Take your crust out of the freezer. It should be nice and firm now. Carefully spread that gorgeous, light mint filling evenly over the crust. Smooth the top as best you can. This needs to chill out and firm up before we put the chocolate on, so pop it back in the refrigerator for at least one hour. Don’t rush this, or your next layer will start bleeding into the mint!
Finishing with the Chocolate Ganache
This ganache is simpler than anything! Put your chopped chocolate in a heatproof bowl. Heat up the other half cup of heavy cream until it’s just simmering—you’ll see tiny bubbles around the edge, don’t let it boil over! Pour that hot cream right over the chocolate bits and just leave it alone for five full minutes. Don’t touch it! After five minutes, grab a whisk and stir gently until it’s one homogenous, glossy sauce. Pour this right over your chilled mint layer and spread it fast. Back into the fridge it goes for at least four hours, or overnight if you can handle the wait! You can peep this recipe for grasshopper pie if you want another no-bake treat!
Tips for Perfect No-Bake Chocolate Mint Icebox Bars
Even though these are technically an easy chocolate mint bars recipe, there are a few things I swear by to make sure they look professional and taste incredible every single time. We want those distinct layers for our No-Bake Chocolate Mint Icebox Bars, not a soupy mess!
First up, let’s talk about achieving those stiff peaks for the whipped cream. If your cream doesn’t whip up, your mint layer will weep later, and that’s not good! Make sure your heavy whipping cream is straight out of the fridge—ice cold—and use a clean, chilled bowl. Any fat residue or warmth will stop those lovely peaks from forming.
When you fold that whipped cream into the cream cheese mixture, think of it like you’re tucking in a baby for a nap. Be gentle! You’re incorporating air, not mixing cake batter. Use a spatula and cut down the middle, then sweep up the side. That keeps the filling airy and light, giving us that wonderful texture contrast with the crust.
For the ganache, never let the cream boil vigorously. If you see those big, rolling bubbles, pull it off the heat immediately! Pouring scalding hot cream onto the chocolate can actually cause the cocoa butter to seize up, giving you a grainy topping instead of that smooth, luscious chocolate coating. If you’re nervous about your ganache, I always keep an extra splash of warm milk or cream handy to whisk in gently if the chocolate looks too stiff once it cools.
Finally, patience is a virtue when setting these bars! If your crust is soft when you pour the filling, they will definitely mix together. If the filling is too soft when you pour the ganache, they’ll merge, too. When in doubt, give it an extra 30 minutes in the fridge. These No-Bake Chocolate Mint Icebox Bars are worth the short wait for that perfect slice! If you enjoy making things from scratch, you might like checking out my guide on homemade chocolate cake, though this bar version is way faster!
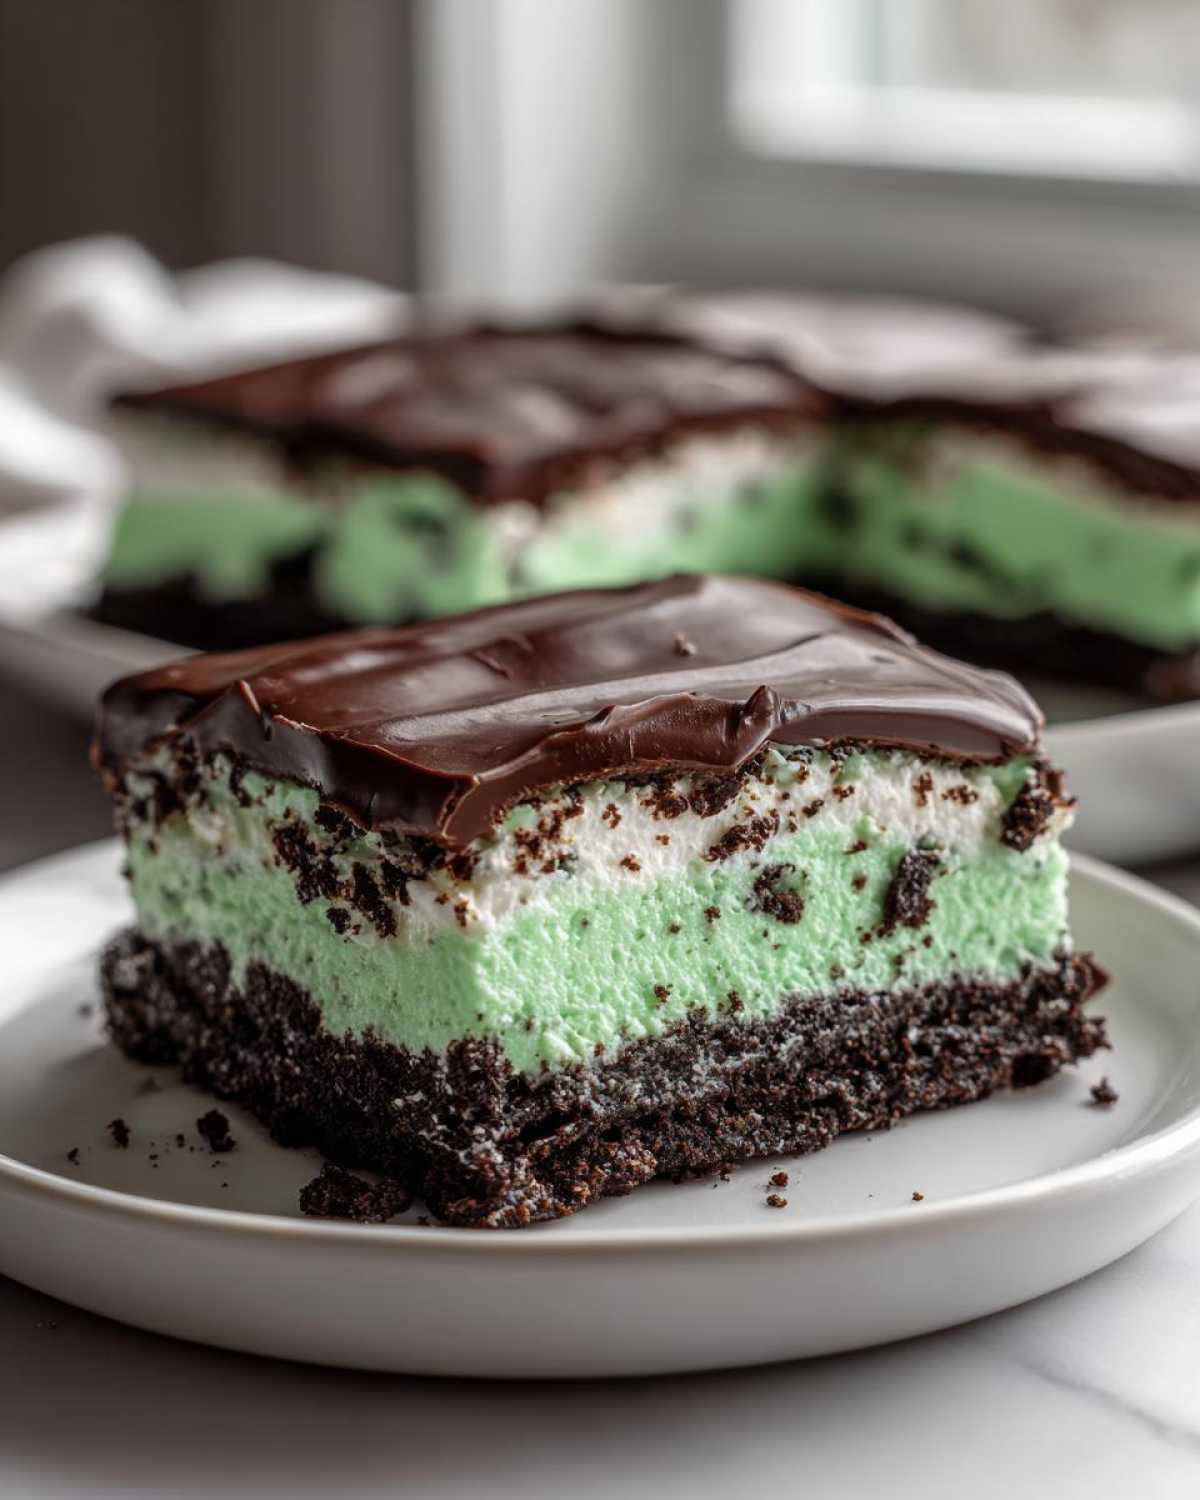
Ingredient Notes and Substitutions for Mint Chocolate Dessert
I get asked all the time if you can swap out ingredients in my favorite recipes, and the answer is usually yes—but let’s talk about what stays the same and what you can change up in these creamy mint bars!
The structure of these bars really relies on that base being firm and the filling being light, so we tread carefully when approaching substitutions. However, if you find yourself missing an ingredient, don’t fret; we can make it work for a lovely chocolate mint dessert!
For instance, if Oreos are out of stock, I’ve got you covered. You can definitely use graham cracker crumbs instead of the crushed Oreos for the base. Just follow the recipe chart—you’ll use the same amount of crumbs (1 1/2 cups) and the same amount of melted butter (6 tablespoons). It changes the crust flavor from super dark chocolate to something a bit milder, but it still provides that crunchy texture we need.
Now about the chocolate on top—the recipe calls for semi-sweet, which I love because it balances the sugar in that mint layer beautifully. But if you dream in deep, dark chocolate, using chopped bittersweet chocolate will give you a much richer, less sweet finish. If you want to learn how to make a super simple chocolate treat, check out my recipe for easy 3-ingredient chocolate fudge!
For the mint flavor, peppermint extract is what I use because it gives that sharp, crisp cooling sensation we associate with the best mint chocolate desserts. You *can* use regular vanilla extract and add just a few drops of mint extract, but I find that peppermint extract gives that signature zing. Stick to the amounts listed, though; peppermint is strong, and you don’t want your filling to taste like toothpaste!
One last thing: the food coloring. It’s totally optional! If you leave it out, you get a beautiful, pale ivory filling that still tastes exactly the same. My personal preference for these refrigerated dessert ideas leans toward a hint of green, but feel free to skip it if you prefer a more natural look for your chocolate mint squares.
Storage and Make Ahead Tips for Your No-Bake Bars
One of the best features of these No-Bake Chocolate Mint Icebox Bars is that they are champions of planning ahead! They are truly fantastic make ahead desserts because they need that chilling time anyway, so you can make them a day or two before you even need them. That takes so much stress out of holiday gatherings or when you have company over.
When it comes to storage, you have two main options depending on how firm you want your final dessert to be. Remember, the goal is to keep that gorgeous mint layer creamy but firm, and the chocolate topping glossy!
Storage Timeframes: Refrigerator vs. Freezer
For serving them cold but soft, keep them in the refrigerator. Once you cut the bars (wait until they are fully set!), you can store them in an airtight container lined with a little parchment paper between layers for up to four days. The Oreo crust stays nice and crumbly, and the filling remains soft.
If you want a *super* firm slice—almost like a frozen fudge bar—pop that whole uncut slab into the freezer. You can freeze these bars for up to a month. If you do freeze them, just make sure you wrap that entire pan tightly in plastic wrap first, followed by aluminum foil so no freezer smells get in. You can check out my full guide on make ahead desserts for more time-saving recipes!
Thawing Frozen Bars
If you went the freezer route for your No-Bake Chocolate Mint Icebox Bars, you can’t just serve them rock solid, or you’ll shatter your teeth! Take the container out of the freezer about two hours before you plan to serve them. Let them thaw on the counter at room temperature, still covered, until the filling is slightly softened. If your kitchen is super warm, maybe move them to the fridge for that final hour.
If you cut the bars *before* freezing, make sure you separate the cut pieces with wax paper. If you cut them after thawing slightly, use a large, sharp knife dipped in hot water and wiped dry between each cut. That hot knife slices right through the cold chocolate topping like butter!
Serving Suggestions for Creamy Mint Bars
So, you’ve got your perfect, chilled squares of No-Bake Chocolate Mint Icebox Bars ready to go. Everything looks clean, the layers are set, and now it’s time to make them look absolutely show-stopping on the plate! These bars are already incredibly rich thanks to that dark chocolate topping and the creamy filling, so you just need simple garnishes that enhance that minty, cool flavor profile.
My absolute favorite way to serve these is alongside something warm to cut through the cold richness. A tiny mug of freshly brewed, strong coffee is genuinely perfect—the bitterness of the coffee just makes the mint pop even more. If you have kids around, or just want something extra indulgent, try serving them with a dollop of freshly made whipped cream. I have a recipe for whipped hot chocolate that uses just the right amount of vanilla—you can use that exact same whipped cream and just skip the chocolate powder!
For presentation, especially if you’re making these for a holiday spread, a tiny sprinkling of shaved dark chocolate right on top of the ganache looks fantastic. A little bit of texture contrast never hurts! Or, if you want a tiny bit of brightness to balance all that chocolate and mint, a few raspberries or thinly sliced strawberries placed right next to the bar on the plate adds color without competing with the flavor profile. They don’t need much fuss, but a little bit of care when plating really elevates these simple chocolate mint squares!
Frequently Asked Questions About No Bake Dessert Recipes
I always get a flurry of questions when I post one of these super easy no-bake dessert recipes because everyone wants to make sure they get that perfect set! Since these No-Bake Chocolate Mint Icebox Bars rely on chilling rather than baking, timing is everything. Here are some of the most common things folks ask me when they are whipping up these layered refrigeratored dessert ideas.
How long do these No-Bake Chocolate Mint Icebox Bars last?
That’s a great question for anyone looking for easy potluck desserts! Since this recipe contains cream cheese and whipped cream, food safety is important. In the refrigerator, tightly covered, these creamy mint bars are best eaten within 4 to 5 days. If you freeze them (which I totally recommend if you can’t eat them all right away!), they are rock solid and delicious for up to a month. They still taste great after that, but the crust might get a little harder.
Can I use vanilla extract instead of peppermint extract?
You certainly can, but you’ll end up with a more general chocolate dessert rather than the specific mint chocolate dessert we were aiming for! If you skip the peppermint, you’ll just have a lovely, rich chocolate cream bar. If you *must* substitute, I would suggest using maybe 3/4 teaspoon of peppermint extract, or, if you don’t have peppermint, you could try using a tiny bit of mint flavoring—but be careful! Peppermint is much stronger than regular mint flavoring.
Why did my mint filling weep or get soupy after chilling?
Oh, that’s always disappointing! Weeping usually happens for one of two reasons when making these no oven recipe ideas. First, was your cream cheese soft enough? If the cream cheese is cold, it doesn’t incorporate the powdered sugar smoothly, which can leave pockets of liquid that weep out later. Second, and this is most common, you need to make sure you whip your heavy cream to stiff peaks *before* folding it in. If you under-whip the cream, it can’t stabilize the filling, leading to softer, soupier chocolate mint squares.
Can I make this a different flavor, like peanut butter?
Absolutely! These layered icebox cake recipes are so adaptable. If you want to ditch the mint, swap the peppermint extract for extra vanilla—maybe 1 1/2 teaspoons total. Then, if you want a different flavor, you can replace the peppermint entirely with 1/2 cup of smooth peanut butter mixed in with the cream cheese, or even a tablespoon of instant coffee granules for a mocha treat! Either way, keep the crust and the chocolate topping the same for the best results.
Estimated Nutritional Data for Chocolate Mint Squares
I always like to give folks a heads-up on what they are diving into when they make these rich chocolate mint squares! Now, you have to remember that this data is just an estimate based on the standard ingredients and measurements listed in the recipe. The exact numbers are going to change a bit depending on whether you use dark chocolate versus semi-sweet, or even what brand of Oreos you grab for that crust.
I always encourage people to check out my full nutrition disclaimer page just to be safe, especially if you have specific dietary concerns. But generally speaking, here is what you can expect per serving, which the recipe makes 16 squares:
- Serving Size: 1 bar
- Calories: 310
- Sugar: 25g (Watch that powdered sugar!)
- Sodium: 180mg
- Fat: 21g
- Saturated Fat: 12g
- Unsaturated Fat: 9g
- Trans Fat: 0.5g
- Carbohydrates: 30g
- Fiber: 1g
- Protein: 4g
- Cholesterol: 55mg
It is a rich dessert, no doubt about it, loaded with that butter and cream cheese, but wow, those calories are totally worth every creamy, minty bite, especially since it’s a no-bake treat!
PrintNo-Bake Chocolate Mint Oreo Icebox Bars
Make these easy, layered icebox bars using a crushed Oreo crust, a creamy mint filling, and a simple chocolate topping. These bars set in the refrigerator.
- Prep Time: 25 min
- Cook Time: 0 min
- Total Time: 4 hr 25 min
- Yield: 16 servings
- Category: Dessert
- Method: Refrigeration
- Cuisine: American
- Diet: Vegetarian
Ingredients
- 1 1/2 cups crushed Oreo cookies (about 30 cookies)
- 6 tablespoons unsalted butter, melted
- 8 ounces cream cheese, softened
- 1 cup powdered sugar
- 1 teaspoon vanilla extract
- 1/2 teaspoon peppermint extract
- 1/4 teaspoon green food coloring (optional)
- 1 cup heavy whipping cream, cold
- 4 ounces semi-sweet chocolate, chopped
- 1/2 cup heavy whipping cream (for ganache)
Instructions
- Line an 8×8 inch baking pan with parchment paper, leaving an overhang on two sides for easy removal.
- Combine the crushed Oreos and melted butter in a bowl. Press the mixture firmly into the bottom of the prepared pan to form the crust. Place the pan in the freezer while you prepare the filling.
- In a large bowl, beat the softened cream cheese until smooth. Gradually add the powdered sugar, vanilla extract, peppermint extract, and green food coloring, if using. Beat until fully combined and creamy.
- In a separate bowl, whip the 1 cup of cold heavy whipping cream until stiff peaks form. Gently fold the whipped cream into the cream cheese mixture until just combined.
- Spread the mint filling evenly over the chilled Oreo crust. Return the pan to the refrigerator to set for at least 1 hour.
- Prepare the ganache: Place the chopped chocolate in a heatproof bowl. Heat the remaining 1/2 cup of heavy whipping cream in a small saucepan until it just begins to simmer. Pour the hot cream over the chocolate. Let it sit for 5 minutes, then whisk until smooth.
- Pour the chocolate ganache over the chilled mint layer. Spread evenly.
- Refrigerate the bars for at least 4 hours, or until the topping is firm.
- Use the parchment paper overhang to lift the bars from the pan. Cut into 16 squares before serving.
Notes
- For a richer chocolate flavor, use dark chocolate in the ganache.
- If you prefer a firmer bar, you can freeze these instead of refrigerating them for the final set.
- You can substitute the Oreo crust with 1 1/2 cups of graham cracker crumbs mixed with the butter.
Nutrition
- Serving Size: 1 bar
- Calories: 310
- Sugar: 25
- Sodium: 180
- Fat: 21
- Saturated Fat: 12
- Unsaturated Fat: 9
- Trans Fat: 0.5
- Carbohydrates: 30
- Fiber: 1
- Protein: 4
- Cholesterol: 55