

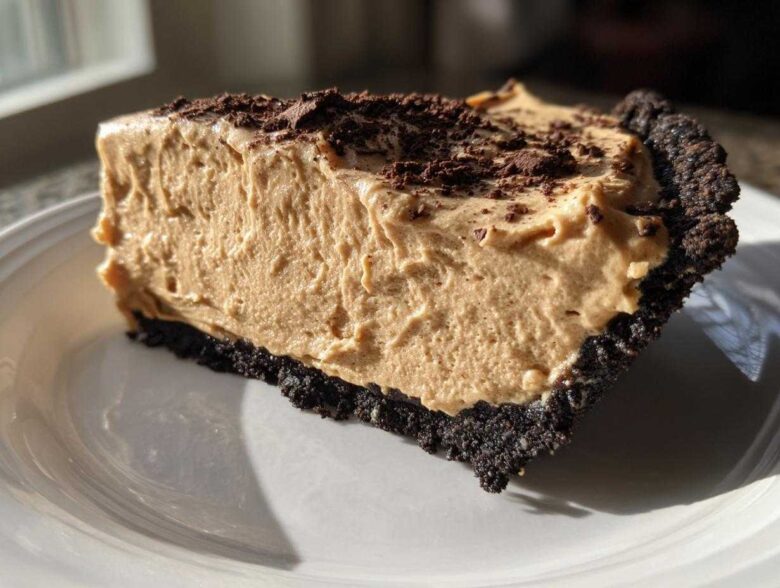
If you are staring down a dessert assignment for a busy holiday, or honestly, just staring into the fridge thinking, “I need something sweet *right now*,” then stop everything you’re doing. I have the ultimate answer, and trust me, it involves zero oven time! This is my beloved Easy No-Bake Creamy Peanut Butter Pie, and Leo and I swear by it when we need something decadent fast. It’s rich, it’s dreamy, and it uses just a handful of simple ingredients to create magic. That’s the whole Cookify Me philosophy, right? Turning kitchen stress into joyous, flavorful success without chasing perfection. This peanut butter pie is proof that the best desserts are often the ones that come together quickly, leaving you time to put on some music and relax! If you want to know more about how Leo and I approach the kitchen chaos, check out our story over at the About Us page!
Why This Easy Peanut Butter Pie Recipe is Your New Favorite Crowd Pleaser Dessert
Honestly, I keep this recipe tucked away for emergencies, but lately, it’s become my go-to for nearly everything! Why? Because it’s the definition of a Quick Peanut Butter Dessert that delivers maximum payoff. We’re talking about a full peanut butter pie assembly in about 20 minutes flat. Seriously! That means more time spent listening to music or catching up with friends and less time anxiously monitoring an oven.
The texture is the real star here—it’s unbelievably Creamy Peanut Butter Pie that sets up perfectly firm thanks to that chill time. I remember one year when our Thanksgiving dessert plans imploded because the oven was totally packed. Panic set in until I remembered this recipe. It saved the day and became the absolute star of the dessert table. It’s hands-down the ultimate Crowd Pleaser Dessert. You can even try making some easy homemade cheese crackers while the pie chills for the perfect salty-sweet appetizer pairing!
Ingredients for the Best Creamy Peanut Butter Pie
When you see how few things you actually need for this peanut butter pie, I think you’ll be as thrilled as I was the first time I made it! Everything here is meant to be simple so we can get that beautiful, rich filling into the crust ASAP. I always make sure my cream cheese is actually room temperature—it makes beating it so much easier and avoids lumps. And please, don’t try to substitute that thawed whipped topping with anything else; the lightness it brings is essential for that classic creamy texture.
For the Graham Cracker Crust
This crust is my favorite because it bakes up sturdy, so you don’t have to worry about it crumbling when you try to slice it later. Remember to pack this mixture down *really* firmly in your pie plate!
- 1 1/2 cups graham cracker crumbs
- 1/4 cup granulated sugar (for crust)
- 6 tablespoons unsalted butter, melted
For the No Bake Peanut Butter Pie Filling
Once the crust is packed, you mix up this heavenly filling. Make sure you use creamy peanut butter so you get that smooth, melt-in-your-mouth experience. If you like a little extra pizzazz on top, have those optional toppings ready to go!
- 1 (8 ounce) package cream cheese, softened
- 1 cup creamy peanut butter
- 1 cup powdered sugar
- 1 teaspoon vanilla extract
- 1 (12 ounce) container frozen whipped topping, thawed
- 1/2 cup peanut butter chips (optional, for topping)
- 1/4 cup chocolate syrup (optional, for topping)
Step-by-Step Instructions for Your No Bake Peanut Butter Pie
Okay, time to get messy! This is the fun part, and trust me, since we aren’t turning on the oven, the stakes feel really low. We have to move relatively quickly so the crust stays perfectly chilled while we whip up the filling for this incredible peanut butter pie. I always put on some loud music at this stage because things tend to go faster when you’re dancing! If you’re looking for inspiration on how to make other fruit or classic bases, check out my recipe for easy homemade apple butter while you wait for things to set up!
Creating the Graham Cracker Crust for the peanut butter pie
First things first, we need a rock-solid base. You’re going to mix your graham crumbs and the 1/4 cup of sugar together, then pour in that melted butter. Mix it with a fork until it looks like wet sand—you want every crumb coated! Then, get that mixture into your 9-inch pie plate. Press it down firmly, using the bottom of a glass maybe, to pack it tight against the bottom and up those sides. A sturdy crust means a clean slice later! Pop that plate right into the freezer while you move on to the filling. That quick freeze helps it lock in place.
Mixing the Creamy Peanut Butter Pie Filling
This step is where the texture is made or broken, so pay attention! In a big bowl, use your electric mixer to beat that softened cream cheese until it is silky smooth—no lumps allowed here! That’s my secret top tip for a truly flawless texture. Once it’s smooth as velvet, beat in your creamy peanut butter and the powdered sugar until it’s totally combined. Now, stir in the vanilla. Now, for the whipped topping: take your thawed container and very gently fold it into the peanut butter base. I mean *gently*! You want to keep all those lovely air bubbles intact, so stop mixing as soon as you see no white streaks left. Recipes like this one from Handled the Heat show just how beloved this simplicity is!
Assembling and Chilling the peanut butter pie
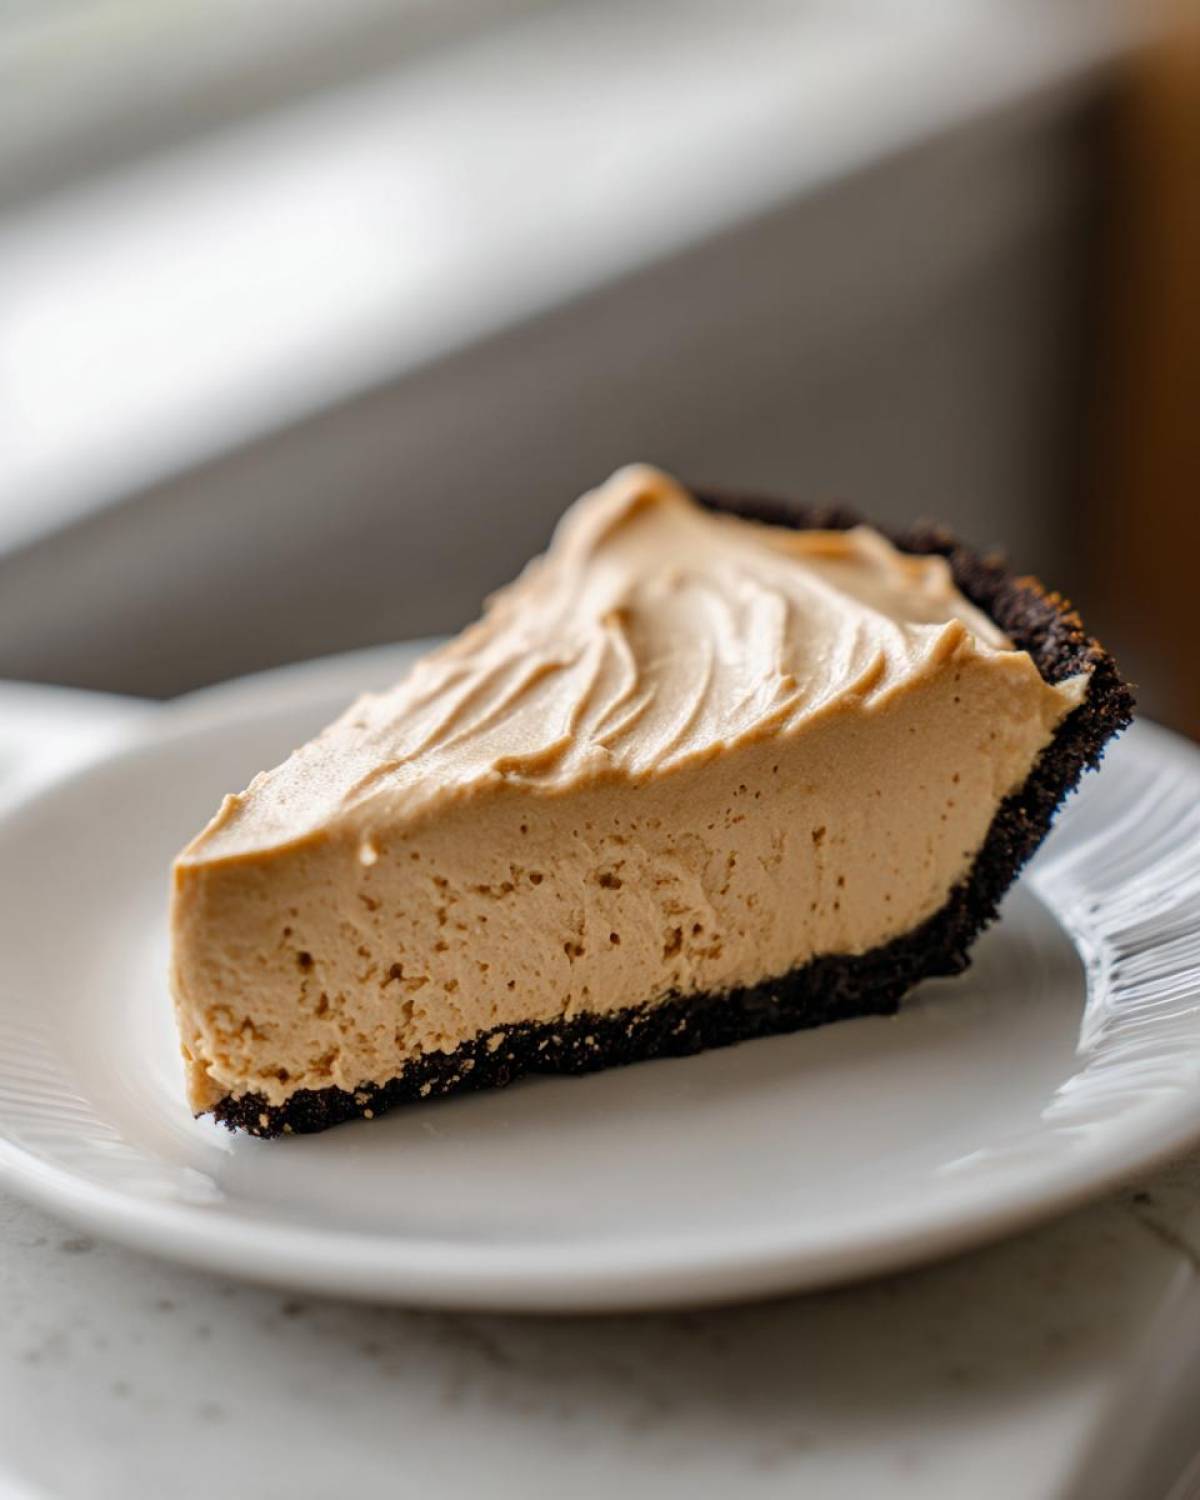
Grab that chilled crust from the freezer. Spoon all that gorgeous, fluffy filling into the crust and use an offset spatula—or just the back of a spoon—to smooth out the top into a nice even layer. Now comes the hardest part: waiting! You absolutely must refrigerate this gorgeous peanut butter pie for a minimum of four hours. I know, I know, it’s tough, but if you try to slice it sooner, you’re going to end up with a soupy mess that looks more like dip than pie. Four hours minimum guarantees that perfect clean slice that makes everyone gasp when it hits the table. Trust me on this chilling time!
Tips for the Perfect Homemade Peanut Butter Pie
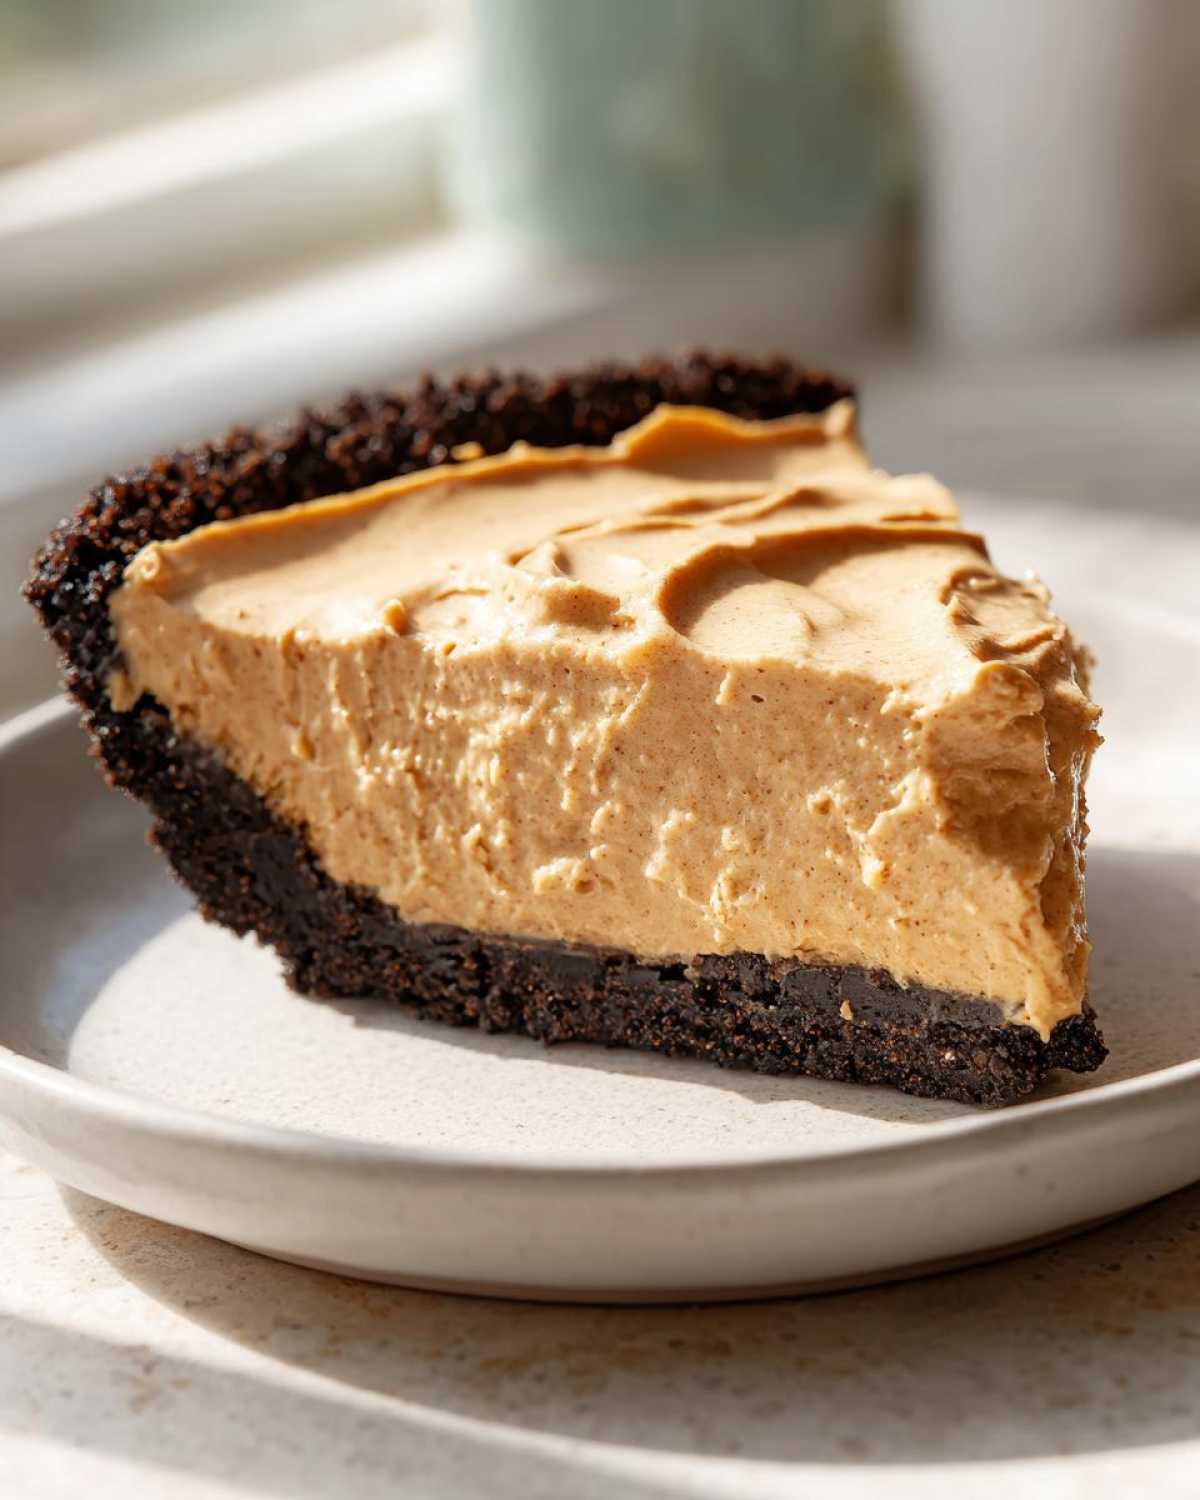
If you follow the steps, you’re already basically home free with this fabulous Homemade Peanut Butter Pie! But since Leo and I are constantly testing things—sometimes accidentally, sometimes on purpose—I have a few little tricks up my sleeve that ensure this pie is perfect every single time. We want that filling firm but cloud-like, and the crust totally ready to hold up to those drizzles we’re going to add later!
Ingredient Notes and Substitutions for your peanut butter pie
I get so many questions about substitutions, and that’s totally fine because I love tinkering! However, for this specific No Bake Peanut Butter Pie, a couple of things are pretty crucial. First, I always recommend room-temperature cream cheese. If it’s cold, it won’t beat smoothly, and you’ll end up with little cream cheese pebbles in your otherwise perfect filling. Trust me, start with soft cream cheese!
Now, let’s talk crust variations for your peanut butter pie. If you’re out of graham crackers, don’t panic! You can absolutely swap them for an Oreo Crust Peanut Butter Pie. Just crush about 25 full Oreo cookies—and yes, keep the filling inside! You’ll use the same amount of crumbs and the same amount of melted butter. The chocolate crust adds such a fun, rich contrast to that sweet filling.
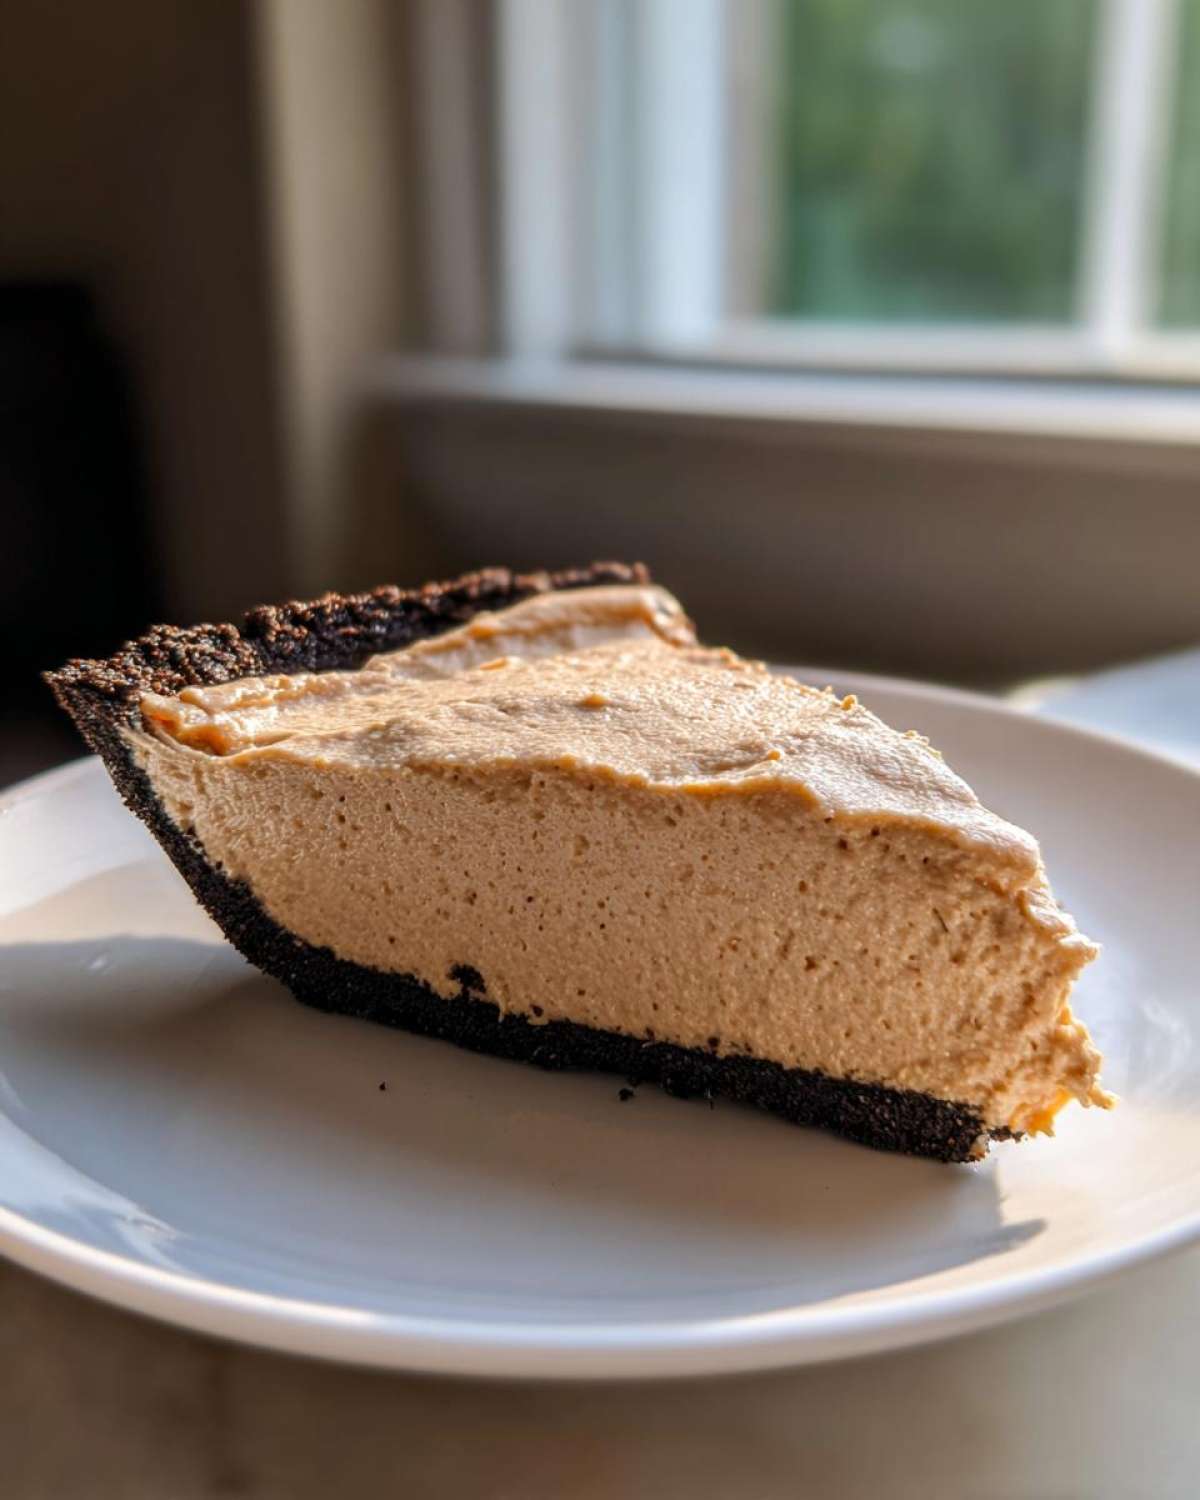
One final note: use standard, creamy peanut butter, like Jif or Skippy. The natural oily kinds are delicious, but their texture tends to be thinner once mixed with the other ingredients, and that can make it harder for your pie to set up properly without baking. We need that stabilized fat for a firm, sliceable dessert!
Ready for some more inside secrets? If you want to see how I get my chocolate chip cookies just right, check out my thoughts on secret ingredients in my chocolate chip cookie recipe secrets post. It’s all about loving the process, whether you’re baking or no-baking!
Peanut Butter Pie Toppings and Serving Suggestions
Okay, my favorite part! This peanut butter pie filling is unbelievably rich and creamy all on its own, but we never stop there, do we? This is where we turn a great easy dessert into a showstopper. The recipe calls for either melted peanut butter chips or a drizzle of chocolate syrup, and usually, I say, “Why not both?!”
If you melt those peanut butter chips until they are nice and pourable, you can drizzle them back and forth across the top while the chocolate syrup zig-zags over that. If you want to get really fancy, crush up a few Reese’s cups and sprinkle them on right after that chocolate drizzle—when the pie is still cold, the chocolate and syrup will set up just enough to hold the candy pieces perfectly.
When I made this for a party recently, I saw someone just use a mountain of whipped cream and grated chocolate curls, and that was gorgeous too! Remember, presentation is half the fun, even for a no-bake treat. If you need extra chocolate inspiration for future endeavors, check out how I perfect my homemade chocolate cake—it might inspire your next level of topping!
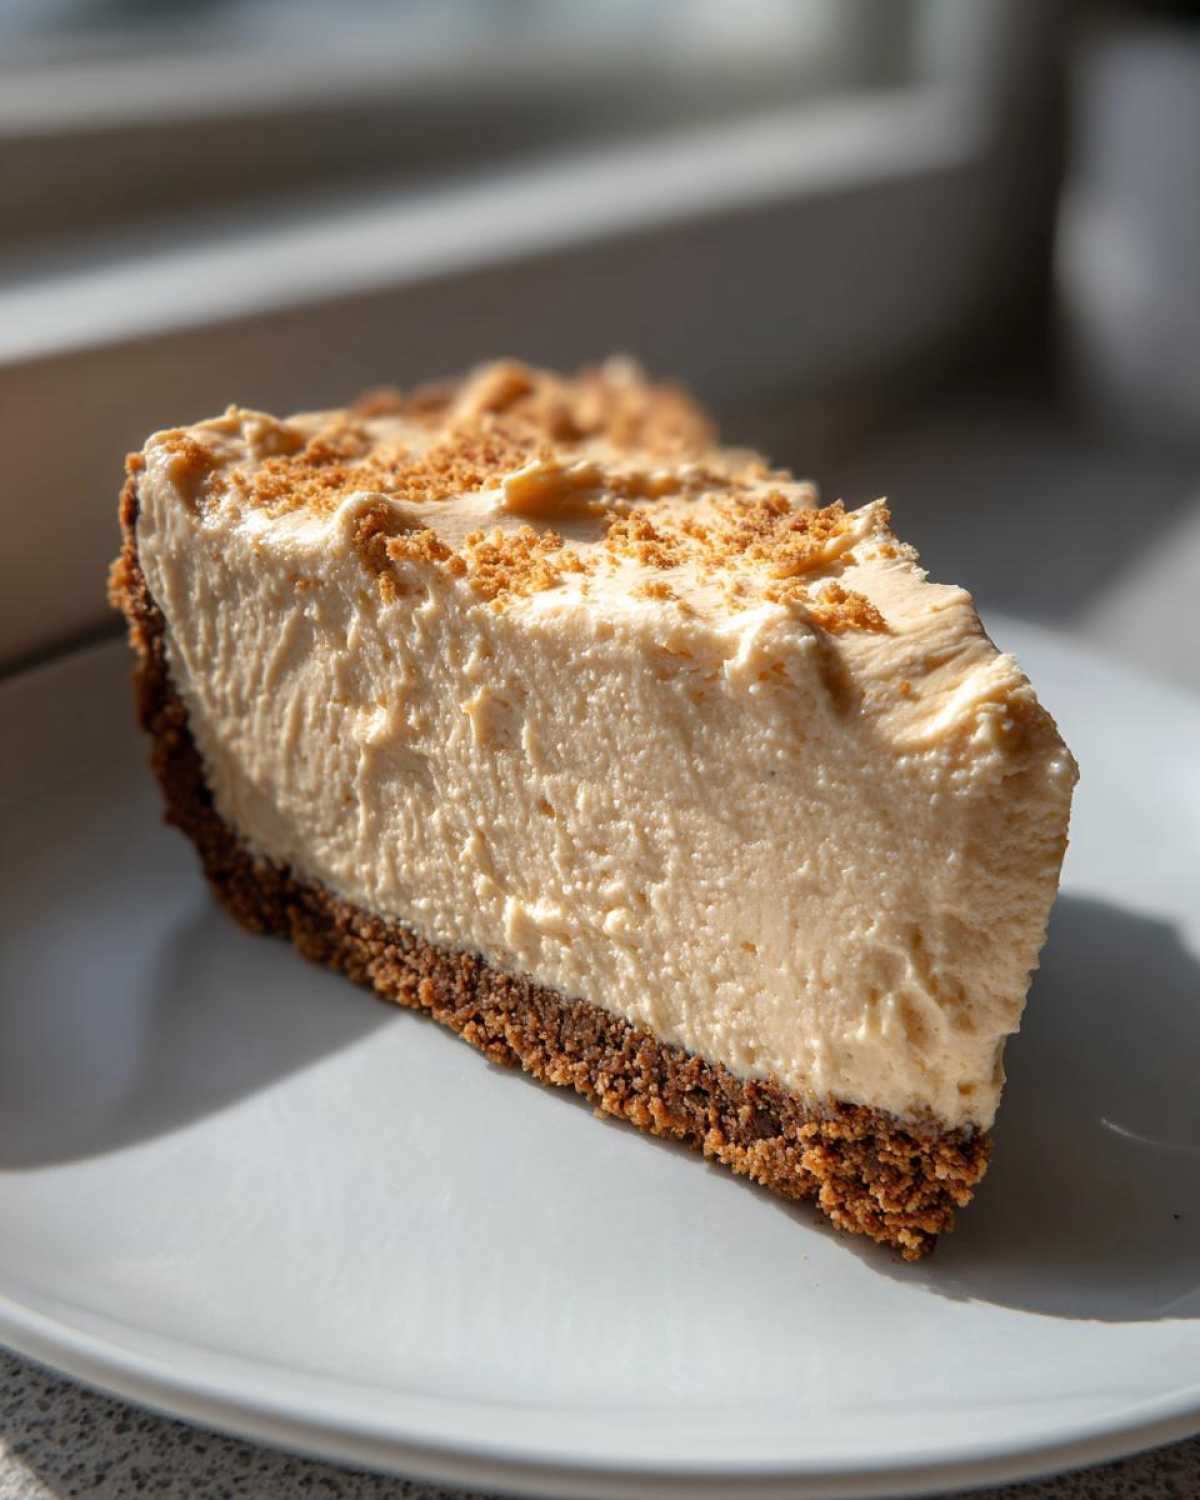
As for serving, because this peanut butter pie is so incredibly indulgent and satisfying, I suggest pairing it with something light to cut through that richness. A strong, hot cup of coffee is perfect, if you ask me. For a warmer occasion, a small side of tart raspberries or even some thinly sliced green apples works wonders to balance the sweet and salty flavors. It truly elevates the whole experience, making this simple pie feel like something you ordered at a fancy spot. If you’re looking for more simple recipes that get rave reviews, this peanut butter pie inspiration is always a winner!
Make Ahead Dessert Recipes: Storing Your peanut butter pie
One of the best things about this spectacular peanut butter pie recipe is how wonderfully it plays into the “make ahead” category. Honestly, this is why it’s my secret weapon for big events like Thanksgiving or those chaotic weekends when Leo and I have friends coming over last minute. No stress! Since there’s no baking involved, we actually *want* this to chill out for a long time.
If you’re making this as a Make Ahead Dessert Recipe, I highly recommend assembling the entire thing—crust, filling, and all—the day before you plan to serve it. Give it that full four hours to set the first day, and then just cover it loosely with plastic wrap and keep it tucked into the fridge. The flavor actually seems to deepen a tiny bit overnight, which is awesome!
It stays perfectly glorious in the refrigerator for up to three days. Just make sure it’s covered well so it doesn’t pick up any weird smells from the leftovers! If you need to keep it longer, the freezer is your friend. You can absolutely freeze this peanut butter dessert for up to a month. When you freeze it, make sure you cover it really well with a layer of plastic wrap *then* a layer of foil. That prevents freezer burn from touching that beautiful creamy top.
When you take it out of the freezer, let it thaw in the fridge for about 6 to 8 hours before you plan to serve it. Just a heads-up: the texture might change slightly when frozen and thawed, sometimes getting just a fraction denser than when fresh, but honestly, it’s still delicious! It’s just one more reason this is such a reliable Make Ahead Dessert Recipe for any large gathering. You can find more of my favorite fuss-free recipes like this one linked on my Make Ahead Dessert Recipes page!
Troubleshooting Common Issues with No Oven Desserts
I live by the philosophy that every cooking adventure involves at least one minor disaster, and that’s okay! That’s how we learn, right? This peanut butter pie is easy, but because it relies on chilling instead of baking, there are a couple of common hiccups people run into. Don’t worry, though! We can fix these things right now so your pie sets up beautifully for your gathering.
My biggest piece of advice for any No Bake Peanut Butter Pie is to respect the chilling time. But let’s talk about what happens when things go sideways!
My Peanut Butter Pie Filling Won’t Set Up!
This is the big one, and usually, it boils down to two things. First, did you rush the chill time? Remember, I said a minimum of four hours! If you try slicing it at two hours, it *will* be soft—that’s physics, not failure! Put it back in the fridge, close the door, and walk away. Patience is flavor, my friends.
The other reason the filling stays too soft is usually over-mixing the whipped topping. When you fold in that thawed topping, you are trying to keep the air in there to keep things light. If you beat it into the peanut butter base like you’re mixing cake batter, you deflate all that lovely volume, and the filling just won’t firm up properly. Next time, fold gently with a spatula until you can barely see white ribbons anymore. You want it light and airy, not dense!
My Graham Cracker Crust is Crumbly and Falling Apart
Ah, the dreaded crumbly crust! If your crust broke when you tried to lift the pie out or if it crumbles off when you take the first slice, it usually means the butter wasn’t mixed in well enough, or you didn’t pack it firmly enough.
When you mix the butter into the crumbs, you need to aim for that *wet sand* consistency—every single crumb should feel damp. If you have dry spots, they will turn into hard, loose boulders once chilled. Also, use the bottom of a flat glass or measuring cup to really press that mixture into the plate before freezing. Give it a good, firm press on the bottom and up the sides. Think of it as building a strong foundation for your decadent future peanut butter dessert!
If you are looking for some other simple solutions for the kitchen, sometimes a hot soup can be the perfect starter before a rich pie. You can check out my recipe for easy creamy zucchini soup for a lighter option!
Why Does My Crust Taste Soggy?
This is rare in a no-bake pie that isn’t pre-baked, but sometimes it happens, especially if you let the mixture sit too long before chilling. The melted butter starts to settle. The fix here is speed! Mix your crust ingredients, press it immediately into the chilled pie plate, and get it straight into the freezer so the butter chills quickly and locks those crumbs together. If you made an Oreo Crust Peanut Butter Pie, the chocolate cookie base sometimes soaks up moisture faster than graham crackers, so that freezer step is even more vital for that version!
Frequently Asked Questions About This peanut butter pie
I figured you might have a few lingering questions about whipping up this absolute dream of a peanut butter pie! Since this is one of those beloved, go-to desserts that people bake when they’re short on time or dealing with a packed house, I’ve tried to think of every possible scenario. You can always find more fun recipe discussions over on our Cookify Me blog!
Can I use crunchy peanut butter for this Easy Peanut Butter Pie Recipe?
Oh, that’s a classic question! You certainly *can*, but I gotta give you the honest Sofia answer: I really don’t recommend it for this specific filling. The beauty of this recipe is how incredibly smooth and velvety the filling is, and crunchy peanut butter introduces those little texture surprises when you are really aiming for that Creamy Peanut Butter Pie melt-in-your-mouth feeling. If you decide to go crunchy just because you love those bits, just know the final texture will be noticeably bumpier than what I describe!
Since this is a Make Ahead Dessert Recipe, how far in advance can I assemble the peanut butter pie?
This is fantastic news for anyone hosting! Because it’s a no-bake wonder, this pie actually likes to hang out in the cold. You can make this Easy Peanut Butter Pie Recipe a full day ahead of time, and it will be even better the next day as the flavors meld together. As I mentioned, you can keep it covered in the fridge for up to three days, making it one of the best Make Ahead Dessert Recipes around for stress-free entertaining, especially for holidays!
What if I don’t have graham crackers? Can I still make a crust for my peanut butter dessert?
Absolutely! If you don’t have graham crackers on hand, don’t let that stop you from making this quick dessert. The easiest swap is using Oreo cookies for an Oreo Crust Peanut Butter Pie. Just grab about 25 full Oreos—yes, scraping the cream filling out totally counts as prep work, ha! Crush them up exactly like you would the graham crumbs and use the same amount of melted butter. The chocolate crust is unbelievably decadent with that sweet peanut butter filling!
How long does the peanut butter pie absolutely have to chill for slicing?
I know we get eager, especially when the aroma of peanut butter fills the kitchen, but this is where we cannot cheat! You need a minimum of four hours. I mean it! If you cut it at three hours, you’re going to scoop out a puddle. Four hours gets you the firm, clean slices needed to call it a true pie. If you want it super firm—maybe you’re transporting it—you can leave it in the fridge overnight instead. For more tips on getting perfect no-bake results, check out great advice on pies like this one here!
Nutritional Overview of This Rich Dessert Pie
I always say not to look too closely at the nutrition label when you’re eating something this incredibly satisfying, but since we’re talking about being fully transparent here at Cookify Me, here’s a breakdown of what’s in one slice of this Rich Dessert Pie. Remember, this is just an estimate, and it can change wildly depending on what fabulous toppings you decide to pile on top!
- Serving Size: 1 slice
- Calories: 450
- Sugar: 35
- Sodium: 280
- Fat: 30
- Saturated Fat: 10
- Unsaturated Fat: 20
- Trans Fat: 0
- Carbohydrates: 40
- Fiber: 1
- Protein: 9
- Cholesterol: 40
If you’re looking for slightly lighter alternatives that still keep that peanut butter flavor front and center, sometimes I experiment with swapping some of the heavy components for Greek yogurt in my peanut butter rice krispie treats, but for this pie, we embrace the richness!
Nutritional Overview of This Rich Dessert Pie
I always say not to look too closely at the nutrition label when you’re eating something this incredibly satisfying, but since we’re talking about being fully transparent here at Cookify Me, here’s a breakdown of what’s in one slice of this Rich Dessert Pie. Remember, this is just an estimate, and it can change wildly depending on what fabulous toppings you decide to pile on top!
- Serving Size: 1 slice
- Calories: 450
- Sugar: 35
- Sodium: 280
- Fat: 30
- Saturated Fat: 10
- Unsaturated Fat: 20
- Trans Fat: 0
- Carbohydrates: 40
- Fiber: 1
- Protein: 9
- Cholesterol: 40
If you’re looking for slightly lighter alternatives that still keep that peanut butter flavor front and center, sometimes I experiment with swapping some of the heavy components for Greek yogurt in my peanut butter rice krispie treats, but for this pie, we embrace the richness!
PrintEasy No-Bake Creamy Peanut Butter Pie

You need a simple, rich, and crowd-pleasing dessert? This no-bake peanut butter pie uses a buttery graham cracker crust and a creamy filling that sets up perfectly in the fridge. It is quick to assemble and always a hit at gatherings.
- Prep Time: 20 min
- Cook Time: 0 min
- Total Time: 4 hr 20 min
- Yield: 8 servings
- Category: Dessert
- Method: No-Bake
- Cuisine: American
- Diet: Vegetarian
Ingredients
- 1 1/2 cups graham cracker crumbs
- 1/4 cup granulated sugar (for crust)
- 6 tablespoons unsalted butter, melted
- 1 (8 ounce) package cream cheese, softened
- 1 cup creamy peanut butter
- 1 cup powdered sugar
- 1 teaspoon vanilla extract
- 1 (12 ounce) container frozen whipped topping, thawed
- 1/2 cup peanut butter chips (optional, for topping)
- 1/4 cup chocolate syrup (optional, for topping)
Instructions
- Prepare the crust: Mix graham cracker crumbs and 1/4 cup granulated sugar in a medium bowl. Pour in the melted butter and mix until the crumbs are evenly moistened. Press the mixture firmly into the bottom and up the sides of a 9-inch pie plate. Place the crust in the freezer while you prepare the filling.
- Make the filling base: In a large bowl, beat the softened cream cheese until smooth. Add the peanut butter and 1 cup powdered sugar. Beat until fully combined and creamy. Stir in the vanilla extract.
- Fold in whipped topping: Gently fold the thawed whipped topping into the peanut butter mixture until no streaks remain. Be careful not to overmix.
- Assemble the pie: Spoon the creamy peanut butter filling evenly into the chilled graham cracker crust. Smooth the top with a spatula.
- Chill: Cover the pie loosely with plastic wrap and refrigerate for at least 4 hours, or until the filling is firm. This chilling time is necessary for a perfect slice.
- Top and serve: Before serving, you can melt the peanut butter chips and drizzle them over the top, or add a chocolate syrup drizzle. Slice and enjoy this indulgent peanut butter dessert.
Notes
- For an Oreo crust peanut butter pie, substitute the graham cracker crumbs with finely crushed Oreo cookies (about 25 cookies) and use the same amount of butter.
- If you want a sweeter filling, you can increase the powdered sugar to 1 1/4 cups.
- Make this ahead! This pie tastes even better when made a day in advance, making it a great make ahead dessert for holidays like Thanksgiving.
Nutrition
- Serving Size: 1 slice
- Calories: 450
- Sugar: 35
- Sodium: 280
- Fat: 30
- Saturated Fat: 10
- Unsaturated Fat: 20
- Trans Fat: 0
- Carbohydrates: 40
- Fiber: 1
- Protein: 9
- Cholesterol: 40